3回に分けて掲載した「Averaging stack of identical photos」の翻訳は今回で終了です。 今回の概要は、 複数枚画像の加算平均をPhotoshootの様な画像処理ソフトで行う場合の各レイヤーの透明度設定をどの様にしたら良いか。
雪の結晶画像の場合、 結晶本体、 背景部分に分離して処理している様子。
星空や明暗の幅が極端に大きな夜景など、静止したシーンであれば、どんな被写体にも適用可能である事を指摘し、 モスクワのクレムリンの夜景に適用した例などをみせてくれている。
訳文中に茶色で区画・表示した部分は僕の理解のために付加したものです、 原文にはありません。
=== XXXXX === の様に書き加えた青文字の部分は原文のその箇所に
画像があることを意味します。
******** Averaging stack of identical photos : Alexey Kljatov
After that we apply Layer > Smart Objects > Rasterize
and have single layer with averaged picture.
その後で、[レイヤー]> [スマートオブジェクト]>[ラスタライズ]を適用します
それで 平均化された一枚のレイヤーの画像が手に入ります。
This method especially useful if we have big (or odd) count of source layers.
この方法は、ソースレイヤの数が大きい(または奇数枚の)場合に特に便利です。
Method 2 suitable for older Photoshop versions or
other graphics editing programs that support layers with changeable opacity.
Method 2 古いPhotoshopのバージョン または
変更可能な不透明度を持つレイヤーをサポートする他のグラフィックス編集プログラムを使う場合。
Also, this method is useful if we have some unwanted details in some source layers
(for example, moving objects)
また、この手法は、
ソースレイヤーの中に細かな望ましくない事項(例えば、対象の移動)がある場合に便利です
<撮影時に雪の結晶は静止していてくれません>
we can easily exlude them by adding white masks to these layers
and remove such objects, painting masks with black brush.
これらのレイヤーに対しては白いマスクを追加して
それらのオブジェクトを削除することが簡単に出来ます、
マスクの描画は黒いブラシで行う<< 僕の理解不足、意味不明
All we need now is set opacity to all layers in stack,
私たちあと必要な作業は、
スタック内のすべてのレイヤーに対して透明度の設定だけです、
in order to all of them will give equal contribution in final result.
それらのすべて(のレイヤー)が最終結果に等しく寄与するような。
For all layers, started from bottom one and toward upper,
opacity will be: 100%, 50%, 33%, 25%, 20%, 17%, 14% and so on,
スタックされた全てのレイヤーに対し、一番下のレイヤーから順に上に向かって
不透明度の設定を行う、
不透明度は: 100%、50%、33%、25%、20%、17%、14%の様にします、
i.e. opacity of each layer = 100% divided by its number in the stack
(counted from bottom). If we have too many layers,
具体的には. 各層の不透明度の数値は、スタック内のその順番の数で割ったものです、
this method becomes ineffective because of rounding errors to integer opacity number.
このメソッドは不透明度を指定する整数への丸め誤差が出ます。 < レイヤーが多数になると
Simple way to avoid this - divide all shots to equal groups,
average them within groups, and then average groups with groups
(for example, 4 groups of 5 shots for 20 shots in serie).
これを避ける簡単な方法は - すべてのショットを等しい枚数のグループに分け、
グループ毎に平均化し、次にグループ間で平均化します
(例えば、20枚の画像がある場合、5枚づつ4つグループにします)。
For seven shots in this example,
i make two groups (4 and 3 shots),
and average smaller group to bigger with opacity 43% (100/7*3).
7枚の写真の場合に対しては、
私は2つのグループを作ります(4ショットと3ショット)、
グループ間の平均化には3ショットグループの不透明度を43%(100/7 * 3)にして平均化。
When it's done, all layers merged in one (layers - flatten).
それが済ませると、すべてのレイヤーが1つに統合されます(layers - flatten)
(レイヤー - 平坦化)。 <<この様な操作があるのか?
After that, we shrink picture back to it's original size (20%).
その後で、元のサイズ(20%)に戻します。
This can be done in "Image - Image size" menu with bicubic method,
but i recommend to do this in several steps (by 70 - 80% in each step).
これ(縮小作業)は [Image] - [Image size] メニューで
バイキュービック方式を用いて行うことができますが、
私は何段階かに分けて、行うことをお勧めします(各ステップ70~80%で)。
When we do such serious shrink,
too big number of source pixels merged into one resulting pixel, and,
likely, bicubic interpolation uses only part of source pixels,
and unused ones simply discarded and
do not make any gain in resulting pixel's color and luminocity.
このような大幅な縮小を一挙に行うと、
多数のソース上の画素が1つの画素にマージされ、
おそらく、バイキュービック補間ではソースピクセルの一部のみを使用し、
未使用のものは単に破棄され、結果として生じる画素の色と明るさに何の益も与えない。
If we carefully compare pictures, shrinked by both methods,
with applied sharpening and at 300-400% zoom,
we can notice small advantage in details of variant,
shrinked in several steps.
両方(一括縮小/多段縮小)の方法で縮小し、鮮鋭化を行い、
300~400%のズームで写真を慎重に比較すると、
多段階での縮小方法の方が、細部の違いに小さいながら利点があると判ります。
Now, we can do same averaging for background
(opening saved .PSD with manually aligned layers).
さて、バックグラウンドの平均化に取り掛かりましょう。
(手作業で整列されたレイヤーを使って保存された.PSDを開く)。
Since for background,
as a rule, sharpness not too important as for photographed object,
we can not do any precise alignment,
an average all layers as is, then flatten them,
load on top of it our aligned object,
move it to it's place and draw mask at object contour,
and then merge it with background.
背景は基本的に、撮影対象物ほど鮮明さが重要ではないため、
精密なアライメント(位置合わせ)は必要とせず、
全レイヤーの平均化、その後の平坦化もまた然り、
整列されたオブジェクトの上へのロード、その場所への移動し
<ちょいとあやふや>
オブジェクト(雪の結晶)の輪郭にマスクを描き、背景とマージします。
Now we can do any usual post processing.
これで、通常行う画像処理を行うことができます。
We need to apply sharpening to our picture
(unsharp mask, smart sharpen,
copy of layer with applied highpass filter
in "overlay" mode or something else).
私たちは写真に鮮鋭化作業を施す必要があります
(アンシャープマスク、スマートシャープ、ハイパスフィルタを適用したレイヤーのコピー「オーバレイ」モードなど)。
Because we dramatically reduce noise level,
we can apply quite strong sharpening, if it needs.
とにかく、私たちはノイズレベルを劇的に減らしたので、
必要に応じてかなり強力な鮮明化を実施することができます。
Now we can finish processing,
but i prefer to make 3 or 4 layer copies,
apply to each of them denoising with different settings
(aggresive for background, medium or delicate for object)
今我々は処理を終える段階に達しました、
しかし私はそれぞれに異なる設定で
(背景用の積極的、オブジェクトのための中程度または繊細な)
ノイズ除去を適用する目的で、3ないし4層のコピーを作るのが常です、
and assembly all layers with hand drawed or semi-automatic masks
(created with help of filters "find edges", "glowing edges"),
すべてのレイヤーに対して 手描きまたは半自動的にマスクを作る、
(フィルターの助けを借りて作成した「エッジを見つける」、「グローエッジ」)
for preserving good object details
and make clean background without any traces of noise.
素晴らしいディテイルの雪にふさわしノイズや傷跡等の無い綺麗な背景を作ることができます。
====画像マスクの写真
====完成した雪の結晶写真
This averaging technique most often used in astrophotography,
but will work with any static scene,
if it's difficult to achieve good quality with just single shot.
この平均化技術は、1回のショットで良質なものを達成することが困難な
天体写真で頻繁に使用されますが、どんな物でも1回の撮影では良質なものを得るのが困難な静的画像に使えます。
Last year i used this technique for enhance quality of night HDR sources.
In this picture, for brightest exposure i averaged 2 shots,
and 8 shots for 5 other exposures, total 42 source shots used:
昨年私は夜のHDRソースの品質を高めるためにこの手法を使用しました。
この写真では、最も明るい露出に応じた2ショット、
5つの他の露出での8回のショット、合計42枚のソースショットを使った:
===クレムリンの夜景写真===
<HDR ハイダイナミックレンジ>
この様な素晴らしい技術資料を公開してくれている Alexey Kljatov 氏には

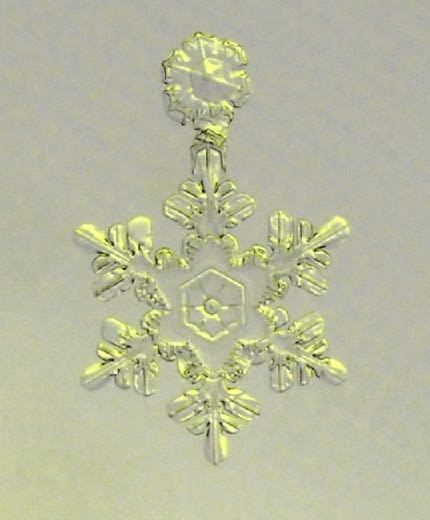
僕が撮影した雪の金メダル
お礼に この金メダル(真鍮に見えちゃうかな?)をメールに添付して贈らせていただいた。 そしたら「綺麗だね」のお褒めの言葉と共に・・・
”In Moscow, spring also starts early, and it
seems that our snow season is over, too.”
と雪のシーズンが僕が住む日本と同じく、終わりつつある事をしらせて呉れた。
さあ、 これから次の雪のシーズンまで、 僕はGIMPに依る画像処理ソフトの操作に習熟する事に熱を入れようと考えている。


