Smarty-phpのテンプレートエンジン
・Smartyとは
PHPで利用できるテンプレートエンジンです。Smartyを使うことで画面デザインとプログラム部分を分けて開発することが容易となる。
【環境条件】
OS:win10
XAMPP v3.2.1
Eclipse(ルナ)
【ダウンロード】
Smartyのダウンロードは
http://www.smarty.net/から行います。

から3・1・30をクリックする
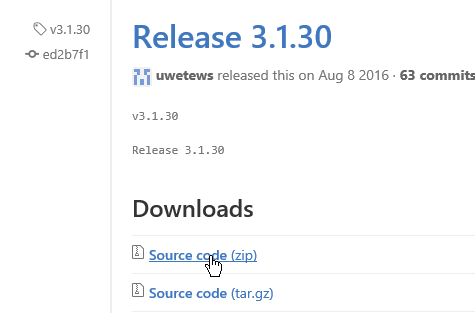
の上の(zip)をクリックするとダウンロードが始まる

ドキメントは上のようにする。
【インストール】
ダウンロードされたsmarty-3.1.30.zipをc:\xamppに展開する


c:\xampp\smarty-3.1.30フォルダが作成されたら、smarty-3.1.30フォルダをsmartyに変更する
※php.iniファイルの変更
;;;;;;;;;;;;;;;;;;;;;;;;;
; Paths and Directories ;
;;;;;;;;;;;;;;;;;;;;;;;;;
; UNIX: "/path1:/path2"
;include_path = ".:/php/includes"
;
; Windows: "\path1;\path2"
include_path=".;C:/xampp/php/PEAR;C:/xampp/php/PHPMailer;C:/xampp/smarty/libs;"
赤字をinclude_pathに追加する。
【Eclipseの設定】
・EclipseでSmartyのテンプレートファイル拡張子tplをhtmlファイルとして関連付ける

メニューバーから「ウィンドウ」→「設定」→「一般」→「コンテンツタイプ」→「テキスト」→「HTML」まで行くと下の「ファイルの関連付け」ボックスにHTMLに関連付ける拡張子の一覧が表示されるので、「追加」から「.tql」を関連付けてあげる。
・新規の作成

1)プロジェクSmartyを作成する

2)必用なフォルダを作成する

templates テンプレートファイル設置
templates_c コンパイルしたテンプレート設置
configs コンフィグファイル設置
cache キャッシュ
3)phpファイルを作成する

【index.php】
<?
require_once "Smarty.class.php";
/*
$path = getcwd();
$smarty->template_dir = "{$path}/templates";
$smarty->compile_dir = "{$path}/templates_c";
$smarty->config_dir = "{$path}/config";
$smarty->cache_dir = "{$path}/cacha";
*/
$smarty = new Smarty;
$smarty->assign('name', '桃太郎');
$smarty->display('index.tpl');
?>
以上
ただし、c\:xampp\htdocs\のルート上にある時は/*~*/のディレクトリ指定は省略出来る
4)templatesフォルダーにテンプレートファイルindex.tplを作成

【index.tpl】
{* index.tpl *}←tplのコメント
<html>
<head>
<meta http-equiv="Content-Type" content="text/html; charset=utf-8">
<title>smartyのテスト</title>
</head>
<body>
ようこそ、{$name}さん<br />
HelloWorld!
</body>
</html>
5)フォルダやファイルの確認!

6)実行
この様に表示されればOK