タイトルのとおり、RoboCupJunior Rescue New Simulation を動かしてみます。
まず・・・RoboCupJunior の ページの RCJ Rescue – New Simulation (Demonstration) に行きます。
https://junior.robocup.org/robocupjuniorrescue-league-new-simulation-demonstration/
このページの下の方に
・WebotsSimAppWebotsSimApp-Erebus Wiki
・RCJ Rescue Community Website for most updated information
この2つのリンクがあります。
普通なら Wiki に飛ぶのですが・・・まず、ここが落とし穴になっていて、Wikiに行くと昔の情報に行ってしまいます。ここは、 community Website に飛ぶのが正解です。(分かりにくい!)
そうすると、Community Website のトップに飛びます。
https://rescue.rcj.cloud/
ここで、下の方の SUB-LEAGUES から、一番右の「New Simulation (Demonstration)」を選んで、リンク先に飛びます。

これでやっと、New Simulation(以下 New SIMと表記)のページにたどり着きました。
https://rescue.rcj.cloud/events/2021/robocup2021/newsimulation/
さて、ここからNew SIM のプラットフォームを見たいので・・・

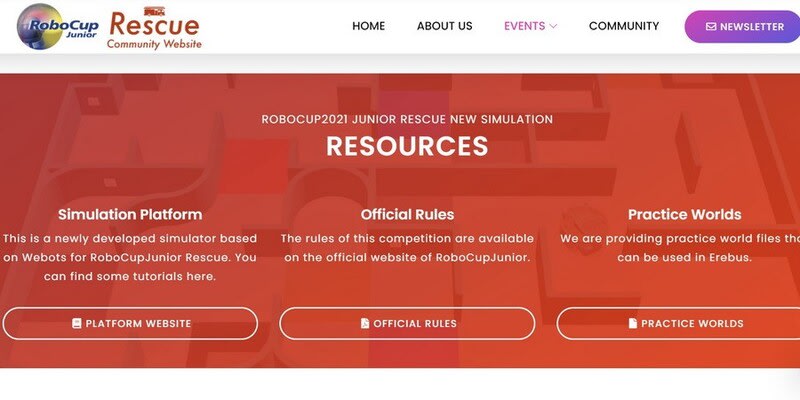
一番左の PLATFORM WEBSITE を選択してリンク先に飛びます。
https://erebus.rcj.cloud/

こんな、ちょっとカッコイイ画面が表示されました。
ここの「Get Started」でインストール方法の解説が始まります。
(ここまで長いですねぇ!)
インストールするのは以下の3つです。(Software Requirements)
1. Webots Robot Simulator Version 2021.a - the simulation environment
2. Competition Supervisor - Implement the rules and scoring
3. Python Version 3.x - to write controllers for the robots
1.が Webots 2.が EreBus 3.が python です。
ちなみに Minimum System Requirements として
・OS-Windows: Win 10, 8.1 64 bit
・CPU: Dual Core 2 GHz
・RAM: 2 GB
・Nvidia 512MB or AMD OpenGL 512MB
が要求されています。私のPCの環境では、一番下を満たしていないので、本当はダメということです。
手順に従うと、まず Python 3.9 64 bit のインストールになります。
(だったら、上の Software Requirements に書く順番も Python を最初にしてくれると、対応が分かりやすいのですがねぇ!)
1. Download & Install Python 3.9 64 bit from the official website. During the install option, please make your python installation is referenced in your PATH (see picture below!)
説明文の中のリンクをクリックすると、いきなり python-3.9.4-amd64.exe がダウンロードされてきます。
ダウンロードした exeファイルを実行すると・・・インストーラーが起動します。
Add Python 3.9 to path にチェックを入れて Install Now をクリックしてインストールします。
(私のPCには古いバージョンの Pythonが入っていたので、トラブらないように、アンインストールしておきました。)
少しすると・・・Setup was successful と表示されて、Python のインストールは終了です。
2. Download & Install the Webots version 2021.a from their official repository.
次は、Webots Ver 2021.a をダウンロ-ドします。
これも、説明文中のリンクをクリックすると、いきなり webots-R2021a_setup.exe がダウンロードされますが・・・ファイルが大きいのか、遅いからか・・・ダウンロードに15分程かかります。 まあ、気長に待つしかないですね! (1.6GBなので、デカいのですね)
ダンウンロードが終わったら、exe ファイルを実行してインストールします。
3. Download and unzip the latest Erebus Release Build.
最後は EreBus のダウンロードです。
これは、説明文中のリンクをクリックすると、リンク先に飛びます。
リンク先の「Download Release Package (zip)」をクリックして「Erebus-v21_0_0.zip」をダウンロードします。
ダウンロードしたZipファイルを展開します。
これで、準備は終了のようです。
いよいよ実行!
\Erebus-v21_0_0\game\worlds\world1.wbt をクリックします。(実行します)

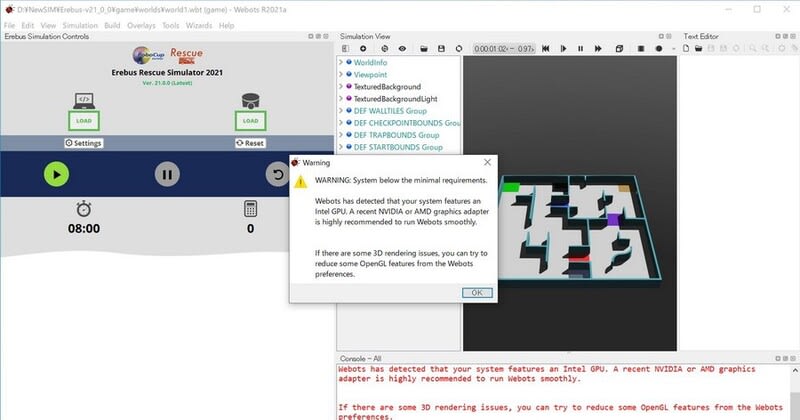
私のPCだと、最低限のハードスペックを満たしていないと、怒られますが・・・とりあえず、起動はしました。
これで、Installation は終了のようです。
いくつか、トラブルシューティングが書かれていますが・・・私には、いまの状態が正常なのか、トラブル発生なのかも良くわかりません。(苦笑)
とりあえず、次に行ってみます。
次は、いよいよ Run the sample code です。
1. Run the world.wbt file from /game/worlds/world1.wbt, opening it in Webots.
/game/worlds/world1.wbt をダブルクリックして実行
2.Press the LOAD button in the Competition Controller displayed on the left side of the screen, and select the sample code included in the release you just downloaded located in the “player_controllers” folder (currently the general sample code is named “ExamplePlayerController_updated.py”).
画面の左側に表示されるCompetitionControllerのLOADボタンを押し、「player_controllers」フォルダーにあるダウンロードしたリリースに含まれるサンプルコードを選択します(現在、一般的なサンプルコードの名前は「ExamplePlayerController_updated.py」です)。
When the program is loaded, the colour of the LOAD button changes to orange.
プログラムが読み込まれると、LOADボタンの色がオレンジ色に変わります。
3.The interface to control the simulation is shown below. The top band is for loading the robot controller and a custom robot if you do make one (see here for more info). Two bands below, the three circular buttons is what you will use to interact with the simulation once the robot is moving. Below that, the remaining time and the current score is displayed.
シミュレーションを制御するためのインターフェースを以下に示します。 トップバンドは、ロボットコントローラーとカスタムロボットを作成する場合にロードするためのものです(詳細については、こちらを参照してください)。 下の2つのバンド、3つの円形ボタンは、ロボットが動いたときにシミュレーションを操作するために使用するものです。 その下に、残り時間と現在のスコアが表示されます。

この説明が、全く分からなかったのですが・・・トップバンド(top band)というのは、上の図の2つの「LOAD」が入っている、灰色の領域のことで、2つ目のバンドというは、丸が3つ並んでいる紺色の領域のことでしょう。
4. When you press the start button, the robot appears in the world and starts moving.
スタートボタンを押すと、ロボットが世界に現れて動き始めます。
と、かかれていますが・・・
スタートボタンを押すと、ロボットは現れるものの・・・

右下に・・・
Traceback (most recent call last):
File "D:\NewSIM\Erebus-v21_0_0\game\controllers\robot0Controller\robot0Controller.py", line 2, in
from PIL import Image
ModuleNotFoundError: No module named 'PIL'
WARNING: 'robot0Controller' controller exited with status: 1.
と赤い文字で表示され PIL のモジュールが見つからない、と怒られて動きません。
というところで、本日は終了です。
ち~ん(合掌)
追補
コメントで、コマンドプロンプトから
python -m pip install pillow
を実行すれば、サンプルプログラムが動作することを投稿しましたが・・・
サンプルのソースプログラムの2行目の
from PIL import Image
を削除するだけでも良いようです。


