


長野に引っ越した時に買ったエプソンのEP-707A。既に7年近く使用しているが、今回3度目の「廃インクエラー」が出た。過去2回も同様に修理したのだが、ブログに載せてなかったので、毎回手順を書いているページを探してから始めるので面倒くさい。と言う事で自分のブログに手順をメモ的に残しておく事にした。
Epson EP-707A that I bought when I moved to Nagano. I have been using it for more than 7 years, but this time the third "waste ink error" came out. I've done the same repair twice in the past, but I didn't post it on my blog, so it's a hassle to start looking for the page that describes the procedure each time. So I decided to leave the procedure as a memo on my blog.
↓廃インクエラーの表示。電源オフしか出来なくなる。

↑Indication of waste ink error. You can only turn off the power.
↓先ずは、スキャナユニットを持ち上げて、前面パネルの裏側のネジを2個外す。

↑First, lift the scanner unit and remove the two screws behind the front panel.
↓前面パネルはケーブルをそのままに、上に外して乗っけて置く。赤四角の所を外す。

↑Leave the cables on the front panel as they are, remove it and place it on top. Remove the red square.
↓ネジを2本外すと上の写真の赤四角の所のカバーが取れる。

↑Remove two screws, you can remove the cover at the red square in the photo above.
↓廃インクタンクの前側のネジを外す。

↑Remove the screw on the front side of the waste ink tank.
↓廃インクタンクの下側のネジを外す。

↑Remove the screw on the bottom of the waste ink tank.
ネジの外れた前面の青矢印の突起を押し込むか、パネル側を前面側にこじって
↓持ち上げ、タンクを真っすぐ下に外す。(本当はネジは外れている状態になってる)

↑Push in the projection of the blue arrow on the front where the screw is removed, or pry the panel side to the front side and lift it, and remove the tank straight down.
この時、プリンタは水平にしたままタンクを外す事。今回私は外す時にタンクを何度か下から見る為にプリンタの前側を持ち上げたら、廃インクが裏に大量に流れ出て来た。
At this time, remove the tank while keeping the printer horizontal. This time, when I lifted the front of the printer to see the tank from below several times when removing it, a large amount of waste ink flowed out to the back.

↑既にほとんど拭き取った後なので余り大した事ない様に見えるが実際はかなり酷い事になった。
It looks like it's not a big deal because it's already wiped off most of it, but it actually turned out to be pretty terrible.
過去2回ではこんな事は無かったので、オリジナルのフエルトだったらこぼれなかったかも知れない。私のは過去2回とも汚れたフエルトを捨てて、コットンパフを詰め込んでいた為こぼれたのかもしれないが注意しておくに越した事は無い。
This has never happened the last two times, so maybe the original felt wouldn't have spilled. Mine may have spilled because I threw away the dirty felt both times in the past and stuffed it with cotton puffs, but it's better to be careful.
↓廃インクタンクの中の古いフエルト(今回はコットンパフ)を捨て、綺麗に水洗いする。

↑Throw away the old felt (cotton puff this time) in the waste ink tank and wash it thoroughly with water.
↓廃インクタンクの底面の形に合わせて下側を少し切りながらコットンパフを詰める。

↑Fill the bottom of the waste ink tank with cotton puffs while cutting a little along the bottom of the waste ink tank.
上側も廃インクの出口のノズルの部分を避ける様にカットする。
The upper side is also cut so as to avoid the nozzle portion of the waste ink outlet.
廃インクタンクを元通り取りつけて、カバーとパネルも元通り組み付ける。
Reinstall the waste ink tank, and reassemble the cover and panel.
ハード的には以上で終了。That's it for the hardware.
但し、内部フラッシュメモリの廃インクカウンターをリセットしないとエラーは消えない。
However, the error does not disappear unless the waste ink counter in the internal flash memory is reset.
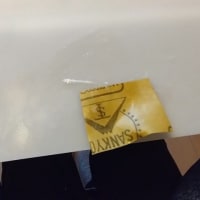
メモリ上のカウンターをリセットする為に、今回はヤフオクで900円で売りに出ていた解除キーを使用しました。
過去は確かPayPalで10.17ドルを支払って、解除キーを入手した記憶が有るが、今回は円安なので、ヤフオクで安く売っている物を使用しました。
In order to reset the counter in memory, this time I used a release key that was on sale at Yahoo auction for 900 yen.
I remember paying $10.17 with PayPal in the past and getting the release key, but this time the yen was week, so I used a cheap one on Yahoo Auctions.
手順は、以下の通りになります。The procedure is as follows.
ヤフオクの説明とソフトのDL先。(今回使用)
↑Explanation of Yahoo auction and DL destination of software.
JPINKの解説。
↑Explanation of JPINK.
廃インクリセットTOOLSのHP(2回目使用)
↑HP of waste ink reset TOOLS
2manuales.comの説明(1回目使用)
簡単に手順を書くと以下の通りです。(詳細は上の手順書参照願います)
Simply write the steps below: (For details, please refer to the procedure manual above.)
①DLしたソフトをインストールする。Install the downloaded software.
②USBケーブルでプリンタとPCを接続。Connect the printer and PC with a USB.
③ソフトを起動してリセットを掛ける。Start the software and reset it.
Wi-Fi接続器はWi-Fi接続のままでもOKと書かれていたが、フラッシュを書いている間に、リンクが落ちるといやだったのでUSBケーブルで接続しました。
It was written that the Wi-Fi connection device can be connected to Wi-Fi, but I didn't want the link to drop while I was writing the flash, so I connected it with a USB cable.
↓無事に復活したプリンターEP-707A

↑Printer EP-707A that became usable.
また、ソフト本体は1回目にインストした物がPCに残っていたので、2回目は新たにインストせずにそれを使って解除キーだけ新たに購入しました。
今回はヤフオク入手でちょっと微妙かなと思い、念の為ヤフオクの説明先からDLし再度インストールして使用しました。
Also, since the software itself was still on the PC after I installed it the first time, I didn't install it anew the second time and used it to purchase a new unlock key.
This time, I thought it was a bit subtle because I got it from Yahoo Auctions, so I downloaded it from the Yahoo Auctions explanation and installed it again just in case.
プリンタ購入当初は年賀状くらいしか使ってなかったので、せいぜい年間150枚位しか印刷していなかったのですが、2017年にアマチュア無線を再開局して、QSLカードを印刷する様になったので、これがいまでは年間2500枚位の印刷量になったので、1回目が3年8か月、2回目がそこから1年8か月、今回は1年4か月での廃インクエラーとなりました。ざっと3000枚のはがきカラー(光沢)印刷でエラーが出る感じでしょうか。
When I bought the printer, I was only using it for New Year's cards, so I was only printing about 150 cards a year at most. Now, the amount of printing is about 2500 sheets per year, so the first time was 4.7 years, the second time was 1.7 years after that, and this time it was 1.3 years. Roughly 3000 postcard color (glossy) printing seems to cause an error.
このEP-707A、さすがに購入6年8か月になるので、はがき印刷の光沢紙を取り込む時に上手く取り込めない事が有り、用紙を少し上に曲げてからセットするとか、使うのにだいぶコツがいる様になってしまいました。次の廃インクエラーが1.3年後だとして、それまでまだ無事に動いているだろうか、、、、、まあ、そろそろ買い替えてもバチは当たらないとは思いますが、、、
It's been seven and a half years since I bought this EP-707A. It seems that there are a lot of tricks to use, such as setting the paper after bending it slightly upwards.
Assuming the next waste ink error is 1.3 years later, will it still be working fine until then?
Well, I think it's time to buy a new one, but...
2022.7.31 (8/4 UP)
修正:購入時期を1年間違えていました。2015/12購入で、最初のエラーまでの期間等を修正。20220805
Epson EP-707A that I bought when I moved to Nagano. I have been using it for more than 7 years, but this time the third "waste ink error" came out. I've done the same repair twice in the past, but I didn't post it on my blog, so it's a hassle to start looking for the page that describes the procedure each time. So I decided to leave the procedure as a memo on my blog.
↓廃インクエラーの表示。電源オフしか出来なくなる。
↑Indication of waste ink error. You can only turn off the power.
↓先ずは、スキャナユニットを持ち上げて、前面パネルの裏側のネジを2個外す。
↑First, lift the scanner unit and remove the two screws behind the front panel.
↓前面パネルはケーブルをそのままに、上に外して乗っけて置く。赤四角の所を外す。
↑Leave the cables on the front panel as they are, remove it and place it on top. Remove the red square.
↓ネジを2本外すと上の写真の赤四角の所のカバーが取れる。
↑Remove two screws, you can remove the cover at the red square in the photo above.
↓廃インクタンクの前側のネジを外す。
↑Remove the screw on the front side of the waste ink tank.
↓廃インクタンクの下側のネジを外す。
↑Remove the screw on the bottom of the waste ink tank.
ネジの外れた前面の青矢印の突起を押し込むか、パネル側を前面側にこじって
↓持ち上げ、タンクを真っすぐ下に外す。(本当はネジは外れている状態になってる)
↑Push in the projection of the blue arrow on the front where the screw is removed, or pry the panel side to the front side and lift it, and remove the tank straight down.
この時、プリンタは水平にしたままタンクを外す事。今回私は外す時にタンクを何度か下から見る為にプリンタの前側を持ち上げたら、廃インクが裏に大量に流れ出て来た。
At this time, remove the tank while keeping the printer horizontal. This time, when I lifted the front of the printer to see the tank from below several times when removing it, a large amount of waste ink flowed out to the back.
↑既にほとんど拭き取った後なので余り大した事ない様に見えるが実際はかなり酷い事になった。
It looks like it's not a big deal because it's already wiped off most of it, but it actually turned out to be pretty terrible.
過去2回ではこんな事は無かったので、オリジナルのフエルトだったらこぼれなかったかも知れない。私のは過去2回とも汚れたフエルトを捨てて、コットンパフを詰め込んでいた為こぼれたのかもしれないが注意しておくに越した事は無い。
This has never happened the last two times, so maybe the original felt wouldn't have spilled. Mine may have spilled because I threw away the dirty felt both times in the past and stuffed it with cotton puffs, but it's better to be careful.
↓廃インクタンクの中の古いフエルト(今回はコットンパフ)を捨て、綺麗に水洗いする。
↑Throw away the old felt (cotton puff this time) in the waste ink tank and wash it thoroughly with water.
↓廃インクタンクの底面の形に合わせて下側を少し切りながらコットンパフを詰める。
↑Fill the bottom of the waste ink tank with cotton puffs while cutting a little along the bottom of the waste ink tank.
上側も廃インクの出口のノズルの部分を避ける様にカットする。
The upper side is also cut so as to avoid the nozzle portion of the waste ink outlet.
廃インクタンクを元通り取りつけて、カバーとパネルも元通り組み付ける。
Reinstall the waste ink tank, and reassemble the cover and panel.
ハード的には以上で終了。That's it for the hardware.
但し、内部フラッシュメモリの廃インクカウンターをリセットしないとエラーは消えない。
However, the error does not disappear unless the waste ink counter in the internal flash memory is reset.
メモリ上のカウンターをリセットする為に、今回はヤフオクで900円で売りに出ていた解除キーを使用しました。
過去は確かPayPalで10.17ドルを支払って、解除キーを入手した記憶が有るが、今回は円安なので、ヤフオクで安く売っている物を使用しました。
In order to reset the counter in memory, this time I used a release key that was on sale at Yahoo auction for 900 yen.
I remember paying $10.17 with PayPal in the past and getting the release key, but this time the yen was week, so I used a cheap one on Yahoo Auctions.
手順は、以下の通りになります。The procedure is as follows.
ヤフオクの説明とソフトのDL先。(今回使用)
↑Explanation of Yahoo auction and DL destination of software.
JPINKの解説。
↑Explanation of JPINK.
廃インクリセットTOOLSのHP(2回目使用)
↑HP of waste ink reset TOOLS
2manuales.comの説明(1回目使用)
簡単に手順を書くと以下の通りです。(詳細は上の手順書参照願います)
Simply write the steps below: (For details, please refer to the procedure manual above.)
①DLしたソフトをインストールする。Install the downloaded software.
②USBケーブルでプリンタとPCを接続。Connect the printer and PC with a USB.
③ソフトを起動してリセットを掛ける。Start the software and reset it.
Wi-Fi接続器はWi-Fi接続のままでもOKと書かれていたが、フラッシュを書いている間に、リンクが落ちるといやだったのでUSBケーブルで接続しました。
It was written that the Wi-Fi connection device can be connected to Wi-Fi, but I didn't want the link to drop while I was writing the flash, so I connected it with a USB cable.
↓無事に復活したプリンターEP-707A
↑Printer EP-707A that became usable.
また、ソフト本体は1回目にインストした物がPCに残っていたので、2回目は新たにインストせずにそれを使って解除キーだけ新たに購入しました。
今回はヤフオク入手でちょっと微妙かなと思い、念の為ヤフオクの説明先からDLし再度インストールして使用しました。
Also, since the software itself was still on the PC after I installed it the first time, I didn't install it anew the second time and used it to purchase a new unlock key.
This time, I thought it was a bit subtle because I got it from Yahoo Auctions, so I downloaded it from the Yahoo Auctions explanation and installed it again just in case.
プリンタ購入当初は年賀状くらいしか使ってなかったので、せいぜい年間150枚位しか印刷していなかったのですが、2017年にアマチュア無線を再開局して、QSLカードを印刷する様になったので、これがいまでは年間2500枚位の印刷量になったので、1回目が3年8か月、2回目がそこから1年8か月、今回は1年4か月での廃インクエラーとなりました。ざっと3000枚のはがきカラー(光沢)印刷でエラーが出る感じでしょうか。
When I bought the printer, I was only using it for New Year's cards, so I was only printing about 150 cards a year at most. Now, the amount of printing is about 2500 sheets per year, so the first time was 4.7 years, the second time was 1.7 years after that, and this time it was 1.3 years. Roughly 3000 postcard color (glossy) printing seems to cause an error.
このEP-707A、さすがに購入6年8か月になるので、はがき印刷の光沢紙を取り込む時に上手く取り込めない事が有り、用紙を少し上に曲げてからセットするとか、使うのにだいぶコツがいる様になってしまいました。次の廃インクエラーが1.3年後だとして、それまでまだ無事に動いているだろうか、、、、、まあ、そろそろ買い替えてもバチは当たらないとは思いますが、、、
It's been seven and a half years since I bought this EP-707A. It seems that there are a lot of tricks to use, such as setting the paper after bending it slightly upwards.
Assuming the next waste ink error is 1.3 years later, will it still be working fine until then?
Well, I think it's time to buy a new one, but...
2022.7.31 (8/4 UP)
修正:購入時期を1年間違えていました。2015/12購入で、最初のエラーまでの期間等を修正。20220805


※コメント投稿者のブログIDはブログ作成者のみに通知されます