


豪州版ライフハッカーに紹介してあった
ニューヨークタイムズのカメラマンAndrew Scrivani氏による
食べ物の写真撮影に大切な5つのポイントです。
プロの機材なしに、
その場でいい写真 をとる方法が紹介してあります。
 可能な限り自然光を利用する
被写体からはなれすぎず、フレーム内は(ブランクを減らし)被写体でみたす
自分が夜でかけるときおしゃれするように皿の上の食べ物も微調整。
盛り過ぎない。大型の容器のほうが撮影が難しい。お皿は10インチ以下。
直射日光があたり明るすぎる場合は、
レンズフィルターを使ったり、光と被写体の間に
白いカードや紙、薄い布(scrims)をかざして光の量を調整。
反対に曇った日や間接光しかない場合は、明るい色の服をきて
その反射光を利用して少しでも光をとりいれる
暗い場所でとるときは、電気をつけて明るくし
部屋の一番明るい部分に被写体を移動。
カメラがオートフォーカス(Point & Shoot)の場合は
フラッシュをオフにして、三脚を使うか、平たいところに
カメラを固定して撮影。
Diner's Journal - The New York Times Blog on Dining Out
April 6, 2010, 7:38 pm
How to Take Photos of Food
By THE NEW YORK TIMES
Andrew Scrivani, a freelance photographer and food stylist for The New York Times, is taking questions on how to photograph food. Andrew writes the food and photography blog Making Sunday Sauce. Post your question in the comments below and he will respond throughout the week. In the meantime, here are five basic tips on creating a successful food portrait.
Making Food Pretty
1. Shoot in natural light whenever possible. Use window light, shoot outdoors. Flash photography is possible but not preferable and takes some gear and instruction to execute well. The flash in most point-and-shoot cameras is your worst enemy for shooting food. Your photos will always look dull and flat from this type of flash. Turn it off. Ideally you want your food to be back lit or side lit.
2. Fill your frame with the food. You don’t want to have a lot of empty space, meaning it shouldn’t be so far away from the plate that you don’t capture what’s on the plate.
3. Set up your plate with the same care you might apply to dressing yourself for a night out ― classic, coordinated and elegant. Every imperfection is magnified under the camera. Don’t overfill the plate. Smaller is better. Larger plates, bowls and pots are much more difficult to frame. Keep your plates below 10 inches wide.
4. For bright and sunny days, where there is direct light, use a white card or paper, placing the food between the light source and the card, which will allow the light to bounce off the card, ultimately softening the level of brightness. And you can also use scrims, filters and gel frosts (available at any camera shop) to cover the window and allow the daylight to filter through. Cloudy days or indirect sunlight often don’t need filtering. Also, wearing neutral colors like white or tan will help reflect light back onto your subject.
5. When shooting in low light, move the food to the brightest part of the room. Turn up your lamps and other light sources. For a point-and-shoot, turn off your flash and employ a tripod or a flat surface to keep the camera steady. Hand holding the camera in low light will often produce blurry images.
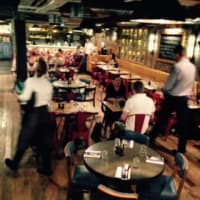
「レストランで写真をとりはじめるフード・ブロガーにはうんざり...
何か規制する方法はないの?」というようなコメントもありました
 後日、日本版ライフハッカーで紹介してありました。
ニューヨークタイムズのカメラマンAndrew Scrivani氏による
食べ物の写真撮影に大切な5つのポイントです。
プロの機材なしに、
その場でいい写真
をとる方法が紹介してあります。可能な限り自然光を利用する被写体からはなれすぎず、フレーム内は(ブランクを減らし)被写体でみたす自分が夜でかけるときおしゃれするように皿の上の食べ物も微調整。 盛り過ぎない。大型の容器のほうが撮影が難しい。お皿は10インチ以下。
直射日光があたり明るすぎる場合は、レンズフィルターを使ったり、光と被写体の間に
白いカードや紙、薄い布(scrims)をかざして光の量を調整。
反対に曇った日や間接光しかない場合は、明るい色の服をきて
その反射光を利用して少しでも光をとりいれる
暗い場所でとるときは、電気をつけて明るくし部屋の一番明るい部分に被写体を移動。
カメラがオートフォーカス(Point & Shoot)の場合は
フラッシュをオフにして、三脚を使うか、平たいところに
カメラを固定して撮影。
Diner's Journal - The New York Times Blog on Dining Out
April 6, 2010, 7:38 pm
How to Take Photos of Food
By THE NEW YORK TIMES
Andrew Scrivani, a freelance photographer and food stylist for The New York Times, is taking questions on how to photograph food. Andrew writes the food and photography blog Making Sunday Sauce. Post your question in the comments below and he will respond throughout the week. In the meantime, here are five basic tips on creating a successful food portrait.
Making Food Pretty
1. Shoot in natural light whenever possible. Use window light, shoot outdoors. Flash photography is possible but not preferable and takes some gear and instruction to execute well. The flash in most point-and-shoot cameras is your worst enemy for shooting food. Your photos will always look dull and flat from this type of flash. Turn it off. Ideally you want your food to be back lit or side lit.
2. Fill your frame with the food. You don’t want to have a lot of empty space, meaning it shouldn’t be so far away from the plate that you don’t capture what’s on the plate.
3. Set up your plate with the same care you might apply to dressing yourself for a night out ― classic, coordinated and elegant. Every imperfection is magnified under the camera. Don’t overfill the plate. Smaller is better. Larger plates, bowls and pots are much more difficult to frame. Keep your plates below 10 inches wide.
4. For bright and sunny days, where there is direct light, use a white card or paper, placing the food between the light source and the card, which will allow the light to bounce off the card, ultimately softening the level of brightness. And you can also use scrims, filters and gel frosts (available at any camera shop) to cover the window and allow the daylight to filter through. Cloudy days or indirect sunlight often don’t need filtering. Also, wearing neutral colors like white or tan will help reflect light back onto your subject.
5. When shooting in low light, move the food to the brightest part of the room. Turn up your lamps and other light sources. For a point-and-shoot, turn off your flash and employ a tripod or a flat surface to keep the camera steady. Hand holding the camera in low light will often produce blurry images.
「レストランで写真をとりはじめるフード・ブロガーにはうんざり...
何か規制する方法はないの?」というようなコメントもありました
後日、日本版ライフハッカーで紹介してありました。


※コメント投稿者のブログIDはブログ作成者のみに通知されます