gooブログはじめました!

写真付きで日記や趣味を書くならgooブログ

How to Solve Digimaster 3 WhiteBlack Screen of Death

2017-09-24 13:32:30 | 日記

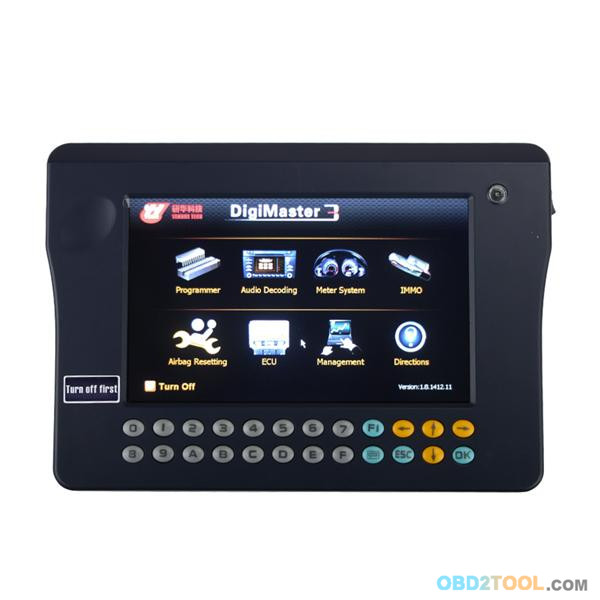
Recently some forum bros talked about their death screen (white or black screen of death) of their Digimaster 3. And now, we technicians offers some solutions.


12-1


First, please try to update your kernel


Then, try the following solution if white or black screen of death still appears on your Digimaster iii after you have updated the kernel.
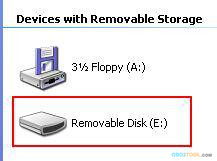
1. Remove SD card from D3 to cardreader,and connect to PC. After successful connection, click “Removable Disk(E:)” as showed in the picture.


12-2


2. Delete the old file “YHTech” which is in the SD card.
3. Copy the “YHTech” files from CD, and save it in SD card.
4. Please insert SD card intocar diagnostic scanner Digimater3 after successfully copy and paste. Then connect to
network and turn on Digimaster 3, click “OK” for downloading when appear remark of “Please connect network download hypervisors!” in the interface.It can be functioned after successful download.


http://cheapobd2.com/2017/09/20/how-to-solve-digimaster-3-whiteblack-screen-of-death/

wiTECH MicroPod II v17.03.10 clone review Dodge Avenger 2014 OK

2017-09-15 17:55:33 | 日記
<section class="entry-content ">

Just ordered a Chinese clone Chrysler Micropod II and it has been working exactly like an OEM unit. No errors so far and tested functions on 3 different vehicles. It has been confirmed working with unmodified software wiTECH v17.03.10 (downloaded directly from a blog, I put the site below) and online (logged into TechAuthority). Not sure if it will be blacklisted or the firmware will be upgradeable with the next software release, but for now it works fine.


I have also uploaded pictures of the internals for those who are curious.


5-1


5-2


5-3


5-4
The site I am using for this tool:


http://www.obd2tool.com/goods-5172-wiTech+MicroPod+2+for+Chrysler+Diagnostic+Tool.html


This version of Witech (17.03.10) works fine on Windows 7 and Windows 10.
on a 2014 Dodge Avenger just fine.


was able to flash a module update & program a new key with the unit


also, possible to use DRB III Emulator with it, DRB III emulator confirmed working.


So far, happy with this witech MicroPod 2.


</section>
http://obd2tools.cuisine-spirit.com/how-to-set-up-witech-micropod-2-chrysler-diagnostic-tool-289596.html

How to register Autel MaxiDAS DS808 scanner

2017-09-14 15:39:17 | 日記

This a how-to guide of 2017 Autel MaxiDAS DS808 automotive diagnostic system registration.


– Necessary to perform Autel DS808 registration?


– Definitely yes! To get access to the Support platform and obtain update and other services from Autel, you are required to register theAutel MaxiDAS DS808 for the first time you use it.


– What you need for the maxidas ds808 registration?


1- autel scanner ds808


2- account id


3- serial number & password


– How to register autel maxidas ds808?


1.Go to the website: http://pro.autel.com.


2.On the Sign In page, input your account ID and other information to log in, if you already have an account.


3.If you are a new member to Autel and do not have an account yet, click the Create Autel ID button on the left side.


4.Enter the required information in the input fields, read through Autel’s Terms and Conditions and tick on Agree, and then click Create Autel ID at the bottom to continue.


5.The online system will automatically send a confirmation email to the registered email address. Validate your account by clicking the link provided through the mail. A product registration screen opens.


6.Find out the scanner’s serial number and password from the About section of the Settings application on the Display Tablet.


7.Select the product model of yourOBD2 Scanner Autel DS808, enter the product serial number and password on the Product Registration screen, and click on Submit to complete the registration.


Then you can use Autel DS808 for OBDII diagnosis and special functions (Oil Reset Service, TPMS Programming Service, EPB Service, ABS/SRS Services, SAS Calibration Service, DPF Regeneration Service)


autel-scanner-ds808-1 autel-scanner-ds808-2 autel-scanner-ds808-4 autel-scanner-ds808-5 autel-scanner-ds808-6 autel-scanner-ds808-7 autel-scanner-ds808-8 autel-scanner-ds808-9 autel-scanner-ds808-11


http://obd2tool.lofter.com/post/1f0c5620_11237ac6

How to Unlock and Add Toyota VXR V8 Smart Key

2017-09-10 13:30:24 | 日記

Guide to unlock and program smart key on a 2016 Toyota Land Cruiser VXR V8 5.7 4×4.


17-0


The solution was provided by a Chinese locksmith A Jie.


Problem:


A customer bought a Toyota Cruiser VXR V8 5.7 in Aug, 2016. When came back home he found one of keys did not working, could not start the vehicle. He came me for help.


Diagnose:


Check the key frequency and chip type with ND900 key copy machine from obd2tool.com. It showed key’s programmed, so the smart key is okay.


17-0
17-1
Analysis:


1. The smart key has been programmed but not been learned


2. 4S store gave you the wrong key (the key is not for this vehicle)


How to check:


Method 1:


Program/learn the smart key by using SKP1000 Tablet car key programmer. Unfortunately, skp-1000 failed to learn key. So the smart key is not correct key for this vehicle.  You should get the smart key unlocked and programmed. Go and check method 2.


Method 2:


Step 1: Unlock Smart key


Unlock the smart key with Xhorse VVDI2 key programmer or ND900 Mini


17-3


17-4
Perform Blank Check,  key indicator will flash within 5 seconds if VVDI2 unlock success


17-5


Again use Mini ND900 to check the unlocked smart key.


It shows not been programmed
17-6


Unlock smart key done.


Step 2: Add/Program smart key


Connect SKP1000 key programmer with vehicle via OBD socket


Select Immobilizer function- >select Toyota->Smart key CANBUS-> Smart key system


17-7 17-9
Choose OBDII connector


Turn ignition ON


Press YES to continue


17-10


Press the Start button
17-11


Put the registered smart card into coil.


If hear a beep sound, take away the smart card


17-12


Select Add smart key


17-13


the working key is close to the emergency starting induction antenna


17-14


Change a new smart key and put it into the coil


Press YES to continue


17-15


the new smart key is close to the emergency starting induction antenna
17-16


Configuring…


17-17


Program/Add smart key success
17-18


Test the new smart key.


obd2tool.blog.163.com/blog/static/276550138201781011725354/

Working Solution for Ktag clone Kessv2 checksum error

2017-09-02 23:38:44 | 日記
Some users of KESS V2/ Ktag clone feedback one same question: They got have problem with checksum when R/W only flash, take this user’s problem for example: I have problem with my ktag clone. In slave (full backup) ver read and write ok, but if i want to read only flash (ex. sid 803) or micro (ex. edc17cp14) at end of reading 99% it write checksum error and every file is different. What I can do to read and write good in master ver.

6-1

Solution as follows:
If You have problem with checksum when R/W only flash, Your OS dont have C++ library. Two way:
– download C++ libarary from net -> instal it

or

– download from alientech website Auto ECU Programmer ksiute 1.85 -> install it, it will install C++ automatically -> remove dir C:\KSiute -> Replace it with KSiute dir which You get from Your clone supplier -> restart WIN -> be happy with Your master ktag.

Solution tested and works on 3 computers.

DONT START KSIUTE WITH YOUR CLONE BEFORE YOU REPLACE KSIUTE DIRECTORY!!!

PS:
-Some users said you must install c++ library 2005,2008, 2010.
c++2005 and net framework 2.0 then worked for my friend.

Our customers feedback some problem about kess v2 at Obd2tool.com,we sovled it and have written below,if you have same problems,it will help you.

How to solve KESS V2 Wake up error?

KESS V2 not works with k-line or does not work well?

(Solved) Kess v2 error “External exception EEFFACE

KESS V2 WARNING: the tool is not updated
http://forobd2tool.com/blog/2017/08/31/working-solution-for-ktag-clone-kessv2-checksum-error/