gooブログはじめました!

写真付きで日記や趣味を書くならgooブログ

Why 09.2014 Xentry XDOS is best for Part D (C3)

2018-08-23 19:14:11 | 日記
<section class="entry-content ">

The reason why Xentry Diagnostic Openshell version 09.2014 is the best software for MB STAR C3 is that:


anything after Xentry 09.2014 you have to do too many fixes to get it fully working..


For those with Mb Star C3 mux, YOU HAVE TO KNOW:


11.2012 Xentry: best for OFFLINE PROGRAMMING


09.2014 Xentry: the BEST – the most famous and favorite


12.2015 Xentry: advise to use xentry xp/xdos up to 12/2015


05.2016 Xentry: the LAST version working with PartD aka C3


07.2018 Xentry: the NEWEST version but better work with SDconnect C4 or Xentry Connect C5


If there is any chance it will work with C3, the first thing is to play with toolkit.ini


It will be in c:\program files\Mercedes-Benz\SDconnect Toolkit\bin\toolkit.ini or C:\Program Files (x86)\Mercedes-Benz\SDconnect Toolkit\bin\toolkit.ini


There will be a line that says UseComPorts=


Here add the port number you wish to use.


Note that since 2016-01 part D is replace with part Z (bosch vci). so if you want to use C3, you have to use old driver.


In summary, version 09.2014 is the best for your C3!!


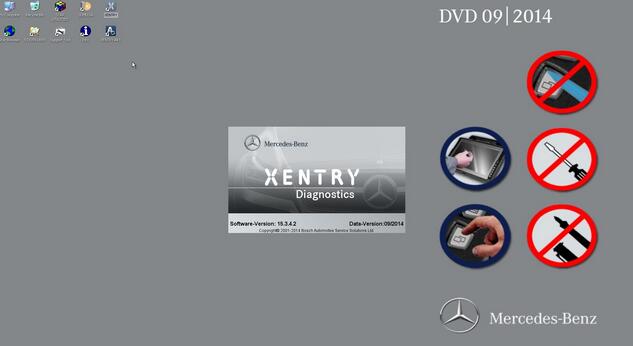
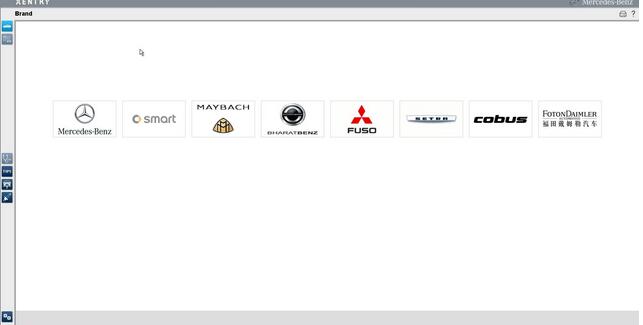
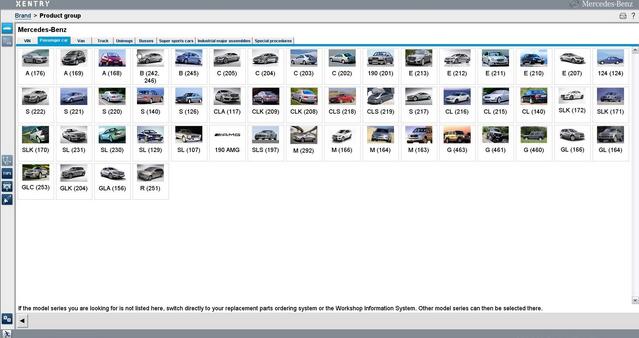
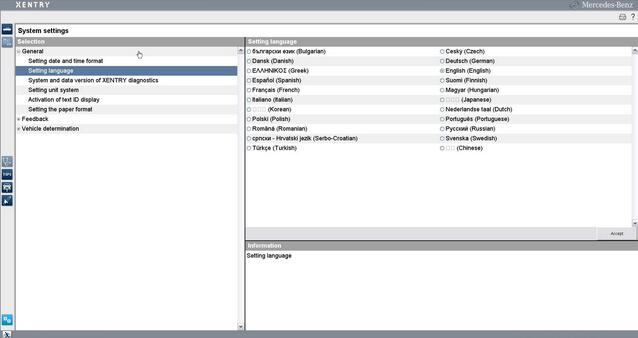
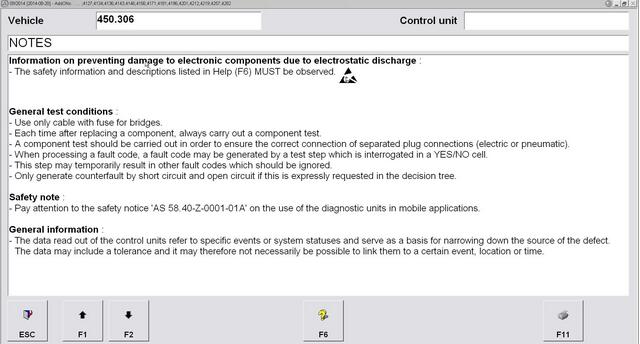
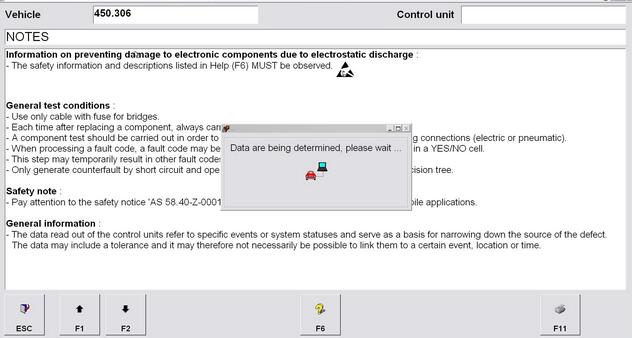
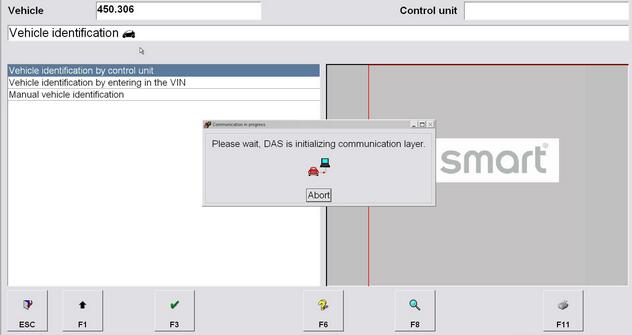
Upload images of C3 and XDOS 09.2014 working perfect…


7-1 7-2 7-3 7-4 7-5 7-6 7-7


source: obd2tool.com


IMPORTANT: XDOS 09.2014 download & how to install


09.2014 XDOS download free:


MEGA Folder with Xentry 9.2014+All Extra Stuff.zip


https://mega.nz/#!sPoV0SYQ!YtDyl8kj56j-Z8Nyd6ra7AkwcXyGJ-iIXSZji8767G8


password: xentry92014@bylallasgr/kalatopas


BIG THANKS to all the folks that provide us all the fixes and solutions for all the errors!!! Without them this guide wouldn’t be possible! It’s not necessary to add all the name here. They know who they are!


– Congrats guys and thanks a lot –


Software requirements:


1) Windows XP Service Pack 3


2) Partition manager


3) Virtual drive program


4) Winrar


5) Adobe Acrobat Reader 10


6) Drivers for your laptop


7) Xentry 2xDVDs (modified)


8) SDMedia 1 2014


9) Fixes (bin fix / blacklists/ pic. fix)


10) Key generators


11) Framework 2.0 and 3.5 sp1


12) Active Iso maker


This installation Guide has be done for a 160GB HDD. Information for 120GB are providing.


Installation guide:


Phase 1: (XP fresh installation)


1.  insert bootable XP SP3 CD
2.  enter bios setting and make boot from CD first choice
3.  install win XP with following considerations in order:


*   Delete your partitions if already your HDD is partitioned…
*   create partition in unpartitioned space C : 30GB
*   install win in C: partition after formatting drive in NTFS “”not quick””
*   create two accounts : the first is STAR , the second OWNER ? login to both accounts
*   restart your system
*   login to STAR
*   Install partition manager (Partition Manager -[epm].exe)
*   Create partition as follows (160GB HDD is recommended) :


[Already Exist]-C: 30GB (STAR)


D: 30 GB (RECOVER)


E: 50 GB (WIS)


F: 50 GB (DAS)


Note: letters are extremely important. NTFS is mandatory…use Default allocation size


*   Restart is required to apply partitions by partition manager program…
*   Login to STAR…Open My computer.
*   Install all the drivers of your machine
*   Go to control panel>system>hardware>Device manager to confirm that no device hasn’t installed. If u find a device not known install its’ driver.
*   Restart system as required by some drivers.
*   After that install: Adobe reader [Adobe_Reader_10_0_1.exe]


Virtual clone program [SetupVirtualCloneDrive5450.exe]


Winrar [wrar400.exe]


.NET Framework 2.0 for Windows XP.exe


.NET Framework 3.5 Service pack 1 (Full Package) .exe


NOTE: If you have 120GB HHD then create the following partitions:


C : 30 GB


D: 10 GB


E: 45 GB


F: 35 GB


Phase 2: (Preparation for Xentry installation)


1   Go to Newguide2j folder
2   click WFP switch (stands for Windows File Protection)
3   restart your system as required to apply settings
4   Logging to Star account.
5   Go to Newguide2j folder
6   Click “prepare.bat” batch (follow commands..10 steps will be executed).system will be restarted
7   Login to Star. You will find Star Utilities in your desktop


Phase 3: (DVD1 Xentry installation)


1   Set time to 05/09/2014 (5th of September 2015)
2   Set power option to Never (Always on)
3   Go to STARTUTILITIES in desktop. Double click to start “star key center”
4   Insert keys for Xentry and WIS and Das with the following considerations:


*   Use keygens provided in sources.
*   BE aware to tick expiry date for the keys and set it forward eg. 01/01/2020
*   keys need information as Hardware id and App id and LAN id….Copy them correctly form the startkey to generate the right key
*   click save
*   if it is correct and saved u will notify that validity appeared after clicking save


Possibly errors: If you get an error for Xentry Diagnosis for saving the key


Example: “LicCheckLicence Xentry Diagnostics


4-Startkey can not be decoded or scheme is not recognized, or appid unknown!”


Solution: Then go to “C:\WINDOWS\ZAK\Starutils” delete the existing “CommonLic.dll” and copy the one from folder “Fixes\FOR-XENTRY-KEY-ERROR\CommonLic_2011-06-19-[For Xentry Key Error Saving]” and paste it in the above folder. After that restart Star Utilities and generate a new key and now the key will be saved without problems. Now Mount DVD1


1   explore mounted dvd1/ STARDIAG
2   click setup.exe
3   Setup will start
4   Choose Language. If you choose different language from you windows language then PC will restart. After that re-launch DVD1 to virtual drive and run again setup.exe
5   Wait and follow instructions ordinary
6   Setup will pop up that no startkey click yes…setup will launch Start Key Center now with new appearance
7   Insert new key using Xentry key generator (Xentry Developer (1).exe) with Appid 253 and NEW hardware id…Save key…


Possibly errors: “star key center (SC0003E)”


Solution: From folder “Fixes\FOR-XENTRY-KEY-ERROR\StartKey Centr” run “StartKey Centr.exe” and now re-ender new generated key from keygen.


8   Exit start key center
9   Setup will continue….


NOTES: ? Setup will need to restart. This is ordinary. After restart launch setup again as previous if not launched automatically


*   Plug computer to power source. If u don’t the setup will be terminated!
*   New login will appear … wait…don’t switch of lap.


10  DVD1 complete successfully and setup will require DVD2 after restart


Phase 4: (DVD2 Xentry installation)


After restart, run from Desktop “Star Utilities” and when it opens, press “Star Key Center” button to check if it’s ok.


Possible Error: “Launch4j This application was configured to use a bundled Java Runtime Environment but the runtime is missing or corrupted”


Solution: From folder “SKC_SETUP” run “SETUP.EXE” and choose to repair the installation. Now Star Key Center should run without problems.


*   mount DVD2
*   Explore DVD2 >STARDIAG
*   Click setup.exe
*   Setup will start
*   Wait?
*   Setup will complete and require YOU to click finish to restart…DON’T CLICK FINISH!!
*   Go to Newguide2j
*   Click after installation.bat patch and wait to be finished
*   Return to Xentry setup and now click Finish. System will restart and hot fixes installation begins.


Now you have XENTRY


Phase 5: (fixes and configurations phase)


*   Navigate to: Control panel > System > Hardware > Device manager > Ports (COM & LPT). Right click on that COM port you have left enabled and select Properties. Go to Port Settings tab and set these values:


Bits per second: 115200


Data bits: 8


Parity: None


Stop bits: 1


Flow Control: None


Then click on Advanced… button and make sure Use FIFO buffers are checked and COM Port Number is set to COM2.


Press OK and close Device manager.


THIS for Part D


*   Apply pic. Fix [Xentry Pics Fix (9.2014).exe]
*   Apply bin fixes [ALL BIN_T_D_D2 09.2014] for your version of MUX.
*   Apply blacklist [Xentry_Blacklist_Fixed_Solutions_2013-2014.exe].
*   From DAS AddONs 9.2014 run mb_add_installer_v1.exe and press install (wait to finish)


Phase 6: SDMedia installation


*   Mount “SDMedia 1-2.2014 FULL.iso” to virtual DVD drive
*   Run “setup.exe” from the main folder and wait the installation to complete
*   ENJOY!!


This guide is provided by lallasgr/kalatopas after a lot of reading and searching in forums


I hope that you will be able to install Xentry 09.2014 without problems


– Good luck to everybody –


</section>
http://obd2trade.com/2018/08/13/why-09-2014-xentry-xdos-is-best-for-part-d-c3/

OBDSTAR Tools released new upgrade on July 31st, 2018

2018-08-11 14:46:29 | 日記


OBDSTAR Scanner released new upgrade on July 31st, 2018. Update applied to OBDSTAR X300 DP/X300 DP Plus full version


IMMO


Toyota/Lexus


Optimize type 8 support car list


Isuzu


Increased D-MAX/MU-X remote programming


Holden


Increased pincode reading function


Increased Barina C IMMO system


Increased Barina MJ IMMO system


Increased Barina Spark IMMO system


Increased Barina TK IMMO system


Increased Barina TM IMMO system


Increased Berlina IMMO system


Increased Colorado RG IMMO system


Increased Frontera IMMO system


Increased Rodeo TF IMMO system


Increased Trax IMMO system


Increased Jackaroo IMMO system


Increased Viva IMMO system


Increased VE Commodore IMMO system


Increased VF Commodore IMMO system


Increased VR Commodore IMMO system


Increased VS Commodore IMMO system


Increased VT Commodore IMMO system


Increased VX Commodore IMMO system


Increased VU IMMO system


Increased VY Series 1 IMMO system


Increased VY Series 2 IMMO system


Increased VZ Series 1 IMMO system


Increased WH Statesman IMMO system


Increased WK Statesman IMMO system


Increased WL Statesman IMMO system


Increased WH Caprice IMMO system


Increased Barina B remote control system


Increased Barina TK remote control system


Increased Barina Spark remote control system


Increased Viva remote control system


Increased VE Commodore remote control system


Increased type 1-6


BMW
Optimize all keys lost programming problems


Nissan


Solve ISO communication unstable problem


VW/Audi/Skoda/Seat


Solved Audi RB4/RB8 IMMO bug


Solved Audi A3/TT EEPROM backup problem


Increased the function of clear fault code for dashboard and air bag


Zotye


Increased T700 smart key system


Increased Zotye E200 smart key system


Increased T500 remote control system and smart key system


Increased Damy X7 remote control system and smart key system


Chrysler


Optimize Jeep Free Light 2014-transponder key and smart key


Ford


Optimize Europe FORD Transit 07-14 Erase key function


Renault


Increased Fluence/Latitude/Avantime/Duster/Master/Symbol


Combined the pincode and pincode free menu with auto select function


Geely/SMA/Englon


Optimize Geely Boyue key programming text tip


Renault/Dacia/Lada


Solved Fluence type vehicles pincode reading mode auto select error


Solved Symbol(2013-2018)type vehicles pincode reading problem


Increased DOKKER/LODGY/LOGAN 2013-/SANDERO 2013-/ SYMBOL 2013-2018(DUSTER2014-2018)


GM


Optimized Cadillac XTS key programming (solved the bug: compulsory to wait for 12minutes)


Remote Control Manual Setting


Increased English, Russian, Thai, Portuguese, Turkish, Spanish, Indonesian, Polish, Persian, French


EPB


New Increased:


FAW:Besturn X80F


BAIC MOTOR:BJ20


Baihc Hyosow:S5/S6


Zotye:Damy X7/Z300


Land Rover:New Range Rover(2017)


GAC Trumpchi : GS4/GS8/GS7/GM8/GS4-2018


SAIC MG:New GS/MG6 EU(2014)/MG6 TT(2015)


GAC Honda:ACCORD/CIVIC/FIT/ODYSSEY/EVERUS S1CRIDER


Geely: EMGRAND X6(2018)/EMGRAND EV series (EV300/EV450)


Changan:CS95(S401)/CS55(S201)/RAETON CC(C301)/Oshan/X70A


Changcheng:Hover H2/Hover H2s/Hover H4/Hover H7/H7L/Hover H6/Hover H6 COUPLE/VV5/VV7/P8


Optimize VW/Skoda/Audi
Solved Mercedes-Benz S600(222-S series)communication failure


Oil/service Reset


New increased in Auto Reset


Roewe: EI6/I6


Geely: New Vision(2018)/ Vision X3


Skoda: CITIGO/FELICIA/RAPID/YETI/ROOMSTER


Seat: ALHAMBRA/ALTEA/CORDOBA/AROSA/EXEO/IBIZA/INCA/MII/TOLEDO


Zotye: T700/Z700/Damy X7/SR9/T600 Sport/Sesame E30/SR7(2017)/T600 Coupe/T300


Changcheng: Changcheng C30EV/Changcheng CH041E/Hover H4/Hover M6/VV5/VV7/P8


Hyundai:


ACCENT/CRETA/CELESTA/ELANTRA/ELANTRA/GRANDEUR/AZERA/G80(DH)/G90(HI)/HB20(HB)/i30/i40/IONIQ electric(AE EV)


IONIQ hybrid(AE HEV)/IONIQ/PHEV(AE PHEV)/ ix25(GC)/NEW VERNA/RV VERNA/ SANTAFE/SONATA/ VELOSTER (FS)


KIA:


BORreed/Carnival/Ceed(JD)/K2(UC)/KX3(KC)/K4(PFC)/KX5(QLC)/K5 HEV(JFC HEV)/Niro/Optima/PICANTO/MORNING/Rio/Sorento/ Sportage/Stinger


Renault:


CAPTUR/QM3/KABIN/CAPTUR(Brazil/India/Russia)/Clio III/Clio IV/ESPACE V/KANGOO II/KANGOO ZE/StopStart/PH2/Koleos II(QM6 China)


Koleos II(QM6)/MASTER III/Megane II/MEGANE III/SCENIC III/Megane IV/MEGANE IV SEDAN/MODUS/NEW SM3/FLUENCE/MEGANE/SCENIC II


SCENIC IV/SM7-L47/TALISMAN(SM6)/ TWINGO II/TWINGO III/WIND/ZOE


New increased in Manual Reset


Honda:


CRV(2017-/2018(low configuration)/2018(high configuration)/CR-Z(2012)/Integra( 1992-1993/1994-1995/1996-2001)/


JADE(2017)/Legend(1992-1995)/Vigor(1992-1994)/Civic(2015-)


Jeep/Dodge/Chrysler: updated the vehicle menu as follow:


MK-Compass/Patriot 2007-2014
WK-Grand Cherokee 2006-2017
KK-Liberty 2014-2015
JK-Wrangler 2014-2017
J8-Wrangler 2016-2017
JS-Avenger/Sebring 2007-2014
LA-Challenger 2015-2017
LD-Charger 2014-2017
WD-Durango 2014-2017
JC-Journey 2008-2017
RT-Caravan/Town & Country 2014-2017
ZH-Crossfire(NAFTA) 2007-2008
RU-CHRYSLER PACIFICA 2017
D2-Ram 3500 Pickup 2010-2017
DF-Ram 3500 Cab Chassis 10K 2016-2017
DJ-Ram 2500 2010-2017
DP-4500/5500 2011-2017
DD-3500 Cab Chassis 2011-2017
DS-Ram 1500 2014-2017


MP 2017


M4-Compass(China) 2017
M1-Compass(Brazil) 2017


New added vehicles as follow:


M6-556 2016-2017


LC-Challcnger 2014
KL-Cherokee 2014-2017
JF-Freemont 2011-2017
FF-500 2012-2017
FB-500X 2016-2017
BU-Renegade 2016-2017
BQ-JEEP (China) 2016-2017


BF-Fiat 500L 2014-2017


B1-Renegade 2015-2017


Optimization


Combined Jeep/Dodge/Chrysler vehicle menu
Optimized the following Jeep/Dodge/Chrysler vehicles:Ram Pickup/Jeep compass/Wrangler/Charger/Nitro/Intepid/Vison/Aspen


Steeling Angel Learning


Solved Subaru flash back problem in steeling angel reset


Battery Matching


Optimize BMW 5 series battery matching function


Oil/service Reset


Added the manual reset in part of Jeep vehicles


Solved Changan CS15 oil/service reset failure problem


Airbag Reset


Increased Indonesian language


Increased multi-language translation text


P001 Adapter


Solved P001 adapter PIC Initialization problemmatch


Switch Activation


Increased Porsche Macan dashboard activation function


Increased Lamborghini LP750 dashboard activation function


Increased Ford Mondeo CHIA-X dashboard activation function


Increased Range Rover LCD low speed dashboard activation function


OBDSTAR X300 DP PLUS ECU Clone


Optimized communication time during EEPROM and FLASH writing


DP Display Program


Solved Audi RB4/RB8 IMMO bug


Solved NISSNA OLD OBD14 bug: no clock output


Solved NISSNA OLD Nissan_RecvFrame function received bug


http://obd2codes.net/2018/07/31/obdstar-tools-released-new-upgrade-on-july-31st-2018/


New “Network Check” feature in wiTECH Diagnostic Application

2018-08-02 18:56:21 | 日記
<section>

Description:


Starting from version 14.02.56, a new feature called “Network Check” has been implemented in wiTECH. This feature can be accessed by selecting Help → Network Check option as depicted in the screenshot below:


15-1


Upon selecting the “Network Check” option, the “Network Check” utility window will appear as shown in the screenshot below:


15-2


This new feature will enable the user to check whether the PC in which the wiTECH Diagnostic Application runs, has been able to connect to the required web-sites for


* Automatic software updates.
* Receive software updates in a silent mode.
* Diagnostic Tools registration.
* Data recordings and various reports upload.
* Smooth functioning of wiTECH Diagnostic Application.


To run the “Network Check” utility, please click on the “Start Network Check” button as shown in the screenshot below:


Network Check will test the following sites to confirm they are available from your network.


15-3


If any of the web-sites listed above in the screenshot is not available, you may experience issues with the wiTECH application functions/features listed above.


The “Network Check” feature is also available from witech2 “Standalone Mode” by accessing Help → Network Check option.


If you are not getting an automated wiTECH Diagnostic Application update prompt or receiving a device registration warning despite your device is registered, you can run the “Network Check” utility to confirm you have access to the required web-sites/domains.


NOTE: All wiTECH users should have network access to Obd2tool.com and all of its sub-domains as trusted sites.

</section>

Leave a comment


http://obd2tool88.egloos.com/6369675