gooブログはじめました!

写真付きで日記や趣味を書くならgooブログ

Toyota H chip all keys lost Solution

2020-02-22 17:14:46 | 日記

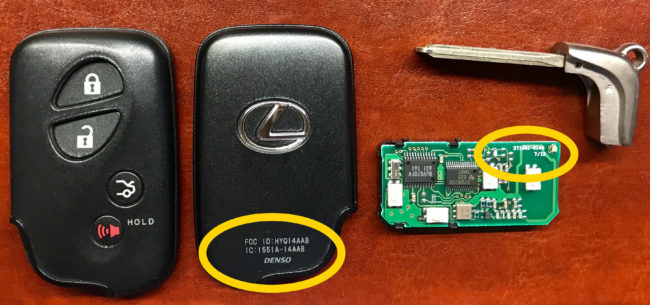
Dose anyone knows any device capable of programming keys on regular toyota H chip, when all keys lost situation?


Many tools can do this.


1. OBDSTAR X300 DP PAD
2. OBDSTAR X300 PR03
3. Vxdiag Vcx Nano Techstream
4. SKP900
5. Lonsdor K518ISE
6. OBDSTAR X300 Pro 4


1. OBDSTAR X300 DP PAD Do Toyota RAV4 with G ALL Key Lost programming:


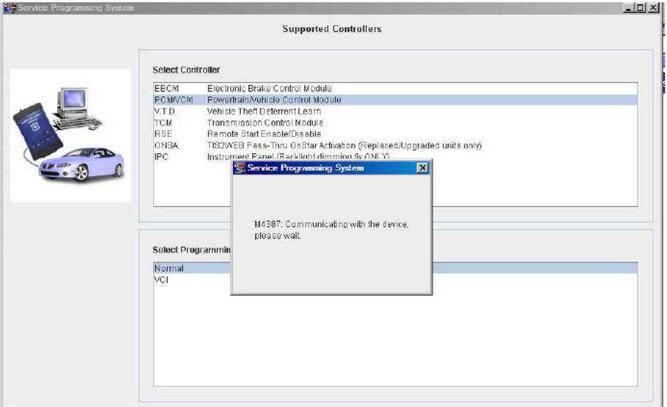
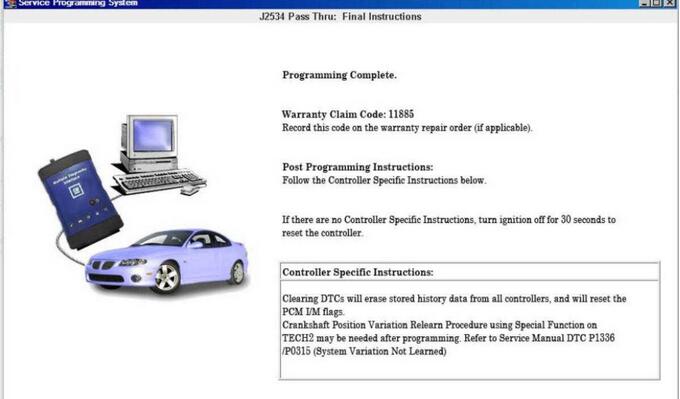
2. OBDSTAR X300 PR03 Program Toyota H Chip All Key Lost


OBDSTAR X300 DP/X300 Pro3 key master can do all keys lost for Toyota H chip via OBDII within 3 minutes, fast and easy. (mainly for Toyota with America and middle east standard).


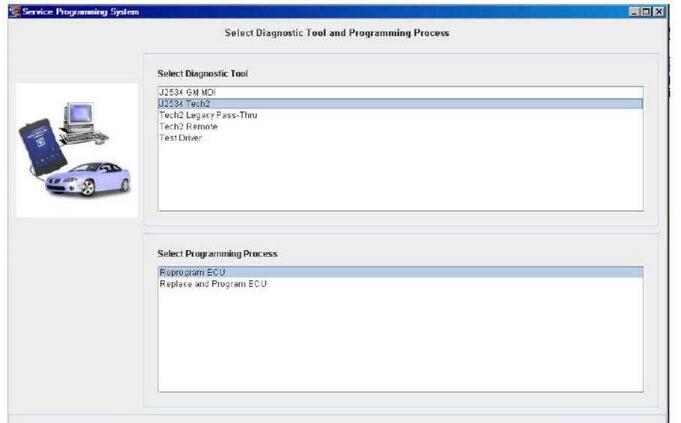
Here’s the demo guide on programming Toyota H chip all keys lost with X300 Pro3 step-by-step:


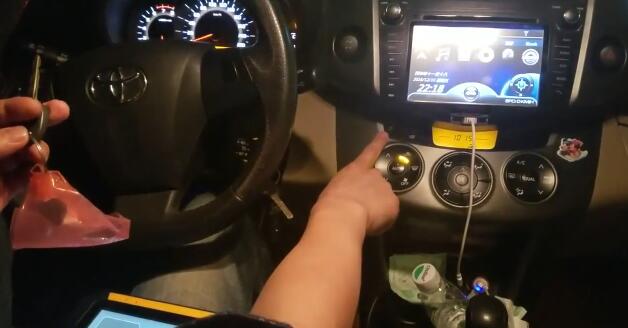
Connect OBDSTAR X300 pro3 host with vehicle via OBD socket


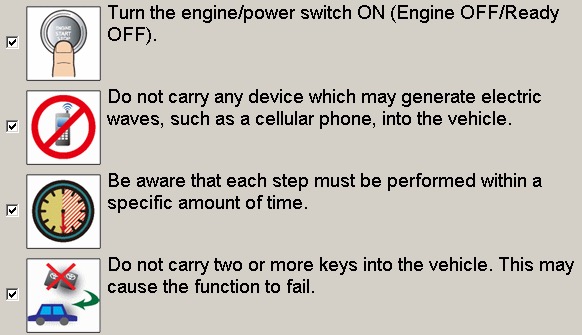
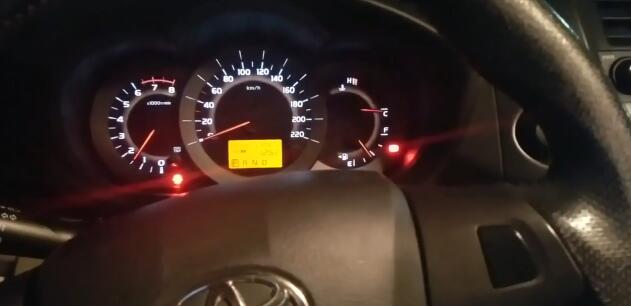
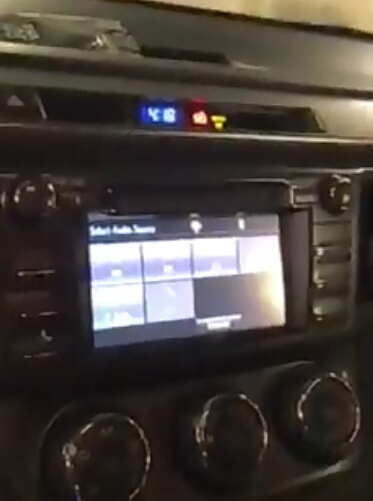
Turn ignition switch to ON position


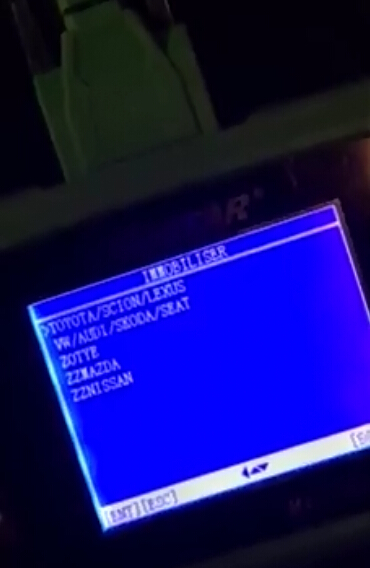
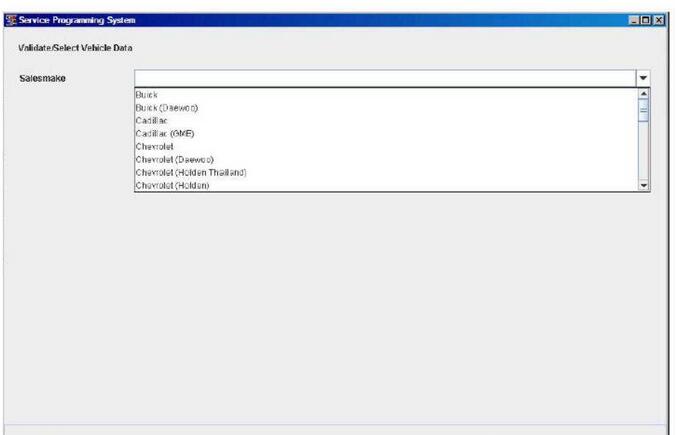
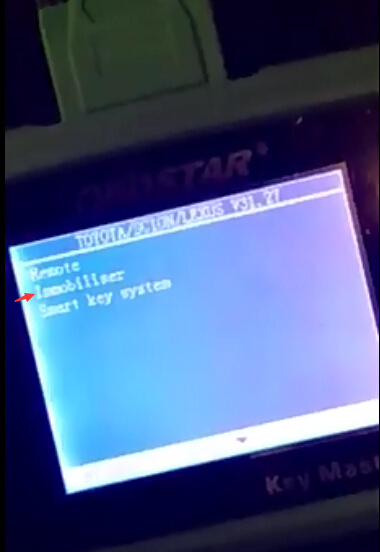
Select Toyota/Scion/Lexus->Toyota/Scion/Lexus V32.17
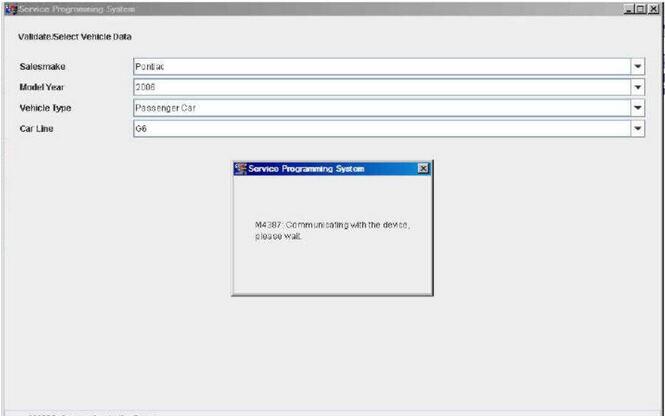

Initializing


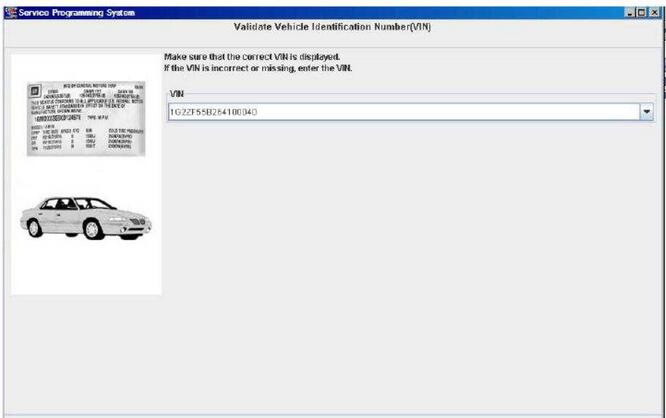
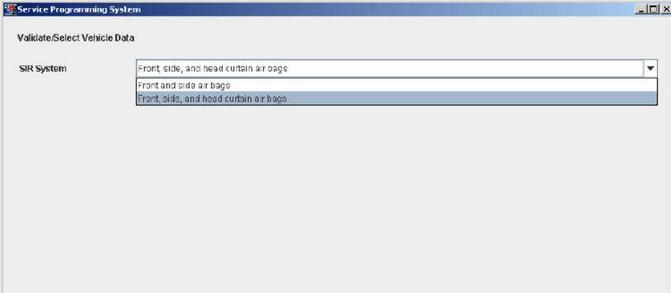
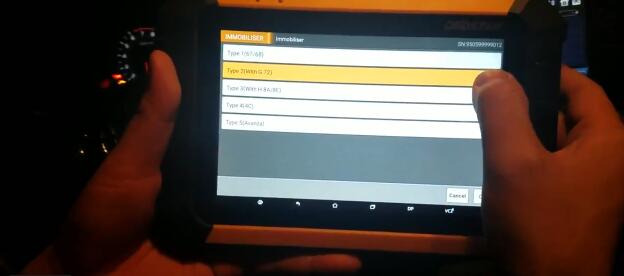
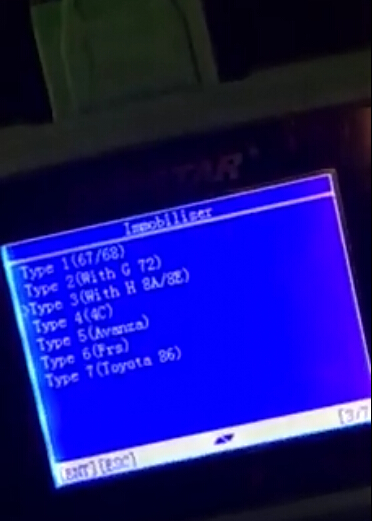
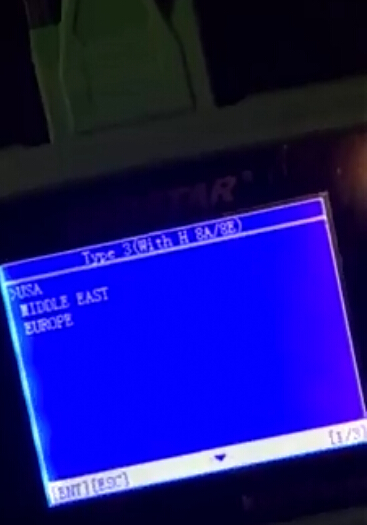
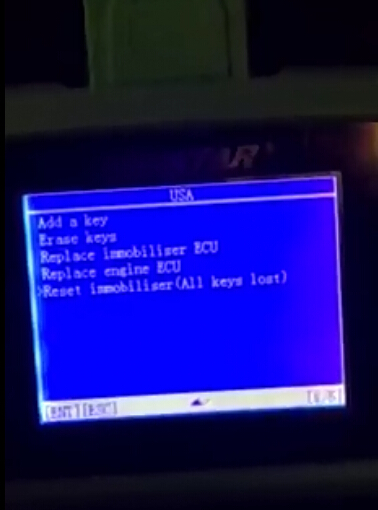
Select Immobilizer->Type 3 (With H 8A/8E)->select region USA/Middle East->Reset Immobilizer (All key lost)


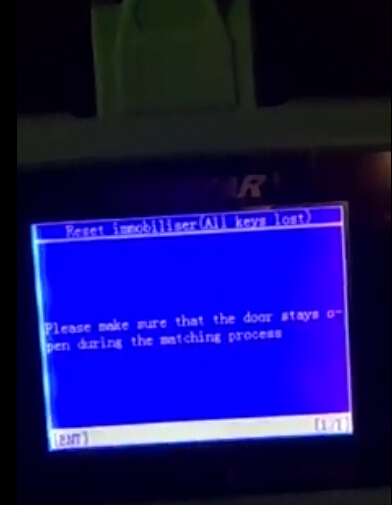
Please make sure the doors stay open during the programming procedure


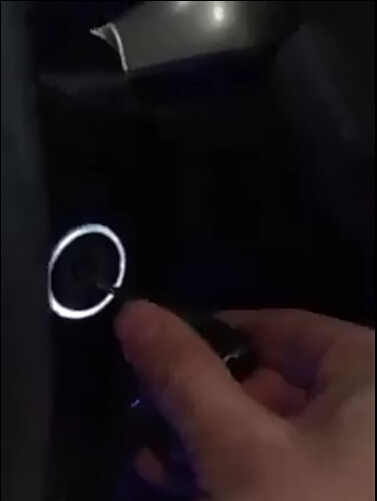
Turn ignition off and turn it on again


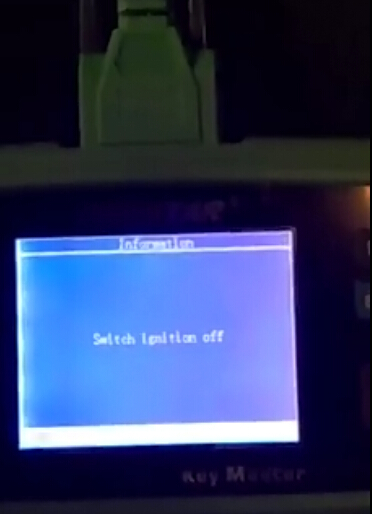
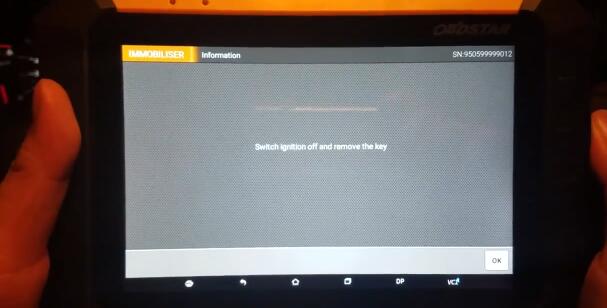
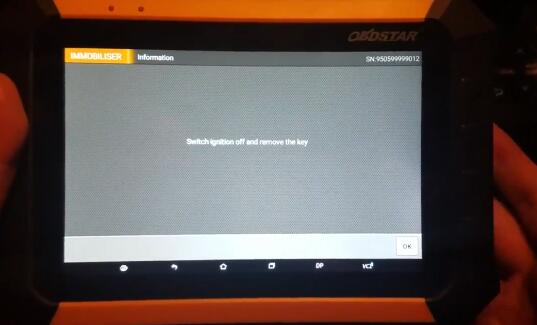
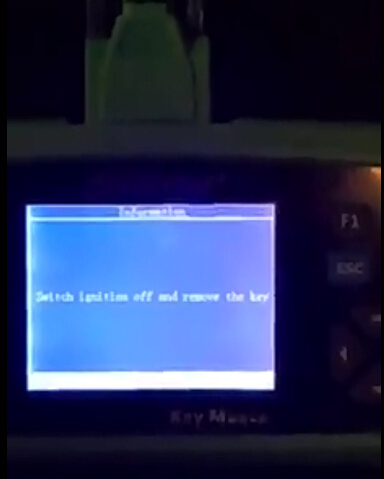
Turn ignition off and remove the key


Configuring the system…
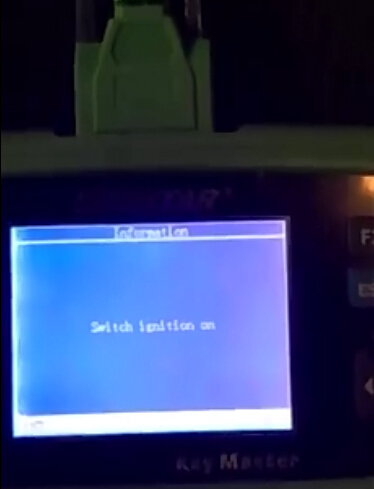

Switch ignition on


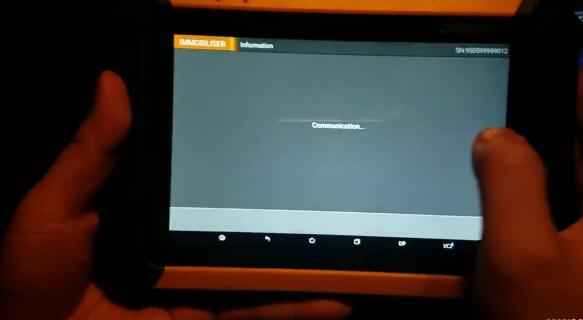
program key in progress


Turn ignition off and remove key


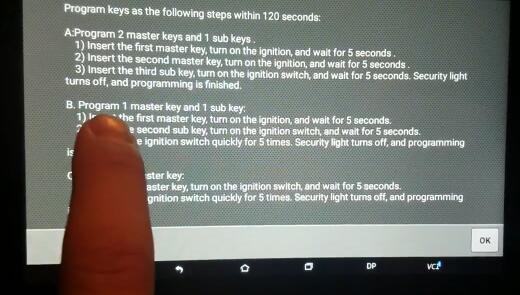
Program keys as the following steps:


Program 2 master keys and 1 sub keys
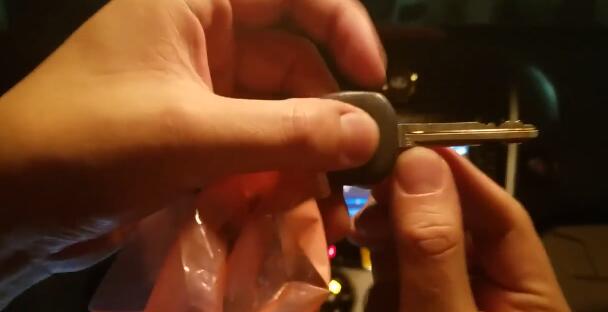
1)Insert the first master key, turn on the ignition and wait for 5 seconds
2)Insert the second master key, turn ignition on and wait for 5 seconds


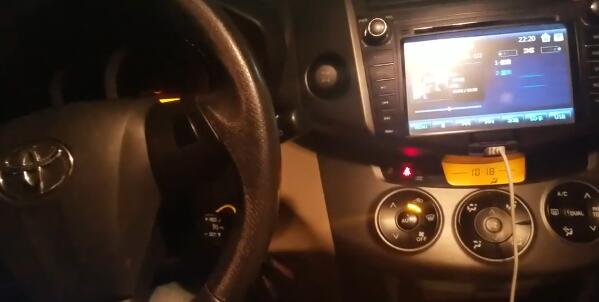
Program H chip key success


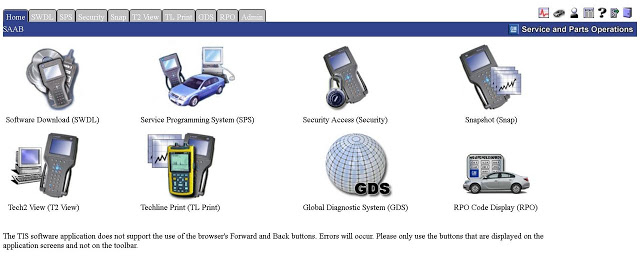
3. Vxdiag Vcx Nano Techstream do Toyota H chip All Keys Lost


Toyota H chip all keys lost with Toyota Techstream, how to do? Here is the step-by-step instruction for you. Wish it helps.


First you should buy a Toyota OEM Standard Transponder Key : H Chip (Non-Valet) / 89785-0D 170 / TOY 44H. Because it is frequent that non original Toyota H key sold on Ebay will not work.


Then the step to follow to pragram (Non-Valet) / 89785-0D 170 / TOY 44H key on 2014+ Toyota.
With Vxdiag vcx nano for Toyota running Techstream V12.00.127, you need disassemble the immo box for some models


Disassemble the immo box


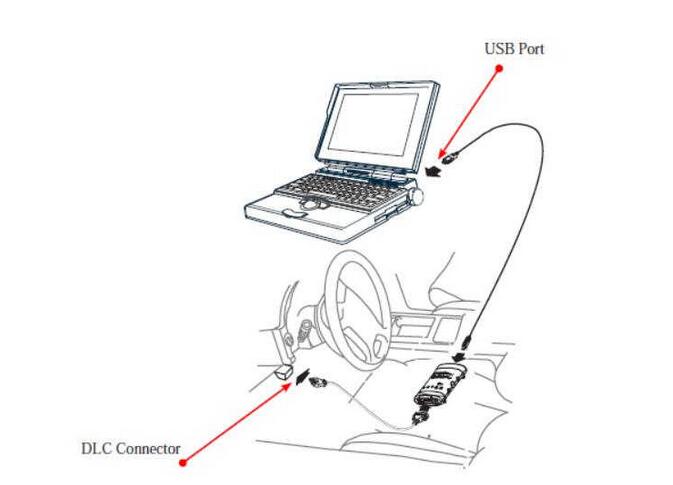
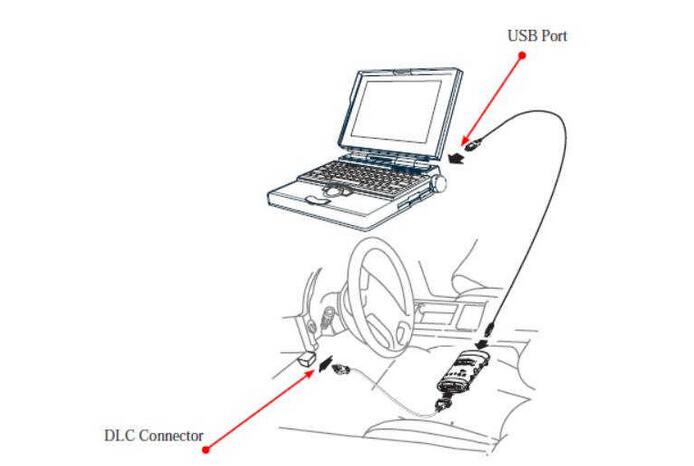
Plug the vxdiag vcx nano Toyota scanner into the OBD2 socket and connect the other end with laptop via USB port


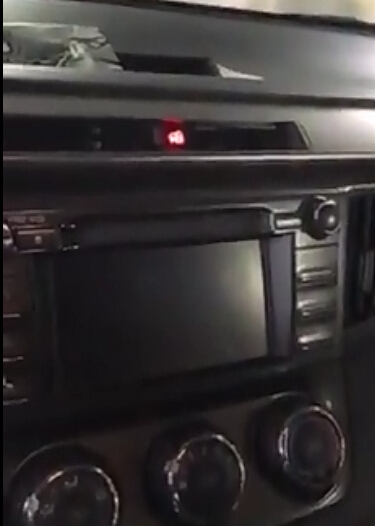
Inserted the master key and turned the ignition to ON.


Click on “Connect to Vehicle”


Connection….


select 2WD or 4WD, 4WD of course.


run a Health Check and the Techstream software was well communicated with all the ECMs for various systems.


started by programming the remote keyless door lock functions


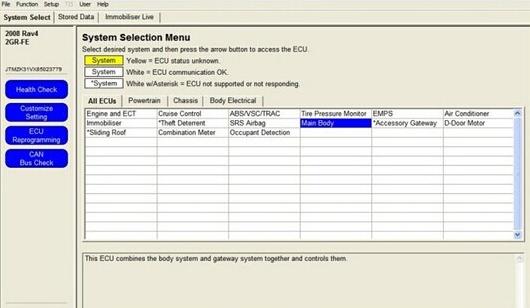
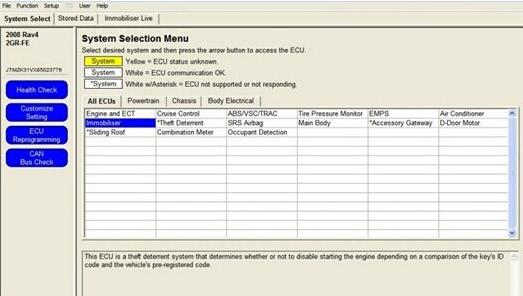
chose “Main Body” in “System Selection Menu”


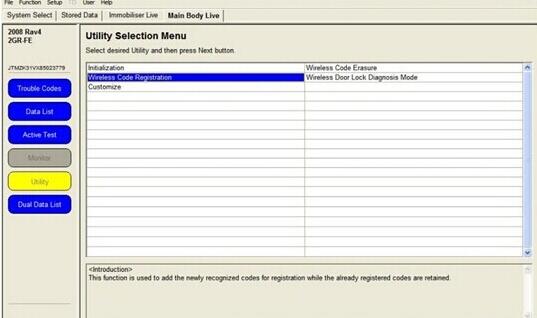
select “Utility” and “Wireless Code Registration.”


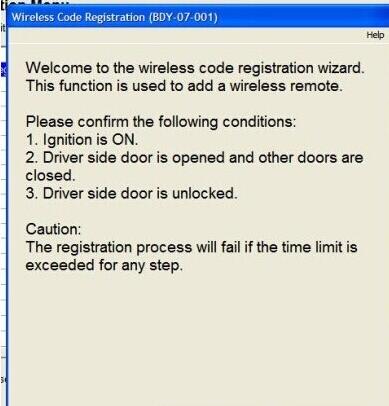
Follow the “Wireless Code Registration Wizard” popped up windows prompts:


key programming is complete (took 2 minutes).


Click on “Next” to program another key or “Exit” if finished.


Now start programming the immobiliser chip so the key would actually start the engine.


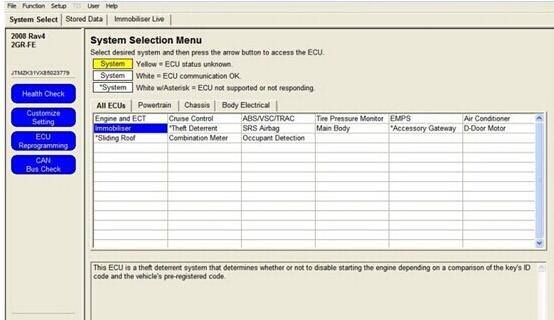
chose “Immobiliser” in “System Selection Menu”


Select “Immobiliser Live” tab appeared


click on “Utility” and “Key Registration”


Another wizard popped up…turn the ignition off, then back on and next. Then it asked me to turn it back off, remove the master key, insert the new key and next.


The security light started flashing, as a timer on the screen counted down from about 90 seconds while the ECU learned the new key code. Once the counter got down to zero, it said “Programming Complete” and showed a “Next” and “Exit” button as before. Then tested the key, started the engine, locked/unlocked the doors and it all worked perfectly.


4. SuperOBD SKP-900 Key Programmer Toyota All Keys Lost


5. How to Program Toyota/Lexus Smart Key and Ordinary Key with Lonsdor K518ISE?
Here are the tips to program smart key and ordinary key on Toyota/Lexus with Lonsdor K518ISE key programmer:


1).Smart Key (not including refitted vehicles):
For vehicles launched before 2007, dismantle smart box and write a key that can start the vehicle.
For vehicles launched after 2007, need an original key/an old key to add a new key. If all keys are lost, try to backup EEPROM in the menu first. Need to dismantle smart box and read Chip 93C86 data with a programmer if you fail to backup EEPROM data via OBD. Not support data of other chips except 93C86.


2).Ordinary Key:
For Chip 8A/H (for example Ralink), need a master key to add a new key. Need to change an immo box if all keys are lost.
For Chip 4D/67/68, program in the menu via OBD.
For Chip 4C, need to dismantle and write a key that can start the car.
For Chip G, need a master key to add a new key. Need to reset the immo box if all keys are lost.


6. Can OBDSTAR X300 Pro 4 do Toyota H Chip All Keys Lost ? The answer is YES. But they can do only Middle East and North American Toyota with H chip AKL.


https://www.obd2tool.com/blog/2020/02/01/toyota-h-chip-all-keys-lost-solution/


How to Program a Spare Smart Key Remote for Any Lexus

2020-02-22 17:05:19 | 日記


When I bought my used 2007 Lexus IS350, it only had one Smart Key fob. I decided not to take any chances and right away programmed a spare key for the car. This procedure will also work for any other Lexus model equipped with Smart Key fob. Let me show you how I did it.


To program additional Smart Key on any Lexus with Smart Key fob you will need a Windows PC computer, TechStream software, and OBD2 to USB cable that supports VIM communication protocol. This will allow connecting to the car ECU and programming new Smart Keys or erasing lost or stolen keys.


Required tools and parts:


* Windows-based laptop or tablet. You can also use a desktop computer, but since we are going to be connecting it to your car, it may not be the most practical solution. The computer can be running on Windows XP, 7, 8, or 10 operating system with 32 or 64-bit configuration. It must have one available USB port.
* USB to OBD2 cable that supports VIM communication protocol.
* Toyota TIS Techstream software. The software may come included with the cable or else you can purchase it at the official Toyota TechInfo website. Note: you will need a 64-bit version of the software if you have Windows 8 or 10, or if you have a 64-bit version of Windows XP or 7. Follow the instructions provided with the software to install it on your computer.
* Existing Working Smart Key. You will need to have at least one working Smart Key for your car, otherwise, you won’t be able to use this method to add additional keys. Obviously, this is done for security reasons, so no one could just get into your car, program new key, and steal the car. If you lost all of your keys, your only option is to go to the Lexus dealer or to your local authorized LockSmith.
* Blank Unregistered Smart Key. You can buy it from your local Lexus dealer or LockSmith, but I found the best prices to be online. Here is where I bought my blank Lexus Smart Key from (this is an eBay affiliate link). Also, it is possible to program a used Smart Key, but it has to be unlocked first. So if you are buying a cheaper used key, make sure it’s been unlocked first or else there are some places online that can unlock it for a fee.


Compatibility


I will be showing this programming technique on the example of Lexus IS250 0r IS350, but these instructions will also work on many other Lexus models including CT200h, ES250, ES300, ES330, ES350, GS F, GS200t, GS300, GS350, GS400, GS430, GS450h, GS460, GX460, GX470, HS250h, IS F, IS200t, IS250c, IS300, IS350c, LFA, LS400, LS430, LS460, LS600h, LX450, LX470, LX570, NX200t, NX300h, RC F, RC200t, RC300, RC350, RX300, RX330, RX350, RX400h, RX450h, SC300, SC400, or SC430.


While this process worked for me, it is not guaranteed to work on other vehicles. Please read full legal disclosure notice here.


Buying Blank Replacement SmartKey


When buying a new blank Smart Key remote, you need to make sure that it is compatible with your specific car. I’ve noticed that same exact year and model of Lexus IS can use different proximity transmitters. In order to find the correct Smart Key, you will need to look for three different part numbers on your existing key fob.


Lexus IS 250 350 blank virgin unregistered Smart Key fob proximity transmitter receiver part number on logic board and FCC IC number HYQ14AAB 1551A-14AAB on the key fob case


First two numbers can be found on the back of the key fob: FCC ID and IC number. In my case, those are HYQ14AAB and 1551A-14AAB respectively. The third number is stamped on the transmitter logic board inside the key fob. To open the key fob, take out the mechanical emergency key, insert it into the hole in the corner and pry open the case. Take out the electronic transmitter logic board. You will find the third number in the corner on the logic board. This is the most critical one. Mine was 271451-0140. All three numbers should match when buying a new Smart Key.


Do not cut the key blade yet.


Your new Smart Key fob will also come with a blank regular mechanical emergency key. That key can be used to get in the car in case your car battery dies, or if your electronic Smart Key is not working. You will need to cut that key blade at a locksmith or hardware store. I don’t recommend cutting the key blade until after you are finished with the programming and after you verified that the new electronic Smart Key works well. First, because we won’t need the mechanical key for this programming method. Second, if you cut the key and later realize it is defective or incompatible, you won’t be able to return it. Most sellers won’t accept returns if the key blade has been cut.


Delete lost or stolen Smart Keys from the ECU.


If you have a concern that one of your keys is lost or stolen and it may end up in the wrong hands, you should erase it from your car ECU before adding a new key. To do that follow the step 8B of the programming instructions below. It is better to do this before adding new Smart Key for a couple of reasons.


* First, if you decide to do this later, the erasure process will remove all of the registered key from the ECU except for the one being used for the procedure. This includes all good working keys that you may still have and they will need to be re-programmed again.
* You can simultaneously reprogram your erased keys while adding brand new keys.
* There is a limited number of Smart Keys that can be registered in the ECU at the same time. If your car had multiple previous owners, there is a small chance that there were multiple keys registered in the ECU. You won’t be able to add more keys if the maximum allowed number of keys has been already reached.


Lexus IS250 & IS350 Smart Key programming instructions.


* Connect your laptop or tablet to the OBD2 port using the cable mentioned above.
* Remove your foot from the brake pedal and press the “Engine Start” button twice to turn on the gauge cluster without starting the engine.
* Launch the TechStream TIS software.
* Click on “Connect to Vehicle”. The program should automatically detect your car model, year and the engine code. If it doesn’t, you can manually enter all that information.
* Click on “Option” drop-down arrow and select the option that applies to your particular car: with “Radar Cruise” or “Others”.
* Select “Smart Access” system on the main menu.
* Click on the “Utility” button on the left side pane.
* Select “Smart Code Registration” option.
* STEP 8B:
* If you would like to erase your lost or stolen Smart Keys from the ECU, select “Smart Code Erasure” option instead. Follow the on-screen instructions to erase all Smart Keys from the ECU except for the one being used for the erasure procedure.


* Read the introductions on the next page and check off each of the prerequisites. Click on “Next” when finished.
* Lexus IS 250 350 blank virgin unregistered Smart Key fob how to program instructions procedure check list
* Check the number of available spaces for new key codes. Make sure there is at least one space available. If there are no spaces available, go back and perform key code erasure procedure first. Click on “Next”.
* Separate your keys. Place your existing registered key in the vehicle and remove the keys to be registered 1 foot (30 cm) away from the vehicle. The following steps will be time-limited and you won’t have enough time to get in and out of the car. I placed the new blank key on the roof of the car and it worked just fine. Otherwise, you can ask someone to hold it for you or place it somewhere else within arms reach from the car.
* On the next page, you will have to review the registration process by clicking on “Pre-Start CHK” button.
* Press the “Start” button to begin the registration process.
* Withing 30 seconds touch the “Engine Start” button with your registered key. Make user the Lexus emblem is facing the “Start Engine” button. You should hear one beep.
* Within 30 seconds remove the registered key from your car (put it on the roof). Place the key to be registered in the car, and touch the “Engine Start” button with that key. You should hear one beep again.
* Place the key you are trying to register on the passenger seat.
* In a few seconds, you should receive “Key code registration is complete.” message on the screen.
* Click on “Next” to register more keys or “Exit” to finish the process.
* Test your new key to make sure it can start the engine, lock/unlock all door and the trunk, and activate the alarm system.
* You are all set!


Cut the mechanical emergency key blade.


After you verified that your newly added Smart Key works well, you will need to take it to your local hardware store or locksmith to duplicate the key blade pattern. It is a little pricey for Lexus keys because it requires “laser cutting”. Expect to pay around $25 per key. Some dealers can also do that for you too but make sure you call them first. Check if they can do that and how much will it cost. I’ve heard some of them would do it for free as a courtesy, while others don’t even have key cutting equipment at all.


I also found that hardware stores are usually the best place to go to. Very often they charge much less than a locksmith since key cutting is not their main business. Some stores may refuse to cut the key for you because you didn’t buy it from them and thus they cannot “guarantee that it will work”. You can either try another store or ask to speak to the manager and explain that you will take full responsibility in case the key blade doesn’t fit. Which never happens btw, they just really want you to buy their keys…
Troubleshooting Tips.


If you weren’t able to program your Lexus Smart Key, visit my Troubleshooting Tips page here, where I’ll try to answer the most frequently asked questions. I will try to update this list if I receive new questions or information. If you don’t find your answer, feel free to ask it in the comments area below. I or other readers may know about your problem to help you with your question. Likewise, if you see others asking questions, feel free to chime in if you feel like you know the right answer. Let’s help each other here by sharing our knowledge and experience.


Program add smartkey LEXUS ES350 2007 by OBDSTAR KEY MASTER DP PLUS


https://www.obd2tool.com/blog/2020/01/30/how-to-program-a-spare-smart-key-remote-for-any-lexus/


MDI TIS2web Pass-Thru Programming Guide

2020-02-02 10:16:26 | 日記

Pass-thru programming requires that the GM MDI remain connected to the terminal and to the vehicle throughout the programming process. The vehicle must be in close proximity to the terminal while using pass-thru programming.Here car-auto-repair.com share the guide on how to use MDI TIS2web to perform Pass-Thru Programming.


Note:TIS 2 Web only supports Pass-Thru Programming with the MDI.


Pass-Thru Programming Procedure


1.Launch TIS 2 Web.


2.From the TIS 2 Web main screen


MDI-TIS2web-Pass-Thru-Programming-Guide-1


Select the Service Programming System icon.


3.Connect MDI to vehicle


MDI-TIS2web-Pass-Thru-Programming-Guide-2


And Display device (e.g. PDA, PC screen)


MDI-TIS2web-Pass-Thru-Programming-Guide-3


Power On MDI using ON/OFF button.


MDI-TIS2web-Pass-Thru-Programming-Guide-4
Key on, battery fully charged.


Select “Start SPS”.


MDI-TIS2web-Pass-Thru-Programming-Guide-5


SPS software version will appear on the screen.
MDI-TIS2web-Pass-Thru-Programming-Guide-6


If hardware screen does not appear, check software connections. This process could take some time depending upon you internet connection.


Select Diagnostic Tool J2534 GM MDI.


MDI-TIS2web-Pass-Thru-Programming-Guide-7
Select Programming Process.


MDI-TIS2web-Pass-Thru-Programming-Guide-8


4.Select “Next” to “Sales Make” screen.
MDI-TIS2web-Pass-Thru-Programming-Guide-9
Complete all terminal directed data until “Next” is highlighted (vehicle data will vary). Select “Next.” You may or may not get a pop-up screen.
MDI-TIS2web-Pass-Thru-Programming-Guide-10
Make sure correct VIN is displayed. If VIN is incorrect or missing enter the correct VIN .
MDI-TIS2web-Pass-Thru-Programming-Guide-11
Note:In order to reduce the potential for signal loss. The MDI should be configured for the most stable communication option at your location. You can choose from USB, Ethernet, or Wireless Ethernet.


5.At the “Supported Controllers” screen:
MDI-TIS2web-Pass-Thru-Programming-Guide-12
Select the appropriate control module under “Select Controller,” e.g. PCM / VCM Control Module etc.
Select the appropriate programming type (Normal, VCI).
MDI-TIS2web-Pass-Thru-Programming-Guide-13
Select Next. For VCI you will need to contact your local Customer Support Center


IMPORTANT


When selecting the vehicle configuration index (VCI) programming type, a valid VCI number for the vehicle must be entered. This number may be obtained from the Techline Customer Support Center.


The correct tire size and axle ratio must be highlighted and a valid VCI number entered if you select Reconfigure for your programming type.


Select Cancel if you receive a message stating that the calibration selected is already the current calibration in the control module and reprogramming with the same download is not recommended.


6.During communication a “validate /select vehicle data” screen will appear.
MDI-TIS2web-Pass-Thru-Programming-Guide-14
You may or may not get a popup screen.
MDI-TIS2web-Pass-Thru-Programming-Guide-15
7.At the Calibration Selection screen:


Select the appropriate calibration(s).
MDI-TIS2web-Pass-Thru-Programming-Guide-16
Make sure all folder tabs have a green check mark.


Select Next.


8.At the Summary screen:
MDI-TIS2web-Pass-Thru-Programming-Guide-17
Verify current calibration(s) with selected calibration(s).


Select Next.


At the Summary Screen, current calibration is displayed along with the new calibrations available for the selected vehicle. Diagnostic enhancements are listed for various DTC’s. Multiple screens may be available. Calibration data may be printed from these screens.


The Transfer Data screen appears as reprogramming begins, finishing when the percentage bar reaches 100 percent. Time may vary depending upon calibration.
MDI-TIS2web-Pass-Thru-Programming-Guide-18
Estimated remaining programming time will appear on the screen.


IMPORTANT


Some vehicles will require that Idle Learn, TP Learn, Theft Deterrent Relearn, or Crankshaft Variation Learn procedures be performed after programming. Consult the appropriate service information for these procedures.


9.The Program Controller “Programming Complete” screen appears.
MDI-TIS2web-Pass-Thru-Programming-Guide-19
10.Select “clear DTC’s” to erase history data. The program will return to the TIS 2 Web main screen. Be sure to verify successful reprogramming.


A warranty claim code will appear if appear if applicable.


A calibration module replacement must be changed on the vehicle for the claim code to appear. These may be “Post Programming” and or controller specific instructions after programming is completed.


At the summary screen, current calibration is displayed along with the new calibrations available for the selected vehicle. Diagnostic enhancements are listed for various DTC’s. Multiple screens may be available. Calibration data may be printed from these screens.


11.Turn off the MDI by pressing the ON/OFF button. Select Cancel.


MDI-TIS2web-Pass-Thru-Programming-Guide-20


12.Disconnect the MDI from the vehicle for disconnect.
MDI-TIS2web-Pass-Thru-Programming-Guide-21


Verifying Reprogramming


After any kind of control module programming, verify that programming was successful:


Turn the ignition off, wait at least 30 seconds, then start the vehicle to confirm that reprogramming was successful. If the vehicle does not repeat the SPS procedure.


How to Program an Electronic Control Module (ECM) with GM SPS

2020-02-02 10:11:13 | 日記


How-to-Program-an-Electronic-Control-Module-(ECM)-with-GM-SPS

The Service Programming System (SPS) is a PC application that updates (programs or reprograms) the flash calibration files that are stored in a vehicle’s ECM. To do this, the application reads VIN information from the vehicle, extracts the correct update data from the SPS application’s data files, then updates the vehicle reprogrammable memory with the data.


How-to-Program-an-Electronic-Control-Module-(ECM)-with-GM-SPS


Electronic Control Module (ECM) Programming with GM SPS


1.Turn the vehicle ignition to the ON position (do not start the engine).


2.From the Windows desktop, double-click the TIS 2000 icon. This displays the TIS 2000 – Application Selection window.


3.Click the Service Programming System icon to start the SPS application. This displays the SPS System’s Select Diagnostic Tool and Programming Process window.


4.Select the following:


a) In the Select Diagnostic Tool area, select Pass-Thru.


Note: The Information Only/PROM Data option displays PROM or calibration data for a vehicle.


b) In the Select Programming Process area, select one of the following:


Select Reprogram ECU to reprogram (reflash or calibrate) the selected ECM (ECU).
Select Replace and Program ECU to program a new ECM.


c) In the Select ECU Location area, select Vehicle.


Note: The OBPA option applies only if an off-board programming adapter (J41207-C) is available for the Tech 2 Flash.


d) Click the Next button to continue. This displays the Determine Vehicle window.


5. Do the following on this window:


a) Skip the VIN area. It is not necessary to enter a VIN.


b) In the Vehicle Data area, for each item, click the down arrows (at the right side of each line) and select the correct options for the vehicle salesmake, model year, vehicle type, car line, and engine type(s).


c) When finished, click the Next button. This displays a connection instructions


6. Do the following:


a) Follow the instructions on the window. Double-check the following:


For the Tech 2 Flash, press the power key to turn on the Tech 2 Flash and then make sure it displays the version number screen.
For the Next Generation scan tool, press the power key to turn on the scan tool and then select GM SPS Reprogramming. Set the baud rate for the PC by selecting CONFIGURATION > I/O management > Pass-thru > Properties > Baud >38400, 57600, or 19200 (whichever works best) >OK. Use Exit to return to the Service Programming screen. Then make sure the scan tool displays the GM Reflash Pass-Thru Mode screen.


CAUTION: Do not change the baud rate after starting the programming process.


Make sure the vehicle key is in the run position and the battery is fully charged. It is permissible to use
a) booster pack, but not a battery charger!
b) Click the Next button to continue.


7. An SPS warning message may appear to warn that you must input the VIN number. If so, click the OK button to continue. This displays the Validate VIN window.


8. Verify the VIN that is automatically read from the vehicle (compare it to the vehicle VIN plate) or manually enter the VIN. Then click the Next button to continue. This displays the Supported Controllers window.


Note: If an option window appears, enter all of the information required and then click the Next button to continue. Also, if you need to enter a VCI number, a message appears to tell you so.


9. On the Supported Controllers window, do the following:


a) In the Select Controller area, select the controller to program.


b In the Select Programming Type area, follow these steps:


First, select Normal to update an existing calibration or to program a new controller.
If a VCI number is required, contact your dealer. Once the VCI number is obtained, select VCI (Vehicle Configuration Index) under Select Programming Type to update an existing calibration or to program a new controller on new vehicles for which the VIN code is not yet in the SPS database. Also select VCI under Select Programming Type to program (calibrate) a vehicle for a different transmission or to calibrate the speedometer for changed tire size or axle ratio.


Note: The Reconfigure selection is not supported for all vehicles, it is not recommended to choose this selection.


c) Click the Next button to continue. Depending on which controller and programming type you entered, this displays either the Calibration Selection window or a a dialog box requesting more information (reconfigure information, a part number, or the VCI number).


10. If you selected a controller that requires additional information, an information request dialog box appears.If this dialog box appears, do the following.(Otherwise, skip this step.)


a) Obtain the required information using the Tech 2 or Next Generation scan tool as follows:


If you are using the Tech 2 scan tool for the passthru procedure, exit the procedure and use the scan tool to scan the vehicle and request the module (controller) information.


If you are using the Next Generation scan tool for the pass-thru procedure and have the GM Reflash Pass-Thru Mode screen displayed, press the Enter key to display the list of controllers. Select the controller from the list and press the Enter key to display the module (controller) information.Note the required information and press the Enter key again to return to the Pass-Thru Mode.
b) Select the correct value from the drop-down list and then click the OK button to continue.


Note: If the correct value is not in the list, do not program the controller; exit this procedure.


11. If you selected VCI as the programming type,a dialog box appears for entering the VCI number. If this dialog box appears, do the following.(Otherwise, skip this step.)


a) Enter the VCI number into the VCI box.


Note: If there is a ZERO (0) in the box, delete it before entering the VCI number.


b) Click the OK button.


12. View the calibration file history descriptions for the controller being programmed; for example, Powertrain (PCM) or Vehicle Control Module (VCM). Select the file(s) for updating the controller as follows:


a) Use the following information to determine which file(s) to select:


Vehicles with PCMs display as a single “tab” that summarizes all calibration files for the vehicle.
Vehicles with VCMs display as multiple “tabs” – one for each distinct calibration file contained in the VCM. A selection must be made under each tab to successfully select the programming files.


The window lists valid calibrations for the VIN entered. Selecting the right calibration is critical. Check the history of each calibration.The history lists an explanation of the calibration file, telling what the calibration is for and whether it supersedes any other calibrations. Related bulletin numbers are sometimes listed along with the calibration files. Read the latest bulletins to stay up to date on why certain calibrations have been released. Based on the history and bulletins, select the appropriate calibration file.


Note: If calibrations are the same, the NAODRUI Control box appears (Figure 2.21) stating that the calibrations selected are already the current calibrations in the control module. Click OK and Back out or click Cancel on the Summary screen.


Important:


Before continuing, consult any service bulletins identified for the calibration and follow all specific steps before beginning the programming.
b) Click the appropriate box(es) to select the calibration file(s).
c) Click the Next button to continue. This displays the Summary window.


Note: If a warning message appears about the Tech 2,follow the instructions and then click the OK button


13. The Summary window displays a summary of calibration selections that are about to be programmed to the controller. Confirm the selections and click the Next button to begin the programming.


14. One or more warning message boxes may appear. If so,follow any instructions they provide and click the OK (or YES) button on each one to continue the procedure. Do this until the Transfer Data window appears