


SD Connect configuration Road24h . Setup and connection via LAN cable and Wi-Fi direct connection.
1. Configuration Road24h mode for Windows XP.
2. Configuration Road24h mode for Windows 7.
1 . SD Connect configuration Road24h mode for Windows XP.
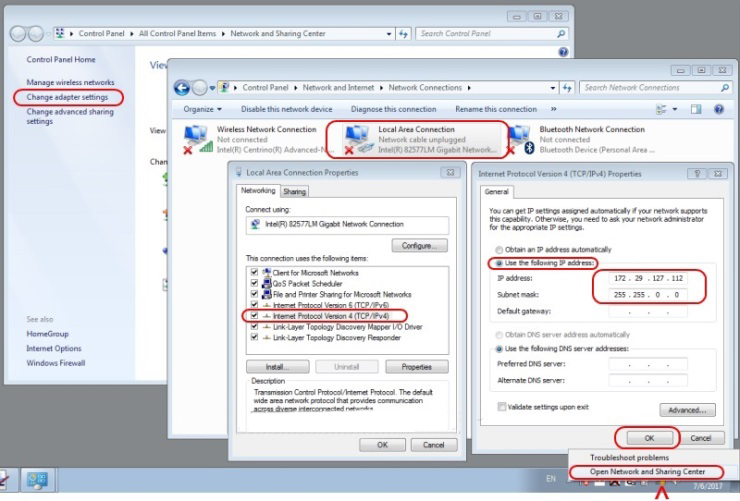
1.1. Make the configuration of the laptop for the LAN connection.
Connect the device to power supply and to the laptop by cable.
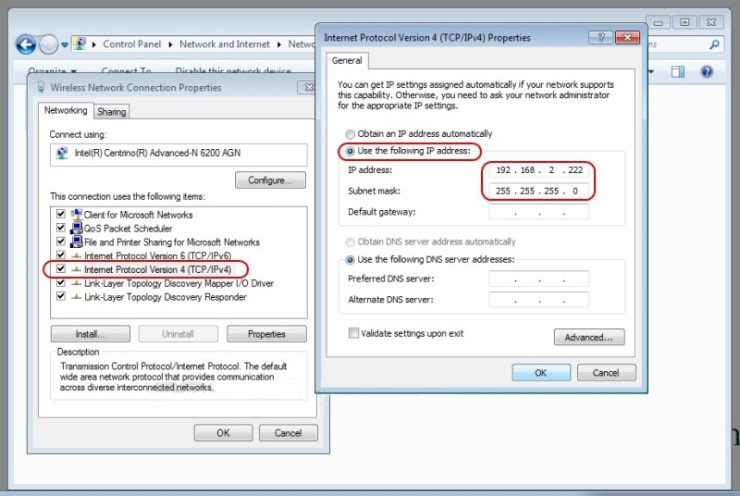
Make the LAN settings connections: network connections/local area
connection/properties/TCP/IP in accordance with the screenshot below:
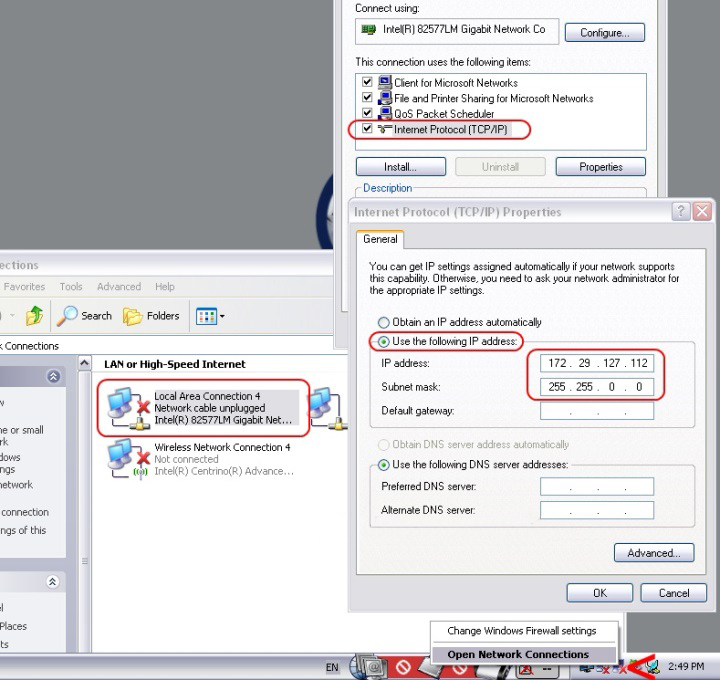
Everywhere click OK, the connection is established :

The device is ready for operation via the lan connection.
1.2. Make the configuration of the laptop for the WiFi connection.
Go to network connections/wireless network/properties/TCP/IP
Custom WiFi connection for the computer :
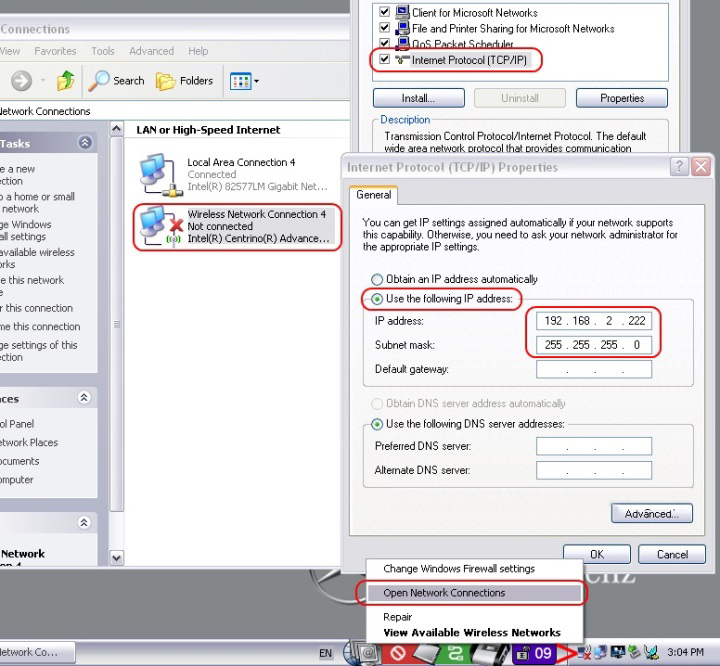
Click on all windows OK.
1.3. Create a wireless network Road24h.
Open the wireless networks list. Click “change the order of preferred
networks” in the new window create a network to connect to by default
Road24h. Enter the settings according to the screenshot:
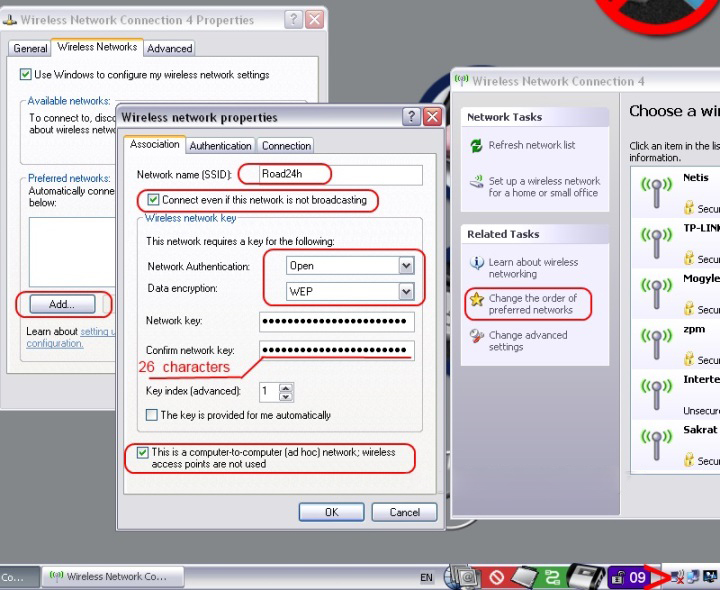
Confirm in the last window OK. See the list of preferred networks, a
network Road24h. Click properties, note the check box automatically
connect, confirm OK:
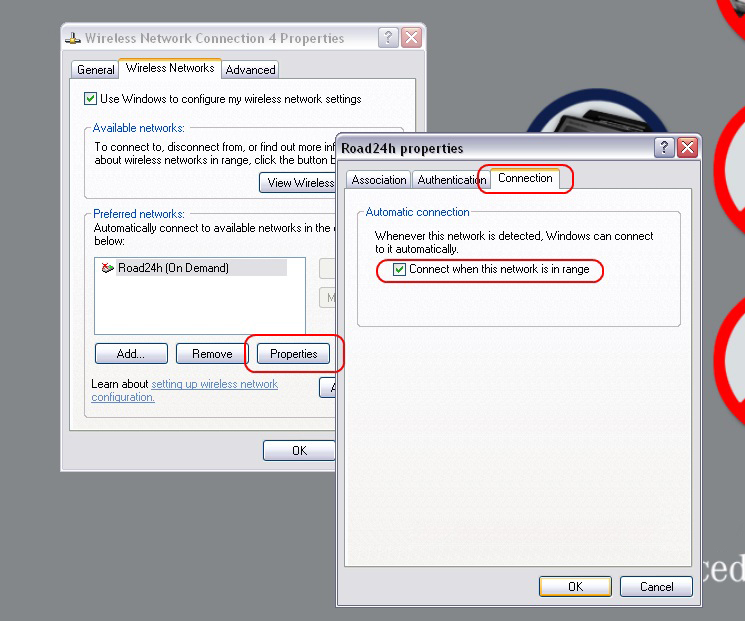
We can see that our network has received the status of
“automatically”. Click OK. Check that the created network in the
networks list:

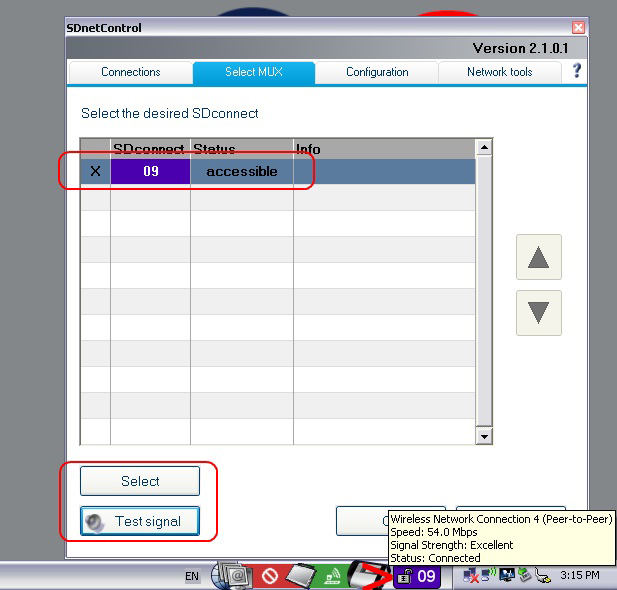
1.4. Make configuration of a multiplexer for a wireless connection Wi-Fi.
The appliance must be connected by cable and connection on a local network.
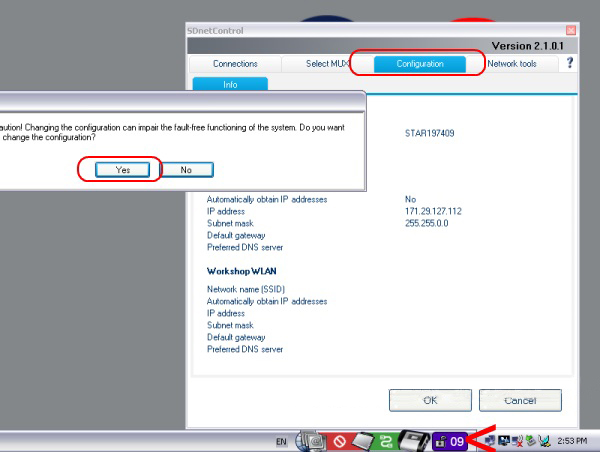
Go to SDconnectControl (lower right corner of your desktop) click in
the system tray SDNC. Click “configuration” and confirm “Yes”:
Select the tab “MUX” and “register/configure”:
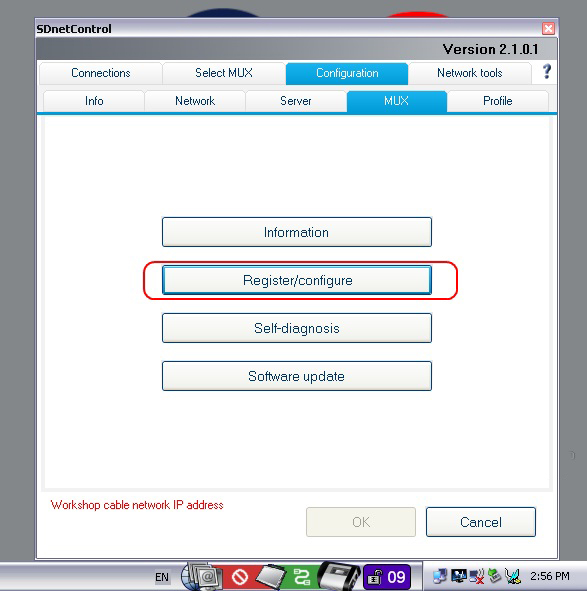
Opens the configuration window of the multiplexer.
Make WiFi network settings for multiplexer in accordance with screenshot :
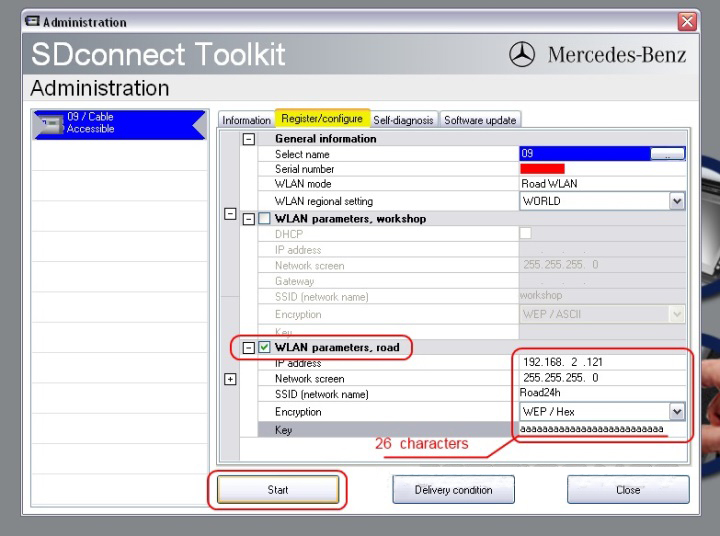
The network key is 26 characters. In this case, 26 English letters “a” in lowercase.
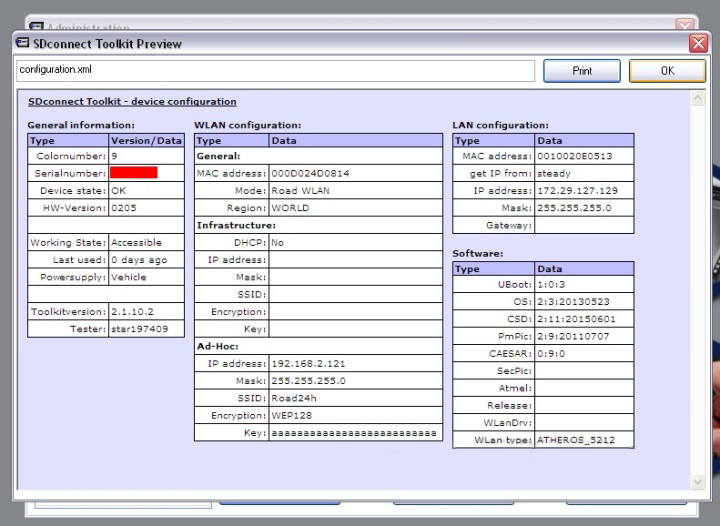
Click start and should see this result :
Disconnect the LAN cable. Now, when you turn on the multiplexer,
Wi-Fi connection will be established automatically. To make sure there
is communication between multiplexer and laptop is possible in the
selection of the multiplexer, click the “Test signal”:
2. SD Connect configuration Road24h mode for Windows 7.
2.1. Make the configuration of the laptop for the LAN connection.
The power supplied to the multiplexer and connected to the computer via LAN cable.
Go : control Panel/control Center network and sharing/Change adapter
settings/local area Connection. Enter the LAN settings of the connection
according to the picture :
Confirm all Windows with “OK”.
The connection cables are installed, which shows its icon in system tray:
2.2 Enter the settings of the wireless WiFi adapter in the computer.
Go: control Panel/control Center network and sharing/Change adapter
settings/Wireless network connection. Make settings according to the
screenshot:
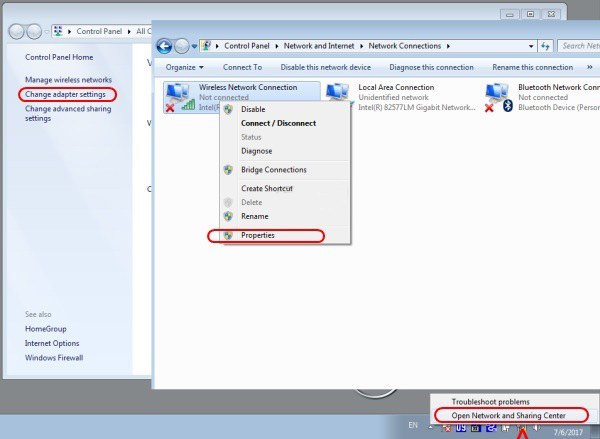
Confirm all Windows with “OK”. All the WiFi network settings entered in the computer.
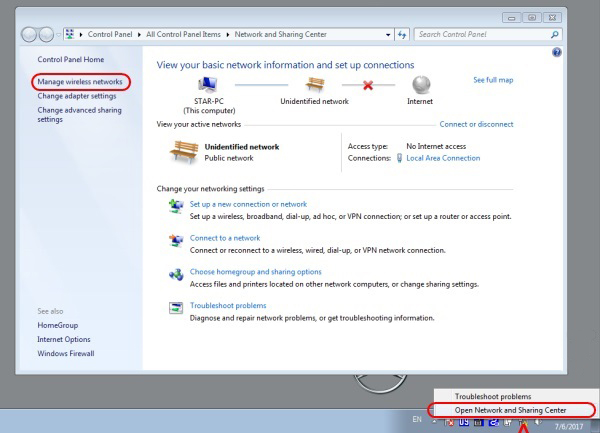
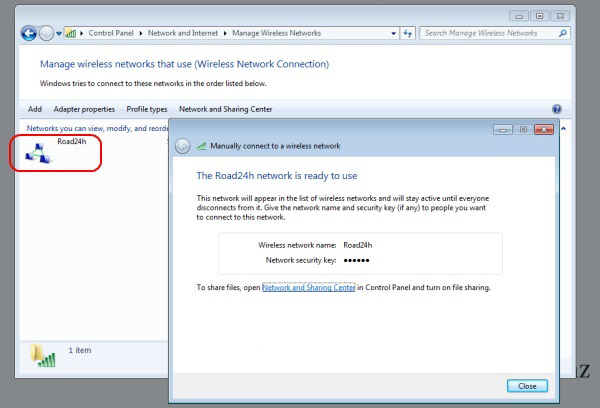
2.3. Create network “Road24h” in the computer.
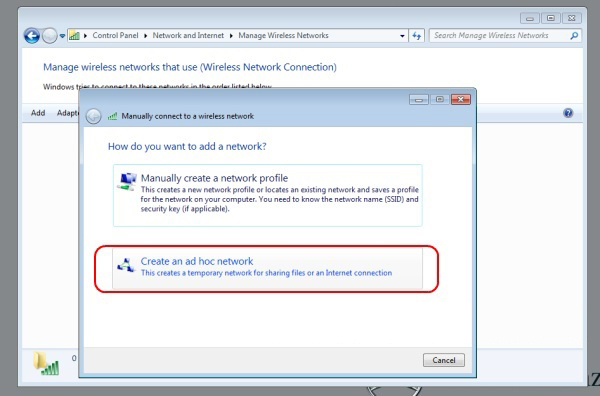
To do this, go to control Panel/control Center network and sharing/
Manage wireless networks/ Add / new connection computer — to-computer
/next. Enter the data according to the screenshot. Do not forget to put a
tick in the checkbox “Save settings for this network” :
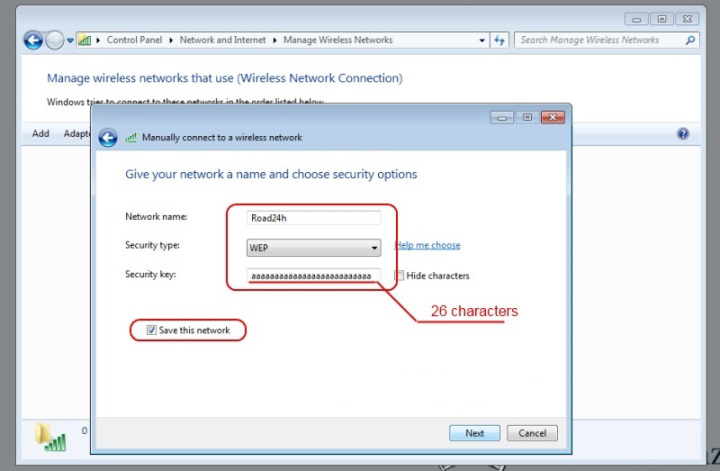
Click “next”. Network “Road24h” created :
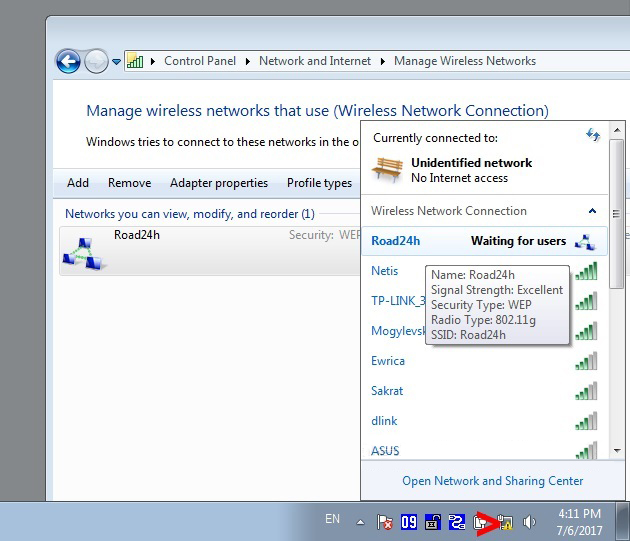
Close all Windows, check that the created network in the wireless
networks list. Our established network must have the status “Waiting for
connection” user :
2.4. Next, enter the configuration settings for the WiFi connection
in the multiplexer. Right-click in the system tray SDNC, in the context
menu, choose “Administration”. In the opened window select the tab
“Register/configure”. Enter settings according to the screenshot (the
key is arbitrary, any 26 characters, the same like for computer
settings) :
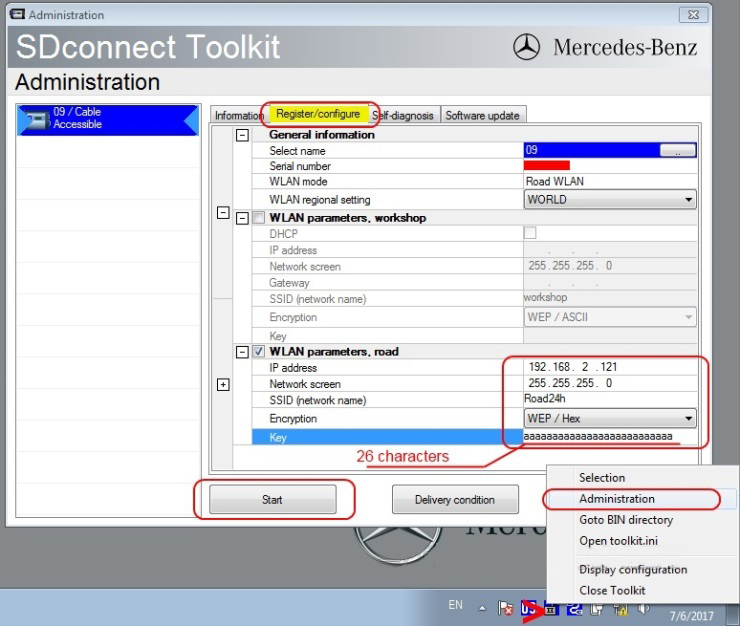
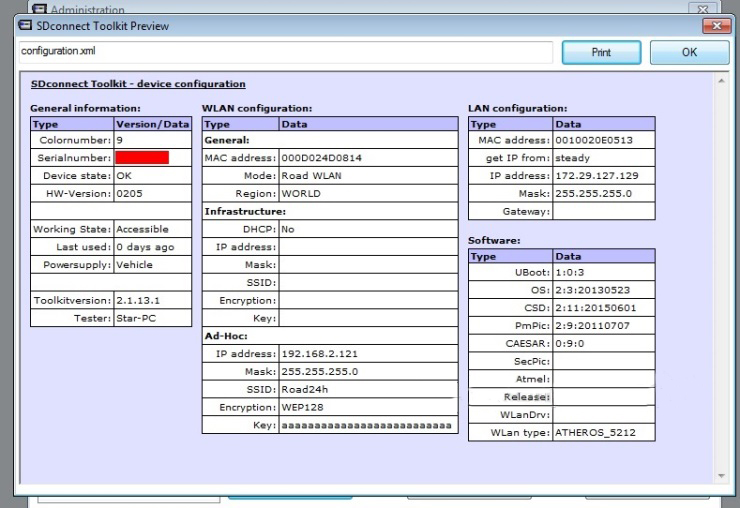
Click “Start”, the configuration is stored in the memory of the multiplexer, and as a result needs to obtain such a table :
The device is configured, close all Windows, LAN cable disconnected.
Then restart the multiplexer. During the boot process of the
multiplexer, the WiFi connection between the computer and the device
will be installed automatically. Its icon appears in the system tray
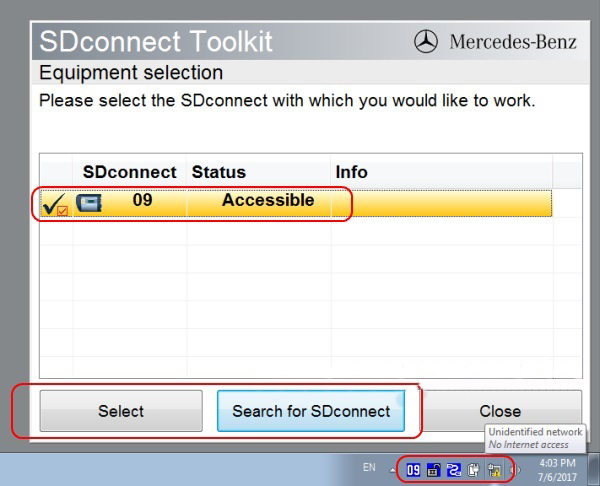
SDNC. open the selection window of the multiplexer. Right-click in the
system tray SDNC, in the context menu choose “Select”. In the opened
window select your multiplexer and confirm “Select”:
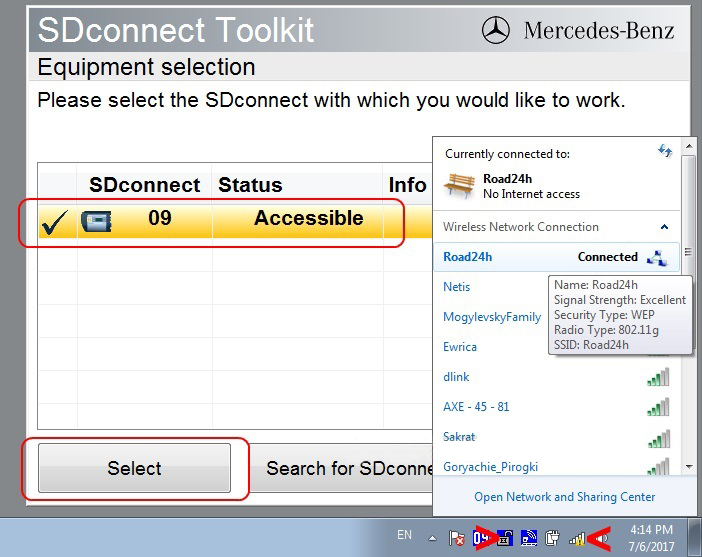
In this procedure the connection setup multiplexer SD Connect to work with Xentry OpenShell program under Windows 7 is finished.
A diagnostic system is ready for operation.
Further, the inclusion of a diagnostic system should be as follows:
Turn on the computer, the operating system boots.
Check in the list of networks network status “Road24h”. Status should be
“Waiting for connection” user, if not, click “Connect”, the network
status is changed to required.
Then turn on the multiplexer. Connection via Wi-Fi network should be installed automatically.
※コメント投稿者のブログIDはブログ作成者のみに通知されます