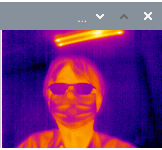
前回、サーマルカメラLepton3.5とUSB接続アダプタPureThermal 2 のプログラムを作成しましたが、同じものをlibuvcを使用して作成しました。
libuvcのインストール
最初にlibuvcの最新バージョンをインストールします。
$ git clone https://github.com/libuvc/libuvc.git $ cd libuvc $ mkdir build $ cd build $ cmake .. $ make $ sudo make install $ sudo ldconfig $ sudo apt install libopencv-dev (画像の表示に使用)
ソースコード
#include "libuvc/libuvc.h" #include#include #include #include /* This callback function runs once per frame. Use it to perform any * quick processing you need, or have it put the frame into your application's * input queue. If this function takes too long, you'll start losing frames. */ void cb(uvc_frame_t *frame, void *ptr) { uvc_frame_t *bgr; uvc_error_t ret; /* We'll convert the image from YUV/JPEG to BGR, so allocate space */ bgr = uvc_allocate_frame(frame->width * frame->height * 3); if (!bgr) { printf("unable to allocate bgr frame!"); return; } /* Do the BGR conversion */ ret = uvc_any2bgr(frame, bgr); if (ret) { uvc_perror(ret, "uvc_any2bgr"); uvc_free_frame(bgr); return; } /* Call a user function: * * my_type *my_obj = (*my_type) ptr; * my_user_function(ptr, bgr); * my_other_function(ptr, bgr->data, bgr->width, bgr->height); */ /* Call a C++ method: * * my_type *my_obj = (*my_type) ptr; * my_obj->my_func(bgr); */ /* Use opencv.highgui to display the image: */ IplImage *cvImg = cvCreateImageHeader( cvSize(bgr->width, bgr->height), IPL_DEPTH_8U, 3); cvSetData(cvImg, bgr->data, bgr->width * 3); cvNamedWindow("Test", CV_WINDOW_AUTOSIZE); cvShowImage("Test", cvImg); cvWaitKey(10); cvReleaseImageHeader(&cvImg); uvc_free_frame(bgr); } int main(int argc, char **argv) { uvc_context_t *ctx; uvc_device_t *dev; uvc_device_handle_t *devh; uvc_stream_ctrl_t ctrl; uvc_error_t res; /* Initialize a UVC service context. Libuvc will set up its own libusb * context. Replace NULL with a libusb_context pointer to run libuvc * from an existing libusb context. */ res = uvc_init(&ctx, NULL); if (res < 0) { uvc_perror(res, "uvc_init"); return res; } puts("UVC initialized"); /* Locates the first attached UVC device, stores in dev */ res = uvc_find_device( ctx, &dev, 0, 0, NULL); /* filter devices: vendor_id, product_id, "serial_num" */ if (res < 0) { uvc_perror(res, "uvc_find_device"); /* no devices found */ } else { puts("Device found"); /* Try to open the device: requires exclusive access */ res = uvc_open(dev, &devh); if (res < 0) { uvc_perror(res, "uvc_open"); /* unable to open device */ } else { puts("Device opened"); /* Print out a message containing all the information that libuvc * knows about the device */ uvc_print_diag(devh, stderr); /* Try to negotiate a 640x480 30 fps YUYV stream profile */ res = uvc_get_stream_ctrl_format_size( devh, &ctrl, /* result stored in ctrl */ UVC_FRAME_FORMAT_BGR, /* YUV 422, aka YUV 4:2:2. try _COMPRESSED */ 160, 120, 9 /* width, height, fps */ ); //res = 0; /* Print out the result */ uvc_print_stream_ctrl(&ctrl, stderr); if (res < 0) { uvc_perror(res, "get_mode"); /* device doesn't provide a matching stream */ } else { /* Start the video stream. The library will call user function cb: * cb(frame, (void*) 12345) */ res = uvc_start_streaming(devh, &ctrl, cb, (void*) 12345, 0); if (res < 0) { uvc_perror(res, "start_streaming"); /* unable to start stream */ } else { puts("Streaming..."); uvc_set_ae_mode(devh, 1); /* e.g., turn on auto exposure */ sleep(10); /* stream for 10 seconds */ /* End the stream. Blocks until last callback is serviced */ uvc_stop_streaming(devh); puts("Done streaming."); } } /* Release our handle on the device */ uvc_close(devh); puts("Device closed"); } /* Release the device descriptor */ uvc_unref_device(dev); } /* Close the UVC context. This closes and cleans up any existing device handles, * and it closes the libusb context if one was not provided. */ uvc_exit(ctx); puts("UVC exited"); return 0; }
コンパイル
$ gcc -o uvctest uvctest.c `pkg-config --cflags opencv` `pkg-config --libs opencv` -luvc -O4
参考
サーマルカメラLepton3.5とUSB接続アダプタPureThermal 2 を手に入れたのでRaspberry Pi4でC言語を使い温度を読み出すプログラムを作成しました。
PureThermal UVC Capture Examplesを参考に作成しました。グラフィックにはEGGX / ProCALLを使用しています。
#include <stdio.h>
#include <stdlib.h>
#include <string.h>
#include <fcntl.h>
#include <errno.h>
#include <sys/ioctl.h>
#include <sys/types.h>
#include <sys/time.h>
#include <sys/mman.h>
#include <linux/videodev2.h>
#include <libv4l2.h>
#include <eggx.h>
#define CLEAR(x) memset(&(x), 0, sizeof(x))
struct buffer {
void *start;
size_t length;
};
static void xioctl(int fh, int request, void *arg)
{
int r;
do {
r = v4l2_ioctl(fh, request, arg);
} while (r == -1 && ((errno == EINTR) || (errno == EAGAIN)));
if (r == -1) {
fprintf(stderr, "error %d, %s\n", errno, strerror(errno));
exit(EXIT_FAILURE);
}
}
double ktoc(double val,int radiometryLowGain)
{
if (radiometryLowGain) {
return (val - 2731.5) / 10.0; //Lowゲイン
} else {
return (val - 27315.0) / 100.0; //Hightゲイン デフォルト
}
}
int main(int argc, char **argv)
{
struct v4l2_format fmt;
struct v4l2_buffer buf;
struct v4l2_requestbuffers req;
enum v4l2_buf_type type;
fd_set fds;
struct timeval tv;
int r, fd = -1;
unsigned int i, n_buffers;
char *dev_name = "/dev/video0";
struct buffer *buffers;
fd = v4l2_open(dev_name, O_RDWR | O_NONBLOCK, 0);
if (fd < 0) {
perror("Cannot open device");
exit(EXIT_FAILURE);
}
CLEAR(fmt);
fmt.type = V4L2_BUF_TYPE_VIDEO_CAPTURE;
fmt.fmt.pix.width = 160;
fmt.fmt.pix.height = 120;
fmt.fmt.pix.pixelformat = V4L2_PIX_FMT_Y16;
fmt.fmt.pix.field = V4L2_FIELD_NONE;
xioctl(fd, VIDIOC_S_FMT, &fmt);
if (fmt.fmt.pix.pixelformat != V4L2_PIX_FMT_Y16) {
printf("Libv4l didn't accept this format. Can't proceed.\n");
exit(EXIT_FAILURE);
}
if ((fmt.fmt.pix.width != 160) || (fmt.fmt.pix.height != 120)) {
printf("Warning: driver is sending image at %dx%d\n",
fmt.fmt.pix.width, fmt.fmt.pix.height);
}
CLEAR(req);
req.count = 2;
req.type = V4L2_BUF_TYPE_VIDEO_CAPTURE;
req.memory = V4L2_MEMORY_MMAP;
xioctl(fd, VIDIOC_REQBUFS, &req);
buffers = calloc(req.count, sizeof(*buffers));
for (n_buffers = 0; n_buffers < req.count; ++n_buffers) {
CLEAR(buf);
buf.type = V4L2_BUF_TYPE_VIDEO_CAPTURE;
buf.memory = V4L2_MEMORY_MMAP;
buf.index = n_buffers;
xioctl(fd, VIDIOC_QUERYBUF, &buf);
buffers[n_buffers].length = buf.length;
buffers[n_buffers].start = v4l2_mmap(NULL, buf.length,
PROT_READ | PROT_WRITE, MAP_SHARED,
fd, buf.m.offset);
if (MAP_FAILED == buffers[n_buffers].start) {
perror("mmap");
exit(EXIT_FAILURE);
}
}
for (i = 0; i < n_buffers; ++i) {
CLEAR(buf);
buf.type = V4L2_BUF_TYPE_VIDEO_CAPTURE;
buf.memory = V4L2_MEMORY_MMAP;
buf.index = i;
xioctl(fd, VIDIOC_QBUF, &buf);
}
type = V4L2_BUF_TYPE_VIDEO_CAPTURE;
xioctl(fd, VIDIOC_STREAMON, &type);
int win = gopen(160,120);
layer(win,0,1);
gsetnonblock(ENABLE);
for (;;) {
do {
FD_ZERO(&fds);
FD_SET(fd, &fds);
/* Timeout. */
tv.tv_sec = 2;
tv.tv_usec = 0;
r = select(fd + 1, &fds, NULL, NULL, &tv);
} while ((r == -1 && (errno = EINTR)));
if (r == -1) {
perror("select");
return errno;
}
CLEAR(buf);
buf.type = V4L2_BUF_TYPE_VIDEO_CAPTURE;
buf.memory = V4L2_MEMORY_MMAP;
xioctl(fd, VIDIOC_DQBUF, &buf);
for(int y=0;y<120;y++) {
for(int x=0;x<160;x++) {
int r,g,b;
unsigned int temp = *((uint16_t *)(buffers[buf.index].start+(160*y+x)*2)) ;
double t = ktoc(temp,0);//温度に変換
if(t<20) t=20; // 20℃〜40℃の間のみ可視化
if(t>40) t=40;
if(makecolor(DS9_B,20,40,t,&r,&g,&b)!=0) {
fprintf(stderr,"makecolor() over flow.\n");
exit(1);
}
newrgbcolor(win,r,g,b);
pset(win,x,120-1 - y);
}
}
copylayer(win,1,0);
xioctl(fd, VIDIOC_QBUF, &buf);
if(ggetch()>0) break;
}
type = V4L2_BUF_TYPE_VIDEO_CAPTURE;
xioctl(fd, VIDIOC_STREAMOFF, &type);
for (i = 0; i < n_buffers; ++i) {
v4l2_munmap(buffers[i].start, buffers[i].length);
}
v4l2_close(fd);
gclose(win);
return 0;
}
コンパイル
$ sudo apt install libv4l-dev $ gcc -o view view.c -lv4l2 -leggx -lX11 -lm

参考
サーマルカメラLepton3.5とUSB接続アダプタPureThermal 2 を手に入れたのでRaspberry Pi4で使ってみました。この組み合わせでRaspberry Pi4からは UVC(USB Video Class) として認識されます。
ファームウェアアップデート
現時点のファームウェアではRaspberry Pi4と正しくデータのやり取りができないため、ファームウェアをアップデートする必要があります。方法は"Raspberry Pi 4 VL805ファームウェアリリース0138a1"に書かれています。
最初にファームウェアをダウンロードします。
にアクセスしてvl805-000138a1.binファイルをダウンロードします。
次に示すようにアップデートを行い再起動後に確認を行います。
$ sudo rpi-eeprom-update -u vl805-000138a1.bin
----再起動-----
$ sudo rpi-eeprom-update
BCM2711 detected
Dedicated VL805 EEPROM detected
BOOTLOADER: up-to-date
CURRENT: 2020年 4月 16日 木曜日 17:11:26 UTC (1587057086)
LATEST: 2020年 4月 16日 木曜日 17:11:26 UTC (1587057086)
FW DIR: /lib/firmware/raspberrypi/bootloader/critical
VL805: up-to-date
CURRENT: 000138a1
LATEST: 000137ad
動作確認
マニュアルにはguvcviewで画像が確認できると説明がありますが、うまく動作しません。VLCでは画像を確認できます。
プログラム
Raspberry PiのカメラをGUIで操作する2にあるプログラムで画像を表示させることができます。

参考