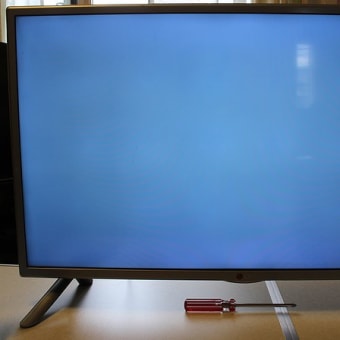
Recently, I have been watching more and more junk repair videos on Youtube. I saw a video about replacing the backlight of an LCD monitor from CCFL to LED, and when I looked into LEDs for backlights, I found that there are LEDs for various TVs as well as for general-purpose ones. I found a backlight for an LG 32-inch TV 32LB5810, which I failed to repair the other day.
↓アリエクで見つけた我が家のLGテレビのバックライト

↑Backlight of our LG TV found in Ali Express.
おお!レンズも付いてる。これなら削りすぎたレンズをバックライトごと交換できるじゃないか!
Oh! It also has a lens. I can replace the backlight with a new lens that has been shaved off too much!
アリエクのサイトに注文する前にバックライトの品番を確認した方が良いと書いて有るので、LGのテレビを引っ張り出して、再び分解してみた。
I pulled out my LG TV and disassembled it again, because the Ali Express website says that you should check the part number of the backlight before ordering.
背面ボディの外し方は、前回blog参照下さい。
Please refer to the previous BLOG for how to remove the rear body.
↓今回は赤丸のコネクタを外し、スピーカーとSW+リモコン受光部を外す。

↑Disconnect the connector circled in red, and remove the speaker and IR receiver.
どちらもねじ止めされてないので持ち上げるだけで外れる。
Since neither of them are screwed down, can remove them just by lifting up.
↓T-CON基板周りのコネクタ三か所と金属板のネジを外す。

↑Remove the three connectors from the T-CON and the screws on the metal plate.
↓T-CON基板を外したところ。

↑T-CON board removed.
↓下側のサブフレームを外す為、赤丸のネジも外す。
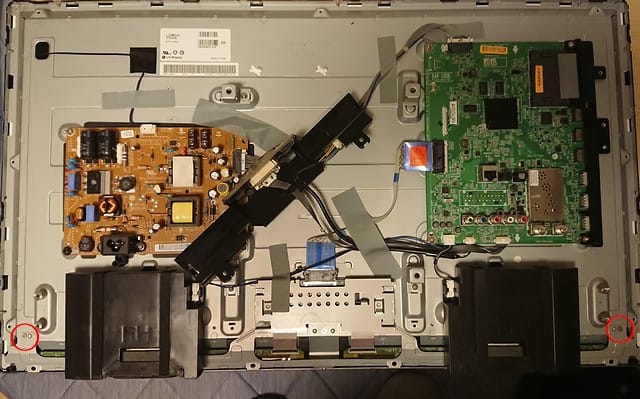
↑To remove the lower sub-frame, remove the screws circled in red.
フロントベゼル周りも前回同様にネジを外しておく。
Remove the screws around the front bezel as before.
↓サブフレームを外すと液晶パネルからつながる細長い基板が見える。
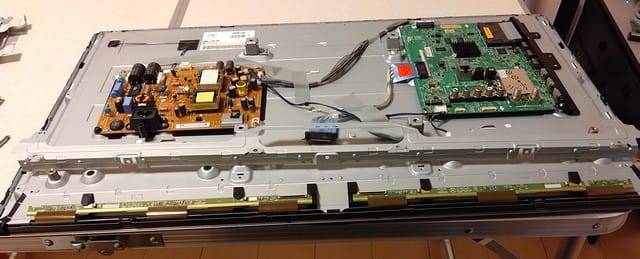
↑Removing the sub-frame, can see a long, thin board connected to the LCD panel.
基板は少し奥に押して、手前側を上に持ち上げ、手前方向に引くと基板が出てくる。
Push the board slightly toward the back, lift the front side up, and pull it toward the front to reveal the board.
フロントベゼルを、前回同様、爪部を持ち上げて外すと液晶パネルが分離。
Remove the front bezel by lifting up the claw part as before to separate the LCD panel.
↓液晶パネルを分離した所。

↑The LCD panel is separated.
Youtubeによると、SONYのTVの液晶はこのフレキが取れ易く、分解時に簡単に液晶から剝がれてしまい死亡!と言うのが有ったので、弱いテープで液晶に止めておいた方が良いかもしれない。(今回はその情報前に作業したので、特に何もしなかった物の問題は起こらなかったが、、、)
According to a Youtube video, the LCD panel of SONY TVs is easily detached from the LCD panel, and the panel is easily peeled off during disassembly! So, it might be better to use a weak tape to hold the panel to the LCD. (In this case, I worked on it before the information, so I did not have any problem...)
↓散光板を外す。4枚構成だ。
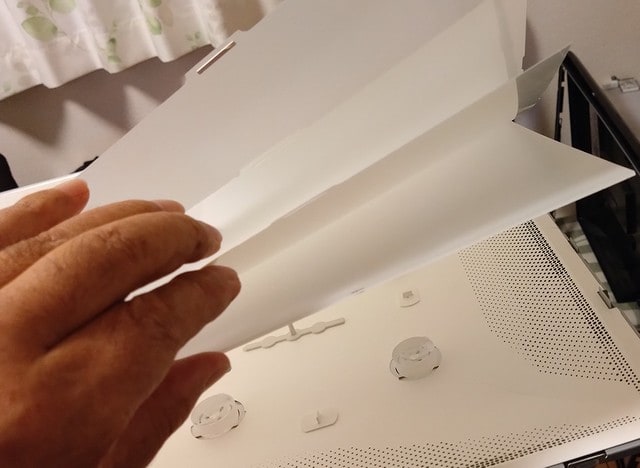
↑Remove the diffuser plate; it's made up of 4 pieces.
↓LEDのレンズを見ると、なんと白濁している物がいくつもある。

↑I looked at the LED lenses, and to my surprise, there are several that are cloudy.
外れているのはたぶん、今回の作業時に外れたのかと思うが、白濁は、前回組み立て時には気が付かなかった。
I guessed that some of them were removed during this work. I did not notice the clouded white when I assembled the LEDs last time.
うっかり付着した接着剤が完全乾燥して白くなったのだろうか?
Did the adhesive that was inadvertently adhered to the lens dry completely and turned white?
確かにこれじゃ、明るさムラ、治らないよねぇ、、、
Certainly, this would not cure the uneven brightness, would it?
↓部品番号を確認する為に反射板(紙)を止めてるプラ部品を45度回して外す。

↑To check the part number, I turned the plastic part holding the reflector (paper) 45 degrees and removed it.
↓散光板を支える支柱は尖ってない方を軽く持ち上げて写真右側に動かして外す。

↑Lift up the non-sharp end of the prop supporting the diffuser lightly and move it to the right side of the photo to remove it.
↓反射板(紙)を外す。
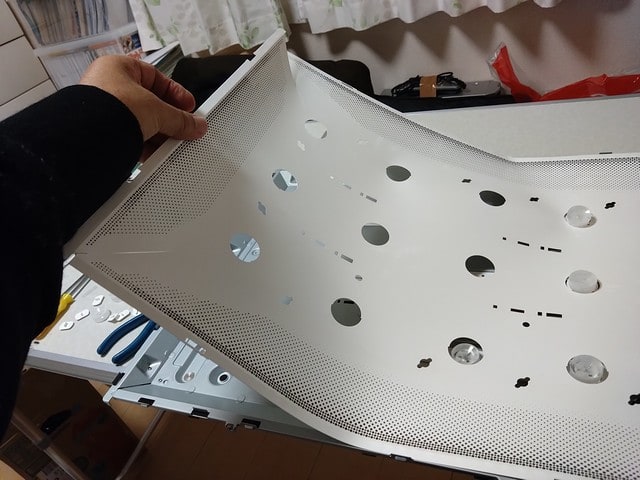
↑Remove the reflector (paper).
↓バックライトストリップとご対面。2種類・計3本使われている。
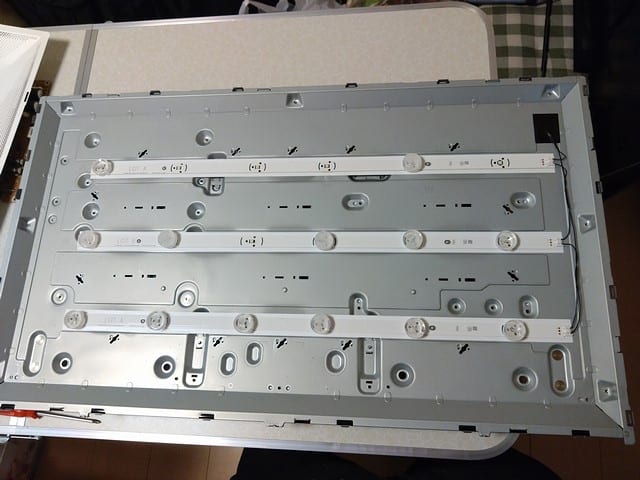
↑Meet the backlight strips. 2 types, 3 strips in total, are used.
↓Aストリップの部品番号は6916L1703A。穴の位置がレンズに近い。

↑The number of strip A is 6916L1703A, and the hole is close to the lens.
↓Bストリップは6916L1704A。穴の位置がレンズから少し離れている。

↑Strip B is 6916L1704A, with the holes slightly farther from the lens.
アリエクの商品ページに載ってる番号と一致するので問題なさそう。
The numbers match the numbers on the Ali express product page, so it looks OK.
と言う事で早速注文した。
So I ordered it immediately.
↓さて、組み戻そうとして、散光板を見ると何やら、白い物が、、、

↑Now, when I put it back together, I saw something white on the diffuser plate..,
↓光にかざすと、散光板にかなり接着剤が付いたのか、変な模様が付いてる。

↑When I held it up to the light, there was a strange pattern on the diffuser plate, as if there was a lot of glue on it.
う~ん、これは接着材を落とすのが大変そうだ。
Hmmm, it looks like it will be difficult to remove the adhesive.
アセトンで落とせるか?それともサンドペーパーで削り落とす?
何か対応を考えないといけないな、、、、
Can I remove it with acetone? Or do I have to scrape it off with sandpaper?
I'll have to think of some way to deal with this. 、、、、
と言う事で、問題が一つ増えたが、取り敢えず元通り組みなおした。
So, one more problem has been added, but I put it back together anyway.
先ずは、注文したバックライトが届くのを待ちましょう。
Let's wait for the backlight I ordered to arrive first.
2024.04.02 (2024/4/20)
① LG 32型TV 修理 32LB5810 バックライトレンズ取付失敗編
② LG 32型TV 修理 32LB5810 失敗原因確認編
③ LG 32型TV 修理 32LB5810 バックライト交換編
④ LG 32型TV 修理 32LB5810 リモコン修理編
⑤ LG 32型TV 修理 32LB5810 散光板修正編
⑥LG 32型TV 2台目修理 32LB57YM
① LG 32inch TV repair 32LB5810 Backlight lens installation failure
② LG 32inch TV repair 32LB5810 Confirm of cause of failure
③ LG 32inch TV repair 32LB5810 Backlight replacement
④ LG 32inch TV repair 32LB5810 Remote control repair
⑤ LG 32inch TV repair 32LB5810 Diffuser plate repair
⑥LG 32inch TV repair 32LB57YM


