-
C# Dev Kit 機能拡張をインストールする
- デバックモードを選択する
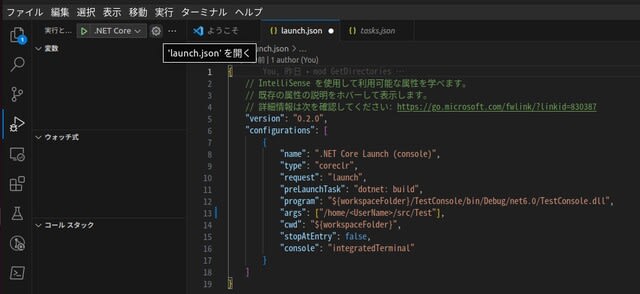
- launch.json 作成する
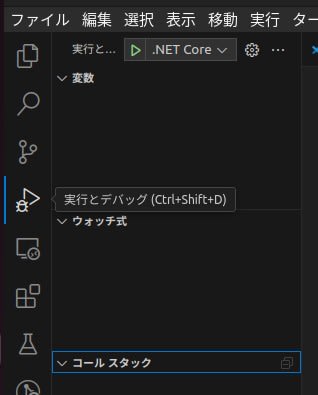
- 歯車アイコンをクリック
-
launch.jsonconsole プロパティ値を「internalConsole」から「integratedTerminal」へ変更する
{
// IntelliSense を使用して利用可能な属性を学べます。
// 既存の属性の説明をホバーして表示します。
// 詳細情報は次を確認してください: https://go.microsoft.com/fwlink/?linkid=830387
"version": "0.2.0",
"configurations": [
{
"name": ".NET Core Launch (console)",
"type": "coreclr",
"request": "launch",
"preLaunchTask": "build",
"program": "${workspaceFolder}/TestConsole/bin/Debug/net6.0/TestConsole.dll",
"args": ["/home/UserName/src/Test"],
"cwd": "${workspaceFolder}",
"stopAtEntry": false,
"console": "internalConsole"
}
]
}
- 歯車アイコンをクリック
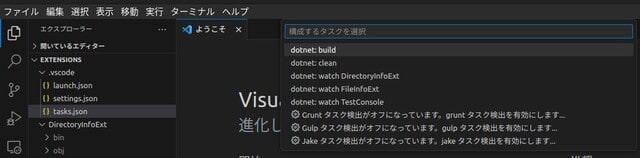
- tasks.json 作成する
- ターミナルメニューから「ビルドの構成...」を選択する

- dotnet: build を選択する
- label 名の「dotnet: build」をコピーする
tasks.json
{
"version": "2.0.0",
"tasks": [
{
"type": "dotnet",
"task": "build",
"problemMatcher": [
"$msCompile"
],
"group": "build",
"label": "dotnet: build"
}
]
} - launch.json の preLaunchTask プロパティ値へ貼り付ける
launch.json
{
// IntelliSense を使用して利用可能な属性を学べます。
// 既存の属性の説明をホバーして表示します。
// 詳細情報は次を確認してください: https://go.microsoft.com/fwlink/?linkid=830387
"version": "0.2.0",
"configurations": [
{
"name": ".NET Core Launch (console)",
"type": "coreclr",
"request": "launch",
"preLaunchTask": "dotnet: build",
"program": "${workspaceFolder}/TestConsole/bin/Debug/net6.0/TestConsole.dll",
"args": ["/home/UserName/src/Test"],
"cwd": "${workspaceFolder}",
"stopAtEntry": false,
"console": "integratedTerminal"
}
]
}
- ターミナルメニューから「ビルドの構成...」を選択する