写真集

Camera:Panasonic LUMIX DMC-LX3
Vine Linux と Ubuntu の設定方法など

VAIO type U のリカバリーDVDから起動HDDを作成してみました

2011-02-26 22:08:17 | Windows7

VirtualBox でリカバリーDVDからリカバリーHDD(ハードディスク)作成してみました。
SonyのDVDドライブじゃないと起動しないのでハードディスクからなんとか起動できないかと模索していました。
Windows XP Pro です。予めリカバリーDVD (CD) をSonyのリカバリー作成ツールで作成しておきましょう。

Ubuntu 10.10 (or 10.04)を使用します。

  1. リカバリー領域を作成します。
    ディスクユーティリティで、リカバリーDVD容量を確保します。
    2.5~5GB、NTFS、ブート可能、で作成します。

  2. MBRを復元します。sudo fdisk -l でハードディスクを確認しておきましょう。
    sonyフォルダのMBRファイルから復元します。(パーティション情報は入っていないみたいですね)
    $ sudo dd bs=384 count=1 if=/media/RECOVERYDISK/sony/mbr.dat of=/dev/sdb
    ブートトラップローダー部分だけを復元なので384です。(仕様は446byteなのですが、384以降00だったので384にしました)残りはパーティション情報みたいです。

  3. I386 フォルダ中の下記の2つのファイルをルートに(トップ)にコピーします
    1) ntdetect.com
    2) setupldr.bin は、 ntldr にファイル名を変更します。
    ディスクユーティリティでNTFSのフォーマットをすると、bootmgr or ntldr のファイルをロードするようです。
    MBR -> Active Partition の先頭 -> Active partiton がNTFSの場合は bootmgr か ntldr を load します。
    (Initial Program Load [IPL])
  4. 残りはそのままコピーします。
    i386フォルダは minint に名前を変更します。

  5. 作成したハードディスクのMBRをバックアップします。
    $ sudo dd bs=512 count=1 if=/dev/sdb of=vaiombr.img

  6. 起動します。
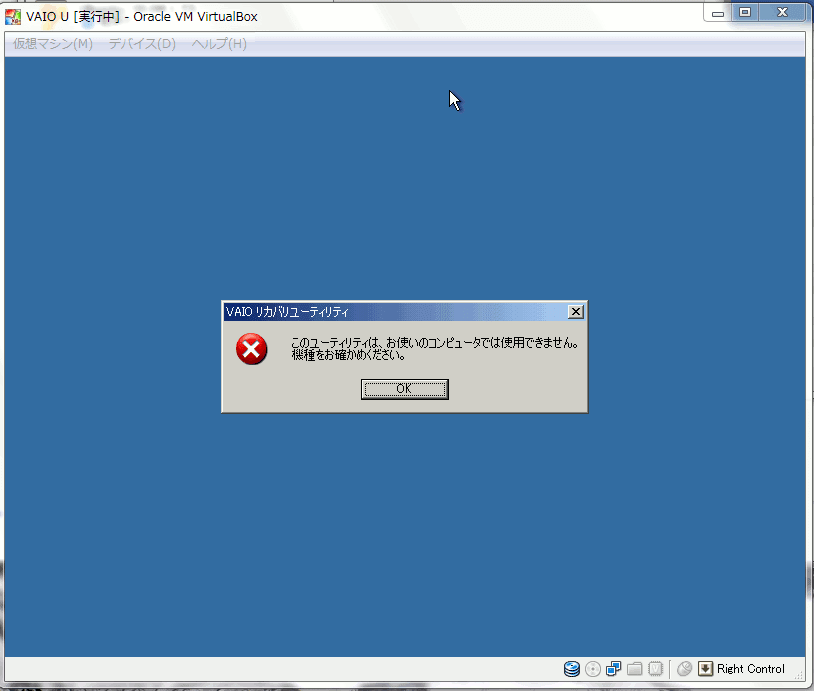
    機種を判定しているためVirtualBoxでは起動しませんが、該当VAIOなら起動するでしょう。
    HDDを交換するのが面倒なので実機では試していません。


システムイメージの作成で作成したイメージを新しいHDDで復元してみました

2011-02-23 01:25:08 | Windows7

Windows 7 でシステムが元気なうちに、まずはシステムイメージの作成
メインで使うソフトはインストールしてからがいいですね。

イメージの作成はこちらを参照します。
http://itpro.nikkeibp.co.jp/article/COLUMN/20100818/351269/

ネットワーク先、またはシステムが入っていないデータディスクにとります。
システム修復ディスクも作成しましょう。
メーカーの回復領域(Windows RE)を取り出して新しいHDDに移行するよりも楽ですね。


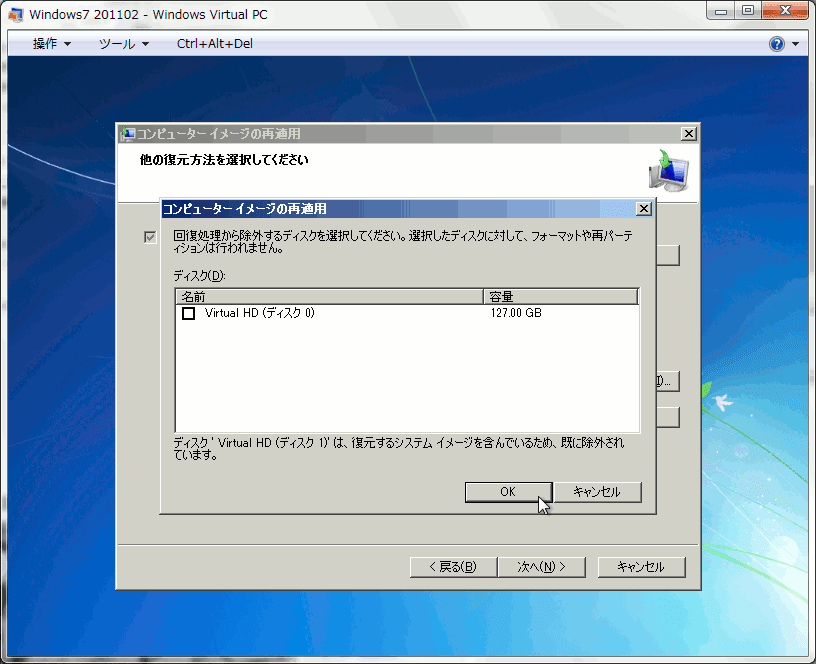
ディスクの除外ボタンを押してバックアップ設定を確認します。


ディスク0が新しいハードディスクでシステムの復元先なのでチェックは付けません。
他のディスクが表示されていたら除外のチェックマークを入れておきましょう。
ディスク1は、WindowsImageBackup フォルダがあるデータハードディスクです。
元のシステムが入っているハードディスクは外さないと、新しいハードディスクに復元できません。強制的に元のハードディスクに復元されますので、注意しましょう。新しいハードディスクに移行できません。なんでだろう面倒ですね。


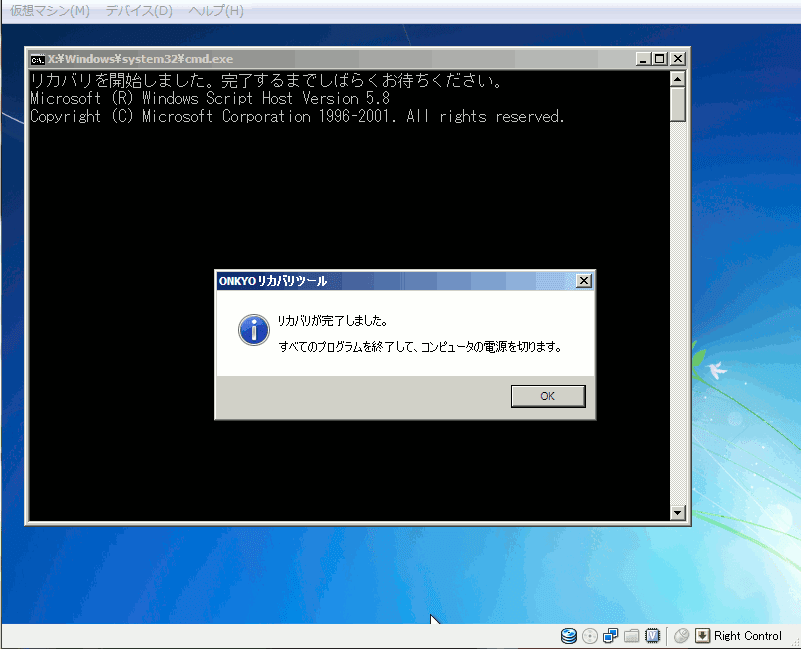
完了を押すと復元作業が開始されます。


Windows RE を新しいハードディスクで起動してみました

2011-02-22 20:20:44 | Windows7

Onkyo PCのハードディスクに入っているリカバリー領域(回復パーティション)を新しいハードディスク(HDD)へ引越しさせてみました。
Virtualboxによるテストです。(ONKYO-RECOVERY)

Ubuntu 10.10 (or 10.04)のLiveCDを使用します。

  1. ハードディスクを確認します。
    $ sudu fdisk -l
    ディスク /dev/sda: 500.1 GB, 500107862016 バイト
    ヘッド 255, セクタ 63, シリンダ 60801
    Units = シリンダ数 of 16065 * 512 = 8225280 バイト
    セクタサイズ (論理 / 物理): 512 バイト / 512 バイト
    I/O size (minimum/optimal): 512 bytes / 512 bytes
    ディスク識別子: 0xcf423475

    デバイス ブート      始点        終点     ブロック   Id  システム
    /dev/sda1               1          39      307200   27  不明
    パーティション 1 は、シリンダ境界で終わっていません。
    /dev/sda2              39        2589    20480000    7  HPFS/NTFS
    /dev/sda3   *        2589       31695   233799680    7  HPFS/NTFS
    /dev/sda4           31696       60801   233793945    7  HPFS/NTFS
  2. MBRのバックアップ
    $ sudo dd bs=512 count=1 if=/dev/sda of=/media/BackupHddName/mbr.img

  3. Windows RE 領域のリカバリー
    自動マウントされないので、RE領域をマウントします。
    $ sudo mount -t ntfs /dev/sda1 /mnt
    $ cp -r /mnt/recovery /media/HddLabelName

  4. Onkyoのディスクイメージを取り出します。
    こちらは自動マウントされていました。
    $ cp -r /media/ONKYO-RECOVERY /media/BackupHddName

    もしマウントされていなければマウントしてからコピーします。
    $ sudo umount /mnt
    $ sudo mount /dev/sda2 /mnt
    $ cp -r /mnt/recovery /media/BackupHddName

  5. C drive からブートに必要なファイルをバックアップします。
    $ mkdir /media/BackupHddName/cdrive
    $ cp /media/Windows\ 7/bootmgr /media/BackupHddName/cdrive
    $ cp -r /media/Windows\ 7/boot /media/BackupHddName/cdrive

  6. BCDファイルを編集します。
    Windows7 のコマンドプロンプトを管理者で起動します。(アクセサリ>コマンドプロンプトを右クリックして、管理者で起動)
    BCDファイルを適当なフォルダへコピーします。
    C:> mkdir d:\editBCD
    C:> copy d:\cdrive\boot\BCD d:\editBSD
    C:> d:
    D:> cd edit\BCD
    D:> d:\editBCD
    D:\editBCD> Bcdedit -store BCD -create {ramdiskoptions} /d "Ramdisk options"
    Bcdedit -store BCD -set {ramdiskoptions} ramdisksdidevice  boot
    Bcdedit -store BCD -set {ramdiskoptions} ramdisksdipath  \recovery\windowsre\boot.sdi
    Bcdedit -store BCD -create /d "onkyo recovery" /application osloader

    エントリ {530a995b-3e72-11e0-a907-0013722cf7bc} は正常に作成されました。
    最後に表示されますので変数BCDIDに登録します。

    set BCDID={530a995b-3e72-11e0-a907-0013722cf7bc}

    Bcdedit -store BCD -set %BCDID% systemroot \Windows
    Bcdedit -store BCD -set %BCDID% detecthal Yes
    Bcdedit -store BCD -set %BCDID% winpe Yes
    Bcdedit -store BCD -set %BCDID% osdevice ramdisk=[boot]\recovery\windowsre\winRE.wim,{ramdiskoptions}
    Bcdedit -store BCD -set %BCDID% device ramdisk=[boot]\recovery\windowsre\winRE.wim,{ramdiskoptions}

    D:\editBCD>bcdedit -store bcd

    Windows ブート マネージャー
    --------------------------------
    identifier              {bootmgr}
    device                  unknown
    description             Windows Boot Manager
    locale                  ja-JP
    inherit                 {globalsettings}
    default                 {default}
    resumeobject            {26d33988-529b-11df-899d-406186e5638a}
    displayorder            {530a995b-3e72-11e0-a907-0013722cf7bc}
    toolsdisplayorder       {memdiag}
    timeout                 30

    Windows ブート ローダー
    --------------------------------
    identifier              {530a995b-3e72-11e0-a907-0013722cf7bc}
    device                  ramdisk=[boot]\recovery\windowsre\winRE.wim,{ramdiskopti
    ons}
    description             onkyo recovery
    osdevice                ramdisk=[boot]\recovery\windowsre\winRE.wim,{ramdiskopti
    ons}
    systemroot              \Windows
    detecthal               Yes
    winpe                   Yes

  7. 新しいHDDにMBRを復元します。
    $ sudo fdisk -l などで新しいハードディスクのデバイス名を確認して下さいね。
    /dev/sda だった場合は
    $ sudo dd bs=512 count=1 if=mbr.img of=/dev/sda

    パーティション復元されます。
    $ sudo fdisk -l
    ディスク /dev/sda: 500.1 GB, 500107862016 バイト
    ヘッド 255, セクタ 63, シリンダ 60801
    Units = シリンダ数 of 16065 * 512 = 8225280 バイト
    セクタサイズ (論理 / 物理): 512 バイト / 512 バイト
    I/O size (minimum/optimal): 512 bytes / 512 bytes
    ディスク識別子: 0xcf423475

    デバイス ブート      始点        終点     ブロック   Id  システム
    /dev/sda1               1          39      307200   27  不明
    パーティション 1 は、シリンダ境界で終わっていません。
    /dev/sda2              39        2589    20480000    7  HPFS/NTFS
    /dev/sda3   *        2589       31695   233799680    7  HPFS/NTFS
    /dev/sda4           31696       60801   233793945    7  HPFS/NTFS

  8. sda2をNTFSでフォーマットします。
    ONKYO-RECOVERYフォルダ以下をコピーします。ONKYO,RData

  9. sda3をNTFSでフォーマットします。
    bootmgr ファイルをコピーします。
    boot フォルダをコピーします。
    boot ファルダのBCDファイルを6.で編集したBCDファイルと置換します。

  10. Windows RE 領域はsda1に置いても認識されないので Cドライブに置きます。
    recovery フォルダ以下をコピーします。BCDファイルもそのように 6.で編集してあります。
    c:\recovery\system32
    c:\recovery\windowsre

  11. 再起動します。


Fedora 14 ( Linux ) swap の容量を変更する

2011-02-16 00:44:41 | Fedora 14

swap 領域を10GBも取っていたみたいなので少なくしようと変更しました。

$ free
$ swapoff /dev/vg_fedora14/LogVol00

swapが使用されていないことを確認します。
$ free

システム>管理>論理ボリューム管理を開きます。
論理ビューでLogVol00(swap)を削除します。
LogVol01(Etx4)の容量を変更(増)します。
swapを作成できないので終了します。
Fedora 14 のディスク・ユーティリティはLVMが扱えますのでこちらを起動します。
アプリケーション>システムツール>ディスク・ユーティリティ
LogVol00をswapで作成します。

もし下記のエラーがでたら
---------------------------------------------------------------
***An error occurred during the file system check.
***Dropping you to a shell the file system will reboot
***when you leave the shell
Give root password for maintenance
(or type Control-D for normally startup)
---------------------------------------------------------------
下記のコマンドを実行します。
# fsck -y

http://blog.nijimo.jp/2009/01/09/87/


Oracle Solaris 11 Express 2010.11

2011-02-13 14:37:09 | Solaris11

Oracle Solaris 11 Express 2010.11 を試しに使用しています。

http://www.oracle.com/technetwork/server-storage/solaris11/downloads/downloads-sol11-168267.html?ssSourceSiteId=ocomen

  • grub のメニュー変更方法
    # bootadm list-menu
    # bootadm set-menu timeout=0
  • Keyboard Layout の変更
    # svccfg -s keymap:default setprop keymap/layout=Japanese
    # svcadm refresh keymap
    この後に再起動します。

Interix 6.1 pkgsrc mysql-5.1.54 をビルドしてみました

2011-02-12 01:35:27 | Interix6.1

$ env MYSQL_SER=mysql MYSQL_GROUP=mysqlgrp bmake 2>&1 | tee mysql51.make.txt

bash もなぜかビルドされるのですが、configre のスクリプトが動いているうちに下記のソースを変更しました。
Subsystem for UNIX-based Applications にて bash4.1.9 を make してみました 
なにもしないとたぶん、エラーになりるのかな、と思ったのですが、
pkgsrcの場合は、予めgettextのライブラリ(gettext-lib-0.14.6 libintl)を入れて使用するのでエラーにならないのですね。

でも、パッチが当たってないので、バージョンが4.1.0のままですね。


mysql-5.1.54 server でエラーが出てしまいました。


gcc -DHAVE_CONFIG_H -I. -I../include -I../include -I../include -I../sql  -Dunix -I/usr/pkg/include -I/usr/include  -D_ALL_SOURCE -O -DUSE_OLD_FUNCTIONS -I/usr/pkg/include -I/usr/include   -c comp_err.c
gmake[2]: *** No rule to make target `../mysys/libmysys.a', needed by `comp_err'.  Stop.
gmake[2]: Leaving directory `/usr/pkgsrc/databases/mysql51-client/work/mysql-5.1.54/extra'
gmake[1]: *** [../include/mysqld_error.h] Error 2
gmake[1]: Leaving directory `/usr/pkgsrc/databases/mysql51-client/work/mysql-5.1.54/extra'
gmake: *** [all-recursive] Error 1
*** Error code 2

Stop.
bmake: stopped in /usr/pkgsrc/databases/mysql51-client
*** Error code 1


Interix 6.1 pkgsrc makeに成功したパッケージリスト

2011-02-11 23:41:28 | Interix6.1
autoconf-2.68       Generates automatic source code configuration scripts
bash-4.1nb1         The GNU Bourne Again Shell
bison-2.4.3         GNU yacc(1) replacement
bmake-20100808      Portable (autoconf) version of NetBSD 'make' utility
bootstrap-mk-files-20090807nb2 *.mk files for the bootstrap bmake utility
bsdtar-2.8.4        Fast multi-format tape archiver
bzip2-1.0.6         Block-sorting file compressor
curl-7.21.3         Client that groks URLs
cvs-1.11.23         Concurrent Versions System
digest-20080510     Message digest wrapper utility
gettext-lib-0.14.6  Internationalized Message Handling Library (libintl)
gettext-tools-0.14.6nb1 Tools for providing messages in different languages
gmake-3.82nb1       GNU version of 'make' utility
gtar-base-1.25nb3   The GNU tape archiver with remote magnetic tape support
gtexinfo-4.13       GNU info documentation utilities
libiconv-1.13.1     Character set conversion library
libidn-1.19         Internationalized Domain Names command line tool
libtool-base-2.2.6bnb4 Generic shared library support script (the script itself)
m4-1.4.15           GNU version of UNIX m4 macro language processor
openssh-5.5.1       Open Source Secure shell client and server (remote login program)
openssl-0.9.8q      Secure Socket Layer and cryptographic library
osabi-Interix-6.1   Operating System version dummy-package
p5-Digest-1.16nb1   Perl5 base class for Digest:: modules
p5-Digest-SHA1-2.13nb1 Perl5 module for SHA1
p5-enum-1.016nb2    Enumerations for Perl
p5-Error-0.17016nb1 Perl extension module for try/throw/catch exception handling
p5-MIME-Base64-3.13 Perl5 module for Base64 and Quoted-Printable encodings
p5-pkgsrc-Dewey-1.1nb1 Perl module to compare pkgsrc Dewey numbers
pax-20080110        POSIX standard archiver with many extensions
perl-5.12.2nb1      Practical Extraction and Report Language
pkg-config-0.25nb1  System for managing library compile/link flags
pkglint-4.94        Verifier for NetBSD packages
pkg_install-20101212 Package management and administration tools for pkgsrc
readline-6.1        GNU library that can recall and edit previous input
tcp_wrappers-7.6.1nb4 Monitor and filter incoming requests for network services
tnftp-20070806      The enhanced FTP client in NetBSD
user-20040426       Limited NetBSD-compatible useradd/groupadd commands
x11-links-0.61      Shadow tree of links to native X11 headers and libraries
zlib-1.2.3          General purpose data compression library

Interix 6.1 pkgsrc scmcvs をビルドしてみました その2

2011-02-11 20:57:18 | Interix6.1

先に gtexinfo.4.13 (texinfo) をビルドします
下記の3つのファイルをダウンロードしてscmcvs (cvs-1.11.23)をビルドしました。


$ cd /usr/pkgsrc/devel/gtexinfo
$ bmake clean
$ bmake

gtexinfo.4.13 のビルドは成功しました。

$ cd /usr/pkgsrc/devel/scmcvs
$ bmake 2>&1 | tee cvs.make.txt

エラーが出てしまいました。
------------------------------------------------------------------------------
gcc -DHAVE_CONFIG_H -I. -I.. -I../lib -I../diff    -I/usr/pkg/include  -D_ALL_SOURCE -O -I/usr/pkg/include -MT add.o -MD -MP -MF .deps/add.Tpo -c -o add.o add.c
In file included from cvs.h:49,
                 from add.c:33:
../lib/xsize.h: In function `xsum':
../lib/xsize.h:61: error: `SIZE_MAX' undeclared (first use in this function)
../lib/xsize.h:61: error: (Each undeclared identifier is reported only once
../lib/xsize.h:61: error: for each function it appears in.)
*** Error code 1

Stop.
bmake: stopped in /usr/pkgsrc/devel/scmcvs/work/cvs-1.11.23/src
*** Error code
------------------------------------------------------------------------------

lib/xsize.h ファイルをobache さんのコメント通りに修正しました。
------------------------------------------------------------------------------
#include <limits.h>
#if HAVE_INTTYPES_H
# include <inttypes.h>
-#elif HAVE_STDINT_H
+#endif
+#if HAVE_STDINT_H
# include <stdint.h>
#endif
------------------------------------------------------------------------------
$ bmake clean
$ bmake
$ bmake install
===========================================================================
$NetBSD: MESSAGE,v 1.1 2007/05/27 09:49:50 schmonz Exp $

Set up the master source repository.  See the "Setting up the repository"
section of cvs.info for details; the one-line summary is (if you are
putting the repository in /src/master):

 $ cvs -d /src/master init

Have all users of the CVS system set the CVSROOT environment
variable appropriately to reflect the placement of your source
repository.  If the above example is used, the following commands
can be placed in user's ~/.profile, ~/.bash_profile file; or in the
system-wide /etc/profile:

 CVSROOT=/src/master; export CVSROOT

for sh/bash/ksh users, or place the following commands in the user's
~/.login, or system-wide in the /etc/csh.login file:

 setenv CVSROOT /src/master

for csh/tcsh users.  If these environment variables are not already set
in your current shell, set them now (or source the login script you
just edited).

===========================================================================

=> Registering installation for cvs-1.11.23
cvs-1.11.23 requires installed package zlib-1.2.3

無事にインストールできました。


Interix 6.1 pkgsrc で openssh をビルドしてみました その2

2011-02-11 20:34:04 | Interix6.1

pkgsrc の openssh が修正されたとのことで下記の4つのファイルを置換して再度ビルドしました。

$ bmake clean
$ bmake

エラーでした。
---------------------------------------------------------------
gcc -D_ALL_SOURCE -O -I/usr/pkg/include -Wall -Wpointer-arith -Wuninitialized -Wsign-compare -Wformat-security -fno-builtin-memset -I. -I. -I/usr/pkg/include -I/usr/pkg/include -DIOV_MAX=16 -I/usr/local/bind/include -I/usr/pkg/include -DSSHDIR=\"/usr/pkg/etc/ssh\"  -D_PATH_SSH_PROGRAM=\"/usr/pkg/bin/ssh\"  -D_PATH_SSH_ASKPASS_DEFAULT=\"/usr/pkg/bin/ssh-askpass\"  -D_PATH_SFTP_SERVER=\"/usr/pkg/libexec/sftp-server\"  -D_PATH_SSH_KEY_SIGN=\"/usr/pkg/libexec/ssh-keysign\"  -D_PATH_SSH_PKCS11_HELPER=\"/usr/pkg/libexec/ssh-pkcs11-helper\"  -D_PATH_SSH_PIDDIR=\"/var/run\"  -D_PATH_PRIVSEP_CHROOT_DIR=\"/var/empty\"  -DSSH_RAND_HELPER=\"/usr/pkg/libexec/ssh-rand-helper\" -DHAVE_CONFIG_H -c loginrec.c
loginrec.c: In function `lastlog_openseek':
loginrec.c:1497: error: invalid application of `sizeof' to an incomplete type
loginrec.c: In function `lastlog_write_entry':
loginrec.c:1526: error: storage size of `last' isn't known
loginrec.c:1526: warning: unused variable `last'
loginrec.c: In function `lastlog_get_entry':
loginrec.c:1579: error: storage size of `last' isn't known
loginrec.c:1579: warning: unused variable `last'
---------------------------------------------------------------

obacheさんからのコメントでMakefileを修正しました。
CONFIGURE_ARGS+= --disable-lastlog
---------------------------------------------------------------
PKG_SYSCONFSUBDIR= ssh

GNU_CONFIGURE=  yes
CONFIGURE_ARGS+= --with-mantype=man
CONFIGURE_ARGS+= --sysconfdir=${PKG_SYSCONFDIR:Q}
CONFIGURE_ARGS+= --with-pid-dir=${SSH_PID_DIR:Q}
CONFIGURE_ARGS+= --with-ssl-dir=${SSLBASE:Q}
CONFIGURE_ARGS+= --with-tcp-wrappers=${BUILDLINK_PREFIX.tcp_wrappers}
CONFIGURE_ARGS+= --disable-lastlog # 追加しました。

.if ${OPSYS} != "Interix"
CONFIGURE_ARGS+= --with-privsep-path=${OPENSSH_CHROOT:Q}
CONFIGURE_ARGS+= --with-privsep-user=${OPENSSH_USER:Q}
.endif
---------------------------------------------------------------

$ bmake clean
$ bmake
=> Creating /usr/pkgsrc/security/openssh/work/sshd
無事にビルドが成功しました。

$ bmake install
===========================================================================
The following directories are used by openssh-5.5.1 and
have the wrong ownership and/or permissions:

 /usr/pkg/etc/ssh (m=755, o=197609, g=131616)

===========================================================================
===========================================================================
The following files should be created for openssh-5.5.1:

 /etc/rc.d/sshd (m=0755)
     [/usr/pkg/share/examples/rc.d/sshd]

===========================================================================
=> Please note the following:

===========================================================================
$NetBSD: MESSAGE.Interix,v 1.1 2005/03/07 23:29:49 tv Exp $

OpenSSH on Interix has some important caveats:

* Hostname resolution uses the BIND resolver library rather than Windows
  native lookup services.  This requires that /etc/resolv.conf be set up
  properly with a "nameserver" line; see resolv.conf(5).  In most
  installations, this was generated automatically when Services for UNIX
  was installed (based on the name server in use at that time).

* Currently, UsePrivilegeSeparation does not work properly, so it defaults
  to "no" on Interix.

* Network drives and encrypted local files may not be accessible after
  logging in through sshd thanks to the way the Windows security API works.
  A workaround is to "exec su USERNAME" after logging in, which will use
  the password to create a proper Windows access credential key.

===========================================================================

=> Registering installation for openssh-5.5.1
openssh-5.5.1 requires installed package openssl-0.9.8q
openssh-5.5.1 requires installed package tcp_wrappers-7.6.1nb4
openssh-5.5.1 requires installed package zlib-1.2.3

無事にインストール終了しました。


Ubuntu 10.04 で BSD系のファイルシステムをマウントする

2011-02-10 00:03:12 | Ubuntu

FreeBSD 7.3
$ sudo mount -t utf-o ufstype=ufs2 -o ro /dev/sdc5 /media/freebsd
$ sudo mount -t utf-o ufstype=ufs2 -o ro /dev/sdc7 /media/freebsd/var
$ sudo mount -t utf-o ufstype=ufs2 -o ro /dev/sdc9 /media/freebsd/usr

NetBSD 5.1
$ sudo mount -t utf-o ufstype=44bsd -o ro /dev/sdc5 /media/netbsd

NetBSDはVirtualBoxで入れられなかったので、Windows 7の Windows XP Modeで使用されているWindows Virtual PCにてインストールをしてみました。
FreeBSDも何故か Sysinstallで設定が終わったあと、インストール用 ISOイメージが読み込みエラーになり、こちらもWindows Virtual PCでインストールをしました。

両方とも wchar.h に mbsinit mbrtows が存在しました。