Fiber Optic Tech

Sharing various fiber optic news, inforamtion, topics, etc.

UTP Cat5e vs. STP Cat5e Cable

2017-01-20 11:49:16 | Copper Net...
Why use shielded CAT5e cable (STP CAT5e)?

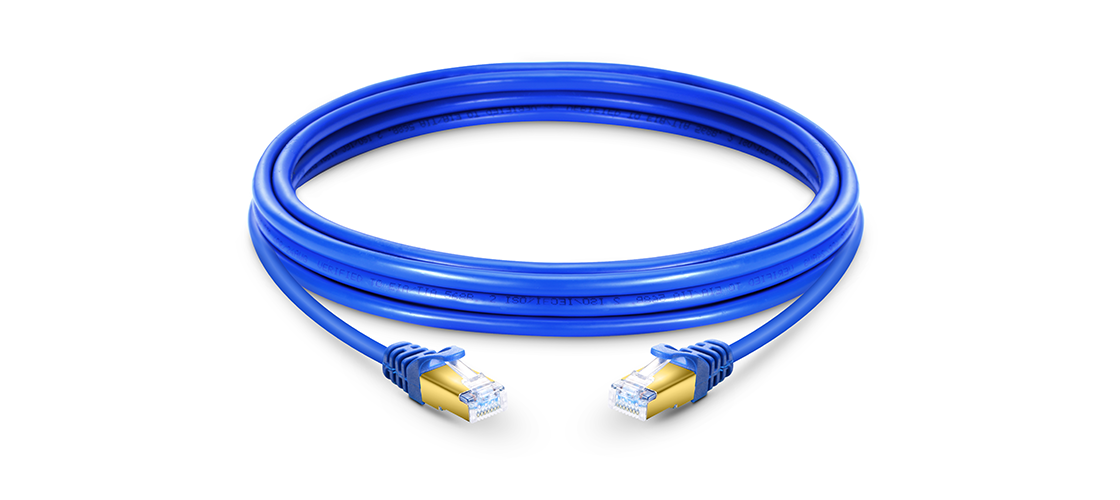
Shielded CAT5e cable is generally referred to as STP CAT5e or Shielded Twisted Pair CAT5e. It is designed to defend against electromagnetic interference or EMI. EMI is also sometimes called radio frequency interference or RFI. EMI is simply the enemy of electrical communication. This interference radiates from electrical components and prevents electrical current from flowing properly. In the case of CAT5e cable this can often result in a partial or complete loss in communication. A partial loss will often be seen by a user as a very slow connection. This is because if some of the data is not transmitted properly the sending equipment must resend it until it is correct, making the time required to transfer data increased. The equipment may not be able to establish a connection or if they do, it may get dropped part way through the data transfer.

Other times the interference may be too much, resulting in a near complete loss of signal where no data can be transmitted correctly. In this case the equipment generally will not be able to even establish a connection to begin communication.

What type of things can cause EMI?

There are a lot of things around us all the time that can and do cause varying degrees of EMI like power lines, electric motors, fluorescent lights, thermostats, and electrical circuits which are found in just about everything these days. Even things as common as elevators, air conditioners, and microwaves cause electromagnetic interference. These days so many appliances, motors, common devices found around the house, and much more in the office or industrial setting cause EMI, that it is often very difficult to narrow down what could slow down your network.The amount of EMI from these devices can vary due to many factors, but they can be a problem for your ethernet connections if not properly protected.

An installation of unshielded CAT5e cable run over fluorescent lights can result in a complete loss of signal in your cable. Running it past electric motors or near high power equipment can result in problems whenever those things are being used.

When use shielded CAT5e cable?

If you're in any situation where you want to make sure that you get the most speed and efficiency out of your network, you'll probably want to use shielded CAT5e cable. It's hard to know when and where you'll run into enough EMI to cause a problem, but if you use shielded CAT5e cable in the first place you won't have to worry about tearing the cable from the wall to replace it if you do run into that problem.

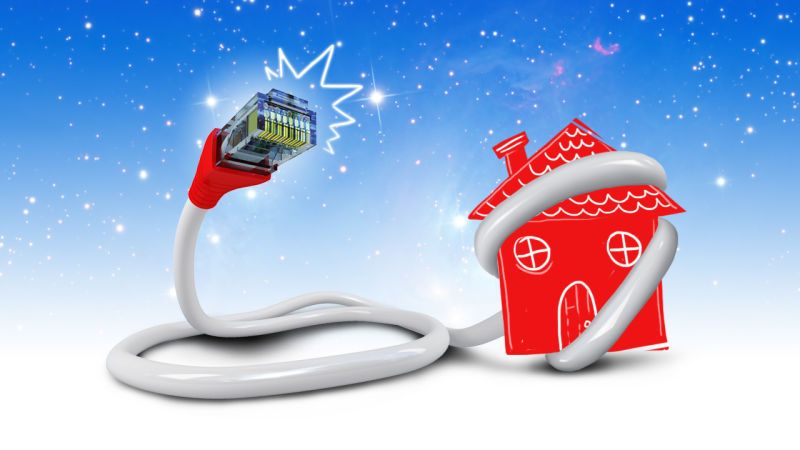
Making sure your network operates properly is especially important in your business or office building, but can also be just as important to you on your home network.

What type of shielded CAT5e cable should I use?

Shielded CAT5e cable is generally referred to as STP CAT5e or Shielded Twisted Pair CAT5e. This term, however, is used to refer to many different styles of shielding. The most common type of shielding uses what is called a screen. This screen is a metal covering that goes around the entire set of 8 wires found in CAT5e cable. This can be done by a single solid foil wrap around the wires, braided strands of cable wrapped around all the wires, or a combination of the two. This type of cabling is very effective at blocking any EMI that could cause problems in most installations.

If you want to ensure the proper operation of your network, we would recommend using STP cable like this for all in wall and other critical runs of cable. This way you can rest easy knowing you’re getting the most speed that you can out of your network.

Do My RJ45 Heads Also Need Shielding?

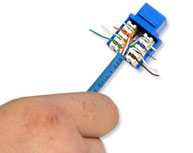
You do, in fact, need to use shielded RJ45 connectors to get the full benefit of STP cable since EMI can effect any and every square millimeter of your cable.


Cat7 Ethernet Cable: Is It Worth The Extra Cost?

2017-01-19 12:19:56 | Copper Net...

Nowadays, homes and businesses are operating on either a wired network connection or a wireless connection. Wired connections are usually faster than wireless connections and have lower latency. Both types of network hardware continue to advance, allowing users to benefit from faster speeds.

This might not be a big deal for the home network where the internet connection speed is usually the bottleneck. But businesses need to consider what kind of cables they are using. When using different types of Ethernet cables, the network speeds differ.

Comparing Other Cables To The Cat7 Ethernet Cable

Let’s start with the most standard types of Ethernet cables. Most of the new ones that are purchased in stores or bundled with equipment are probably recent enough that you do not need to worry. Companies that are still using older Ethernet cables they’ve had for a long time more than likely need to upgrade to a newer version.

Cat7 Ethernet Cable

Cables are not a brand name or generic; they are separated into different standard categories. The most common include Category 5, Category 5e, Category 6 and Category 6a. The newest cable category is 7. Each cable is backward compatible – meaning, you can plug a newer cable into a device created for a slower cable, and you will not have any compatibility problems.

Category Cable Progression

Each newer cable standard allows the user to get higher possible speeds with lower crosstalk. This enables the user to get those fast speeds, even with longer cables. When compared at lengths of 100 meters of cable, the following numbers show the difference in Ethernet cable categories:

  • Cat5 ethernet cable is typically too slow for business networks, allowing the user to get up to 100 Mb/second speed at 100 Mhz
  • Cat5e network cable allows up to 1 Gb/s internet speed with 100 Mhz
  • Cat6 ethernet cable allows up to 1 Gb/s, but cable lengths up to 55 meters can get internet speeds of 10 Gb/s at 250 Mhz
  • Cat6a ethernet cable can get speeds up to 10 Gb/s, even at 100 meters of cable length, operating at 500 Mhz
  • Cat7 ethernet cable is the newest cable category, operating at speeds of 10 Gb/s at 100 meters of cable and transmitting frequencies up to 600 Mhz.
A Little History

The Cat5 cable was the standard in 1995, Cat5e was standard in 2001 and Cat6 came out in 2002. The Cat6a has been around since 2008. Most businesses still have no need for updating their hardware to Cat7 Ethernet cable, much less the Cat7a or Cat8 cables that were first released in 2010 and 2013.

Cable can only allow the power and speeds of whatever equipment and internet type it is working with. Getting a faster cable will not change the internet speed if the equipment is set for a slower speed or the internet speed package is slower.

Most Cat5 and Cat5e cable should be changed out for a business set up. We believe that upgrading as high as Cat6a ethernet cable will be necessary for quite some time. Until companies need the speed, have the equipment to handle the speed and get an internet package that requires faster channels, the Cat7 ethernet cable’s full potential will simply not be used. This makes it an expensive, unnecessary upgrade. Purchasing and running cable is not a small expense, so companies should try to pick their cable in line with what they need currently and will need in the near future.

Solid or Stranded Ethernet Cables

Another difference in the cables will be the way the wires are used within the cable. The solid cable uses one single piece of copper for an electrical conductor. The stranded cable uses multiple (and thinner) copper cables twisted together for the electrical conductor. This makes the stranded cable more flexible, perfect for navigating a complex space. The solid cable is far less flexible making it ideal for permanent installation in the walls or outdoor.

Be sure to make clear of the features and difference between each type of Ethernet cables before finally selecting the one for your home or business project. Hope the information in this article could be helpful or a guide for you when you are confused about which Ethernet cable to choose.


Copper Cabling Installation Guideline

2017-01-05 10:11:53 | Copper Net...

As bandwidth demands continue to rise, both copper and fiber cable manufacturers are developing fast to provide greater capacity and flexibility. Copper cabling is still preferred by many network managers because copper cables especially UTP cables (eg. Cat6 UTP Cable), are as inexpensive as optical fibers and easy to install. And the components such as patch panels, wall-plate outlets, connecting blocks are economical. Here are the guidelines for copper cabling installation which would ensure a faster and safer copper network.

Standards

The first step when planing and deploying a telecommunication infrastructure is to make sure you are following the ANSI/TIA-568-C standard. This standard will ensure that your cabling system is interoperable with any networking or voice applications that have been designed to work with that standard.

Cable Distances

ANSI/TIA-568-C standard defines the maximum distance that a horizontal cable should traverse. The tips relating to distance and the installation of copper cabling are listed below.

  • Never exceed the 90-meter maximum distance for horizontal cables.
  • Horizontal cable rarely goes in a straight line from the patch panel to the wall plate. Remember to account for the fact that horizontal cable may be routed up through walls, around corners, and through conduit.
  • Calculate any additional cable distance that may be required as a result of trays, hooks, and cable management.
  • Leave some slack in the ceiling above the wiring rack in case re-termination is required or the patch panel must be moved. Some professional cable installers leave the extra cable loop in the ceiling bundled together or looped around a hook, shown as below.
extra cable loop
 
Wiring Patterns

The ANSI/TIA-568-C standard releases two wiring patterns for modular jacks and plugs: T568-A and T568-B. The only difference between them is that pin assignments for pairs 2 and 3 are reversed. As for the applications and working principles, these two wiring patterns make no difference. Remember to choose the same wiring configuration on both ends.

The cable pairs are assigned to specific pin numbers. The pins are numbered from left to right if you are looking into the modular jack outlet or down on the top of the modular plug. The following picture shows the pin numbers for the eight-position modular jack (RJ-45) and plug.

Installing Guide

Many factors need to be considered before you start installing copper cabling. Even if you have adequately planned your installation, situations can still arise that will cause problems either immediately or in the long term. Here are some tips to keep in mind for installing copper cabling.

  • Do not untwist the twisted pairs at the cable connector or anywhere along the cable length any more than necessary.
  • Bridged taps are not allowed.
  • Use connectors, patch panels, and wall plates that are compatible with the cable.
  • Never splice a data cable if it has a problem at some point through its length; run a new cable instead.
  • When terminating, remove as little of the cable’s jacket as possible, preferably less than three inches. When finally terminated, the jacket should be as close as possible to where the conductors are punched down.
  • Don’t lay data cables directly across ceiling tiles or grids. Use a cable tray, J hook, horizontal ladder, or other method to support the cables. Avoid any sort of cable-suspension device that appears as if it will crush the cables.
  • If you have a cable with damaged pairs, replace it. Don’t use another unused pair from the same cable because other pairs may be damaged to the point where they only cause intermittent problems, which are difficult to solve. Substituting pairs also prevents any future upgrades that require the use of all four pairs in the cable.

With the rapid development and upgrading of Ethernet technology and the surrounding standards, the applications of copper cables also develop like PoE technology, wireless access, digital camera, LED-based power system and sensor networks. Although fiber is very popular in the data center market, the advent of 25G and 40G copper cable standards demonstrate the continuous evolvement of copper cable technology, which still has a strong presence, particularly in the area of server end access.


How to Punch Down Keystone Jacks?

2016-12-30 16:41:37 | Copper Net...

Keystone jack, also known as keystone module connector, is a snap-in package used for mounting various types of low-voltage electrical jacks. It can also be used for mounting optical connectors into the wall plate or patch panel for network wiring installs. There are numerous requests for wiring diagrams or general information on how to punch down or terminate keystone jacks (Cat5e / Cat6) after running your telecom network's cross-connect cabling. This article will cover materials needed to solve this problem. With our easy-to-follow wiring guide, you'll have your Cat5e and Cat6 keystone jack wired, installed and ready to go in no time!

Step 1: Make sure the stripper is adjusted properly on a scrap piece of cable. The Stripper should be adjusted to only score the jacket to make removing it easier and not nick the twisted pairs. Using a Coaxial Stripper strip around 1 inch of the jacket off. Be careful not to nick the conductors as this will cause the wire to break or short out the connection causing problems down the road. Inspect all wires for damage before proceeding to step 2.

keystone jacks

Step 2: Straighten the pairs out completely and lay them over the top of the keystone jack noting the color pattern for the 568b wiring. Note: Each keystone jack is slightly different in how they are labeled and how the colors are arranged. The 568B standard is most commonly used and ends of the cable must have the same standards to communicate. We have the 3 most common keystone jack styles pictured here. The first jack pictured has the 2 standard pairs on the right, and the 2 variable pairs on the left. The A standard is the center column and the B standard is on the left. Both A and B standard applies to the right side of the jack. The solid color box with the lower right corner missing represents the solid color wire with the white stripe. The white box with the colored tip represents the white wire with the colored stripe.

Step 3: Keeping the pairs as twisted as possible press the wire into the correct groove with your thumbs. If you completely straighten the wires to run them through the jack you will risk cross talk between the pairs.

punch down tool

Step 4: Using a punch down tool to punch the wires down into the blades built into the keystone jack. The blades in the jack are designed to work with solid cable, and may not work with stranded cable. Make sure the blade is facing the outside of the keystone jack. If you reverse it you will cut the wires inside the keystone jack rendering them useless. The punch down tool should cut off the remaining pieces of the wire on the outside, but sometimes you may need to punch them down a 2nd time and wiggle the wire to it breaks clean off. Then you can install the dust covers if your keystone jack comes with them.

Keystone jacks have been widely used in data communication and LAN wiring. FS.COM offers cost-effective Cat5e and Cat6 keystone jack with RJ45 connector-style. They also provide keystone Cat5e toolless style connectors which make for a simple installation without the need for a punch down tool. Toolless keystone jacks are an ideal solution for terminating and connecting network cable. For more details, please visit www.fs.com.


Five Easy Steps to Install a Wired Home Network

2016-12-05 16:13:02 | Copper Net...

It is well known that the usage of WiFi connection is the most popular option among the general public, but when talking about efficiency, wired connection is more recommendable. A direct connection made with cables provide a faster and more secure network, if you can’t connect wireless gadgets like tablets and cellphone to this type of circuit the rest of your devices will function better with this modality.

Of course, setting up a wired network is more complex than just installing a router but we have a step by step guideline that will help you achieve this goal.

Decide the coverage area of the wires

First but foremost, you need to think about what you want from the connection. Some of the decisions that you must make are how many devices will be connected to the network, where located them and in which place set the wires.

Remember that this type of interconnection between the devices will require a lot of cables, so if you don’t want to make a mess, it is really important to consider how the wires will be distributed. In our experience, we can tell that planning the design of your home network is the best way to anticipate to possible problems that may surge during the installation.

By the way, don’t forget that it is also important that the router’s spot be a central point that can reach a good signal, this is an essential consideration if you are planning to combine the wire connection with WiFi. Also, think about the way you prefer this distribution be made, thinks like how the cables will be placed in the path to the devices if you are going to stick them to the floor or the walls.

Remember to avoid placing the cables close to devices like microwaves or TVs when you design the network, because the electromagnetic interference could affect the efficiency of the wired network.

Select the type of cable you want to use

It turns out that the cable that you choose to use has a significant influence on the network speed. The wires used for internet connections are Ethernet cables, and they have several categories for you to choose. We recommend you to decide between two most common categories, Cat5e and Cat6a cable, both of which are some of the best options based in a cost-efficiency relation.

ethernet-cable

Calculate the budget

This step will help you to have an estimated of how much money will be needed to invest in the network.

Once you have decided where and how the wires distribution will be made and which cable category you will choose, it is time to measure the distances.

Calculate the lengths of cable that you will need, that way you wouldn’t buy less material of what you will use but, keep in mind that always is a good idea to acquire at least two more lengths of the planned just in case.

Also consider the rest of the materials you need to use such as wall plates, jack ports, drywall cutters, cable clips, etc.

Before starting to make the installation, remember to check that you have all the necessary equipment to do the job, that way you wouldn’t have to stop in the middle of the process because something is missing.

Set up the cables

Ok, so once you have decided how the installation will be made and which materials you will use for your wired network is time to start to place the cables and connectors.

Here is the thing, you need to be clear that this part of the process is going to be complicated if you don’t have a basic knowledge in electrical installation so maybe you should consult an electrician before rummage with high voltages cables.

You already know the path that the cables will take so, the start by selecting where the router will be. From that spot, you must start to put the cables in the direction of the devices that will be interconnected. To pass the cables from one room to other some people make holes on their home’s walls but is necessary to use tools like a pointed hand saw to do it appropriately.

Install wall jack plates

After setting up the cables, you can proceed to install the wall jack plates. This step is probably the most complicated of the process to build a wired home network.

The wall plates allow you to have multiples ports for different devices in the same place. According to the jacks that you select the wall plate can have a combination of keystone jacks for copper cable, USB, HDMI, BNC, etc. which made this article very useful. To make the installation of the wall jacks plates is necessary to locate the internal cables in the wall and you need some tools such as stud finder, a drywall saw or a pointed hand saw to make the installation.

Once you complete all these five steps you will have a wired home network that will offer you a faster and better internet connection.