Cell Phone spare parts online - ETrade Supply

https://www.etradesupply.com/

5 iPhone Apps You Wish You Could Download Earlier

2020-06-19 16:38:45 | Phone Tips
Since we all know that the iPhone X series features of many amazing functions after iOS 13 upgrades. One of these features should be more powerful applications installable for iPhone users. Here we bring up 5 amazing Apps, and we are sure you will find it useful which you wish you could download them earlier on your iPhone.


1. Anonymous

This is a camera app which can blur faces when you taking pictures or video with your iPhone. When you enable the application and use the camera for picture shots or selfies, you can choose to cover blur on faces by setting. You can change the blur type and shape if you like. With Anonymous, we can take interesting pictures and videos we like and keep personal privacy at the same time. It’s very interesting.


2.  Snippets

This app has many functional items, which make the convenience of surfing on Safari for us. When you open Snippets, there you can see Auto Scroller, Sticky notes, Unzoom, and so on. For example, Auto scroller can make the Safari website page scrolling down automatically, and make it convenient for you on viewing. It’s quite useful for iPhone users.


3.  PDF it at All

Just like it means, this app can create PDF documents on all kinds of files such as website pages, photos, word, Excel, etc. When you enable this application, you can choose file formats you want to PDF it, and also, you can edit the PDF documents it created, email it, or share it with friends. It’s very cool.


4. Marklist

The Marklist app helps you to mark and save the website links so that you can read it later. When you tape on the share button when you are viewing the web page on Safari, you can see the Marklist icon. Tap on it and you will save the previous page on Marklist. You can check all the links you saved and unmark the saved links. Besides, you can copy a link and open the widget panel to mark it.  


5. Tailor

Tailor application enables us to stitch screenshots together on our iPhone. You can make one single image combined with screenshots together when you open Tailor. Moreover, we can share the stitched screenshots with our friends in message or email. This is very convenient for us for message sharing.


In the end, we suggest you download these 5 Apps and try to see if they are suitable for you. There are more useful Apps for iPhones you may not know but you will find them amazing and quite useful after you try. Besides, you may visit our online store for iPhone X replacement parts if you are interested in iPhone repair. Here we have iPhone parts for supply such as iPhone X LCD screen and digitizer, iPhone rear camera, and so on. You may also email us if there is anything we can do to help you.


How to Tear Down and Reassemble Samsung Galaxy A51

2020-06-12 14:46:54 | Samsung Galaxy

The Samsung Galaxy A51 parts mainly consist of a display screen, a middle frame, back panel, mainboard, and SUB board and the inner parts with flexes. Tearing down the phone requires our carefulness and patience during the process. Here we would like to demonstrate to you how to tear down and reassemble this Samsung model in steps, and also some notice during the process. Check this out.


1. Steps of Samsung Galaxy A51 teardown

Firstly, we need to turn off the phone and take out the SIM card tray. Use hot air gun to blow on the edge of the back panel for 2 or 3 minutes and then use a suction cup and an ultra-thin plastic sheet to slice and separate the back panel from the frame. After that, we can see the middle frame is fixing by 13 Phillips screws on the phone. Snap off the 13 screws, and remove the middle frame with plastic plectrum carefully. Disconnect the battery flex, and the SUB flex as well. Disconnect the antenna wire port, and then disconnect and remove the front-facing camera. Snap off the screw and remove the mainboard. After that, we can remove the fingerprint sensor and the charging port board. Lastly, remove the battery with steel pry tool careful, but remember to use battery adhesive sticker glue to melt the sticker before removing. Now the phone is completely torn down, let’s move to the next section about how to reassemble it.

2. Steps of Samsung Galaxy A51 reassembly

Just follow the teardown steps back, install the battery first. Don’t forget to past the adhesive sticker on the battery before installation. Place the Samsung A51 charging port board back and adjust the position. Connect the antenna wire port and the display flex cable. Install the fingerprint sensor and connect the flex, tighten the screws for fixing it. Install the mainboard back and fixing it with the screw. Connect the antenna wire port back to the board and install the front-facing camera. Connect the Samsung Galaxy A51 SUB flex and the battery flex cable back. Cover the middle frame, slightly press and make it tightly stick on the display, tighten the 13 screws for fixing the middle frame. Install the back penal, make sure it is in the right position. Slightly press the edge to make it tightly stick with the display.

3. Notice on Samsung A51 teardown procedure

There are things we have to notice during the teardown reassemble procedure. Firstly, the back panel and the middle frame is flexible but easy to be broken, we need to be careful and don’t twist it too much. Next, always remember to disconnect the battery cable in the first place before take down any internal parts, and connect it on the last after all the parts are installed in the reassembly. Furthermore, always remember the position of each inner part when reassemble the phone. Don’t miss any part or screw. The Samsung phone will not be 100% waterproof after teardown, you should be careful when using it after it is repaired.  


The whole process above is practiced under the hands of our professional colleague. If you are not familiar with Samsung mobile repair, you will need a longer time to finish all the steps. Anyway, mobile phone repair is complex, which requires our patience and insistence. Furthermore, you may come to our online store if you are looking for any Samsung Galaxy A51 replacement parts. Please contact us if there is anything we can do to help you. You may leave your comments if you have any questions about the procedure above. 
 

4 Solutions to Fix Samsung Galaxy Note 9 Camera issues

2020-06-08 18:39:08 | Samsung Galaxy

Sometimes it happens to you Samsung Note 9 that the camera stop working with no reason and the message error appears like “unfortunately, the camera has stopped”. This problem always relates to the software or app crash. Here we would like to share your shortcuts to troubleshoot the issues. Hopeful, the ways we list below could be helpful to solve the problem. 

1. Clear the camera app cache and data

Your camera app is overloaded with cache and junk data after a long time using it. You need to erase and clear the cache and data on your phone. Take the following steps of measurement and restart your phone afterward. Don’t worry, it won’t affect your phone original data. To do so, just follow the steps below:

Open apps tray on home screen>> open settings >> find apps and tap >> Tap Menu and tap show system apps to see preinstalled apps >> Find camera and tap >> Tap storage and select clear cache >> Tap clear data option and confirm the delete

2. Updating the latest android version and the camera app

This works especially to the third party camera App. You may try this way if you are using the third party camera. Sometimes the android version may affect the issue of camera, so updating to the latest system version may be effective for fixing the camera issue.

To update the android version, just follow the steps below:

Open Settings >> Scroll down and software updates >> Select download and install >> Find if OTA update is available. If so, update phone will start the download automatically

To update the camera App, just Select apps from home screen >> Select settings >> Find your third party app >> Select and update it

3. Rebooting the phone in safe mode

To reboot the phone safe mode will allow you to disable the third-party apps, and this will crash the camera app and fix the camera issue somehow.

To run safe mode on an Android phone, follow the steps here: Turn off your phone >> Press and hold the power key until you see the phone model on your phone screen >> When appearing Samsung logo, release the power key >> Immediately press and hold the volume down key after releasing the power key until mobile finishes restarting >> On the safe mode screen appearance in the bottom left corner, release the volume down key.

Now try to use the Samsung Note 5 camera by taking pictures or videos. If the issue is not resolved, try our next solution.

4. Resetting your phone

This is the last and ultimate solution to your camera problem. However, before resetting your phone completely, it is recommended to take a backup of your important data and apps.

To reset your phone, follow the steps here: Turn off the phone >> Press and hold the volume up key and Bixby key, then press and hold the power key >> on the display of logo release all keys >> Press volume key several times >> select ‘wipe data/factory reset’ by volume keys and press power key >> select ‘yes—delete all user data’ and press the power key


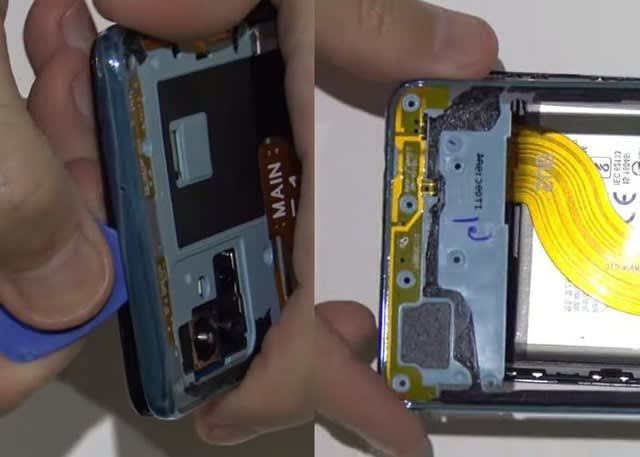
The four solutions above are fast and effective to fix your Samsung Galaxy Note 9 camera issues. You may try the steps if you happen to face the problems on your phone. If the camera problems still exist after you try, we suggest you go to the repair shop to tear down the phone and check the camera. Besides, you may also go to our shop for some Samsung Galaxy Note 9 LCD display screen if you are considering to replace the camera.