Color

日々の備忘録

Raspberry Piにオートフォーカスカメラモジュール(Sony IMX519)を取付

2022年03月30日 11時34分21秒 | Raspberry ...
◆Raspberry Pi用高解像度オートフォーカスカメラモジュールを取付ける手順
 
1.準備
●CPU : Raspberry Pi 4 Model B 4GB
●SD : SDSQXNE-032G-GN6MA [ SanDisk ]
●AC/DC : Google 30W USB-C 充電器
●Case : Raspberry Pi 4アルミニウムケース 冷却ファン付き
●Camera : Raspberry Pi用高解像度オートフォーカスカメラモジュール
●Tripod : SR-RG1 [ SmallRig ]
●PC OS : Windows 10 Pro 64bit
●SSH Tool : TeraTerm-4.106
 
2.OSのダウンロード・インストール
<Download for Windows>をクリック
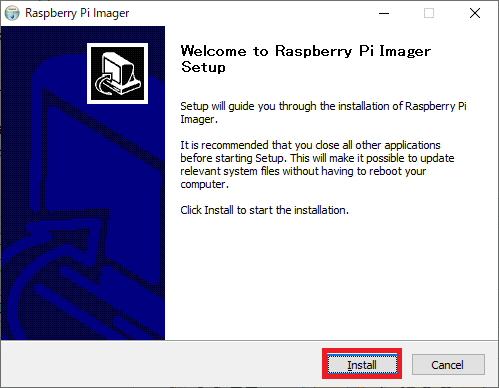
ダウンロードしたファイルを起動
<Install>をクリック
<Finish>をクリック
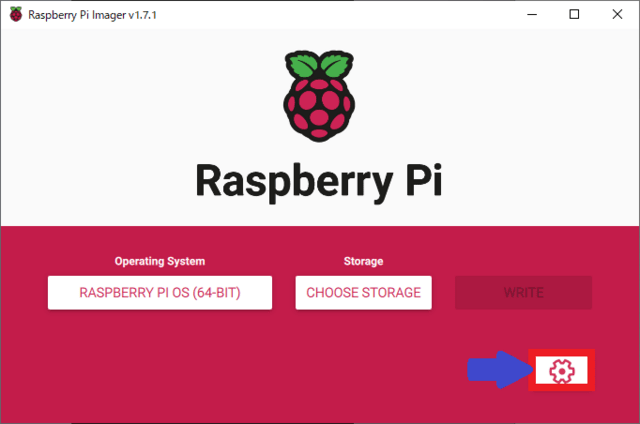
Raspberry Pi Imager v.1.7.1(2022年3月28日現在)が起動する
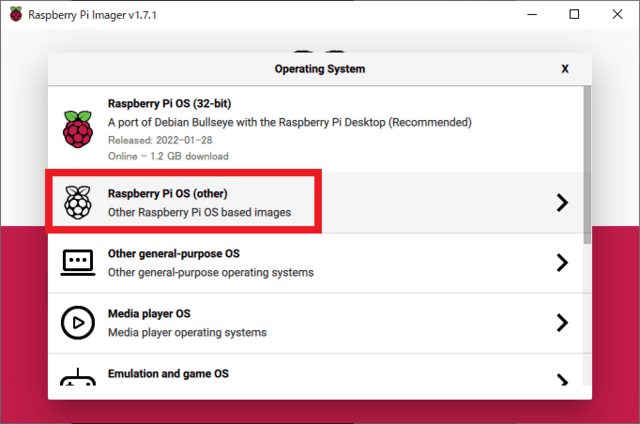
<CHOOSE OS>をクリック
<Raspberry Pi OS(other)>を選択
<Raspberry Pi OS (64-bit)>を選択
<詳細設定>アイコンをクリック
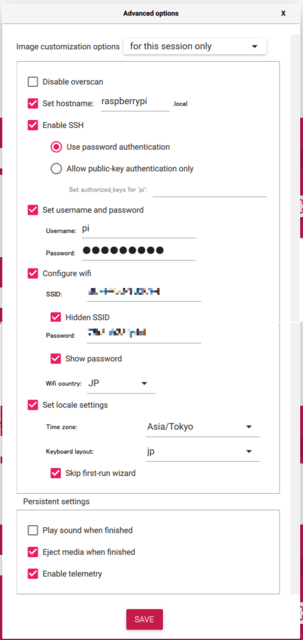
<SSH>を有効にして、<wifi>設定を自分の環境に合わせる
<SAVE>をクリック
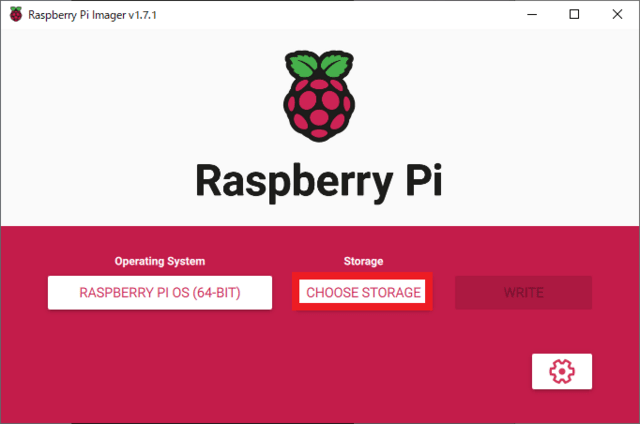
<CHOOSE STORAGE>をクリック
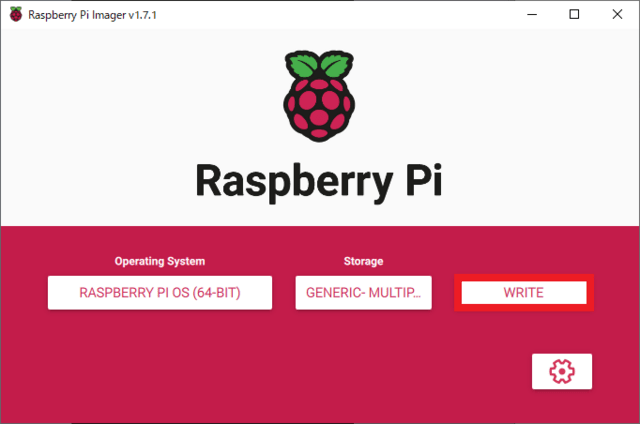
SDカードを選択
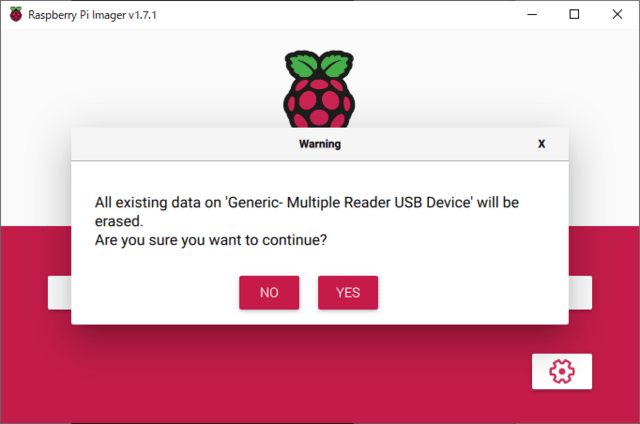
<WRITE>をクリック
OS書込み終了後、<NO>をクリック
 
3.オートフォーカスカメラモジュールを組立
オートフォーカスカメラモジュールをRaspberry Pi に接続
カメラの三脚穴を利用して、三脚に取付
SDカードをRaspberry Pi に挿入して、電源投入
 
4.SSH接続
TeraTerm 4.106を起動
ホスト(T): raspberrypi と入力
<OK>をクリック
<続行(C)>をクリック
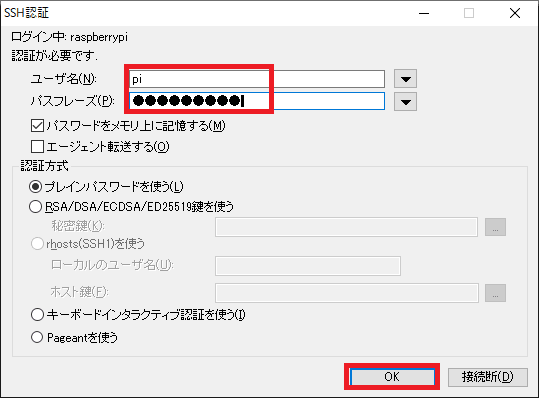
ユーザ名(N): pi を入力
パスフレーズを入力
<OK>をクリック
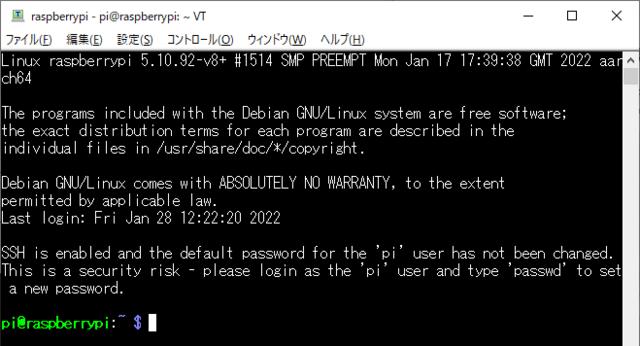
Raspberry Pi と接続完了
 
4.samba の導入
~$ sudo apt install samba
~$ sudo nano /etc/samba/smb.conf
最終行に下記を追記
[pi]
   comment = pi user file space
   path = /home/pi
   force user = pi
   guest ok = no
   create mask = 0666
   directory mask = 0777
   read only = no
上書き保存して、終了
~$ sudo smbpasswd -a pi
パスワードを2回入力して、設定
~$ sudo systemctl restart smbd
samba の再起動を実行
~$ sudo reboot
Raspberry Pi を再起動
 
5.libcamera の導入
SSHで下記コマンドを実行
~$ wget -O install_pivariety_pkgs.sh https://github.com/ArduCAM/Arducam-Pivariety-V4L2-Driver/releases/download/install_script/install_pivariety_pkgs.sh
~$ chmod +x install_pivariety_pkgs.sh
~$ ./install_pivariety_pkgs.sh -p libcamera_dev
~$ ./install_pivariety_pkgs.sh -p libcamera_apps
~$ ./install_pivariety_pkgs.sh -p imx519_kernel_driver
~$ git clone https://github.com/ArduCAM/Arducam-Pivariety-V4L2-Driver.git
~$ sudo reboot
Raspberry Pi が再起動するので、再度 SSH 接続
Raspberry Pi 4 以外は、いろいろ呪文が必要。ドキュメントを参照
 
6.テスト撮影
SSHで下記コマンドを実行
~$ libcamera-still -t 5000 -o test.jpg --autofocus
samba が動作しているので
\\raspberrypi\pi\test.jpg ファイルを開いて、確認
4656 x 3496 画素の画像を取得
カメラモジュールから 撮影距離 70mmの画像
これより近いと、ピントが合わない
カメラモジュールから 撮影距離 150mmの画像
オートフォーカス機能が動作していることを確認
 
─以上─

Windows10 に Flutter を導入[その2]

2022年03月19日 18時04分33秒 | Windows

◆Windows10 に Flutter開発環境を構築する手順。[その1]からの続き


5.Cmdline-tools のセットアップ


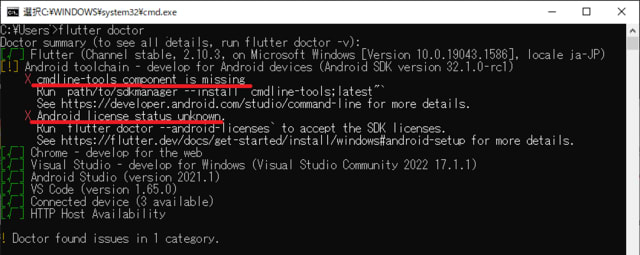
コマンドプロンプトで、flutter doctor を実行
cmdline-toolsAndroid ライセンスが見つからない

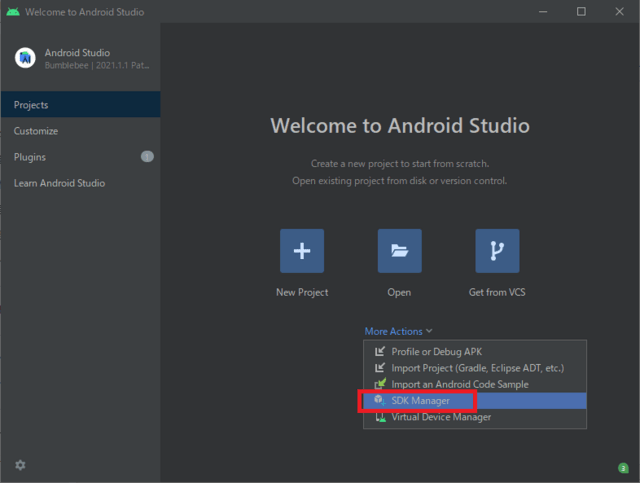
Android Studio → <SDK Manager>をクリック

SDK Tools タブを選択して、Android SDK Command-line Tools(Latest) をチェック
<OK>をクリック

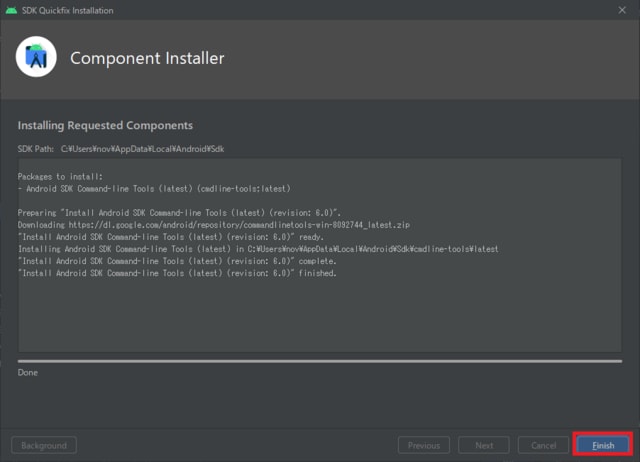
<Finish>をクリック
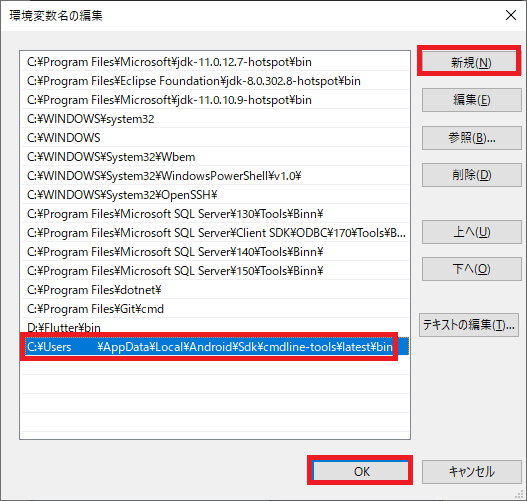
Windows10 の<システム> → <詳細設定> → <環境変数(N)> →
 Path を選択して、 <編集(I)>

<新規(N)> → C:\Users\ユーザー名\AppData\Local\Android\Sdk\cmdline-tools\latest\bin
を入力 → <OK> をクリック

6.android-licenses のセットアップ


コマンドプロンプトで、flutter doctor --android-licenses を実行
すべてのライセンス承認に<y>を入力
すべてのライセンスが承認されたことを確認

コマンドプロンプトで、flutter doctor を実行して、問題がないことを確認

7.Visual Studio Code にFlutter を導入

Visual Studo Code Ver.1.65.2 を起動

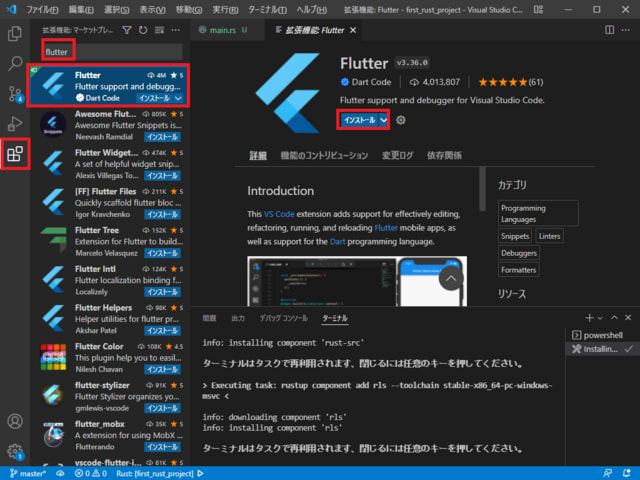
<拡張機能> → flutter を検索 → Flutter を選択
 → <インストール>をクリック

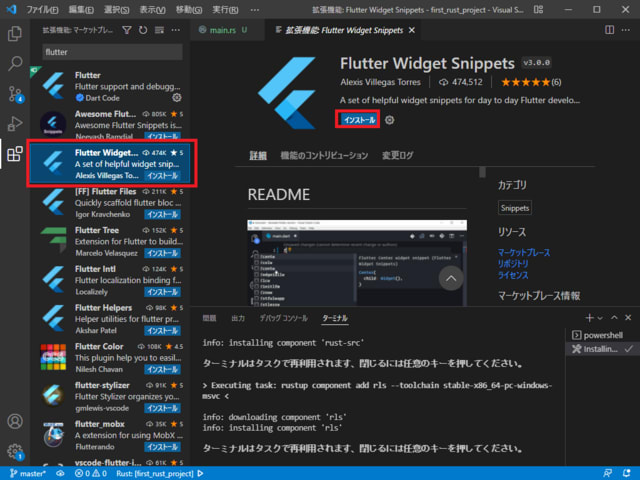
Flutter Widget Snippets を選択 → <インストール>をクリック

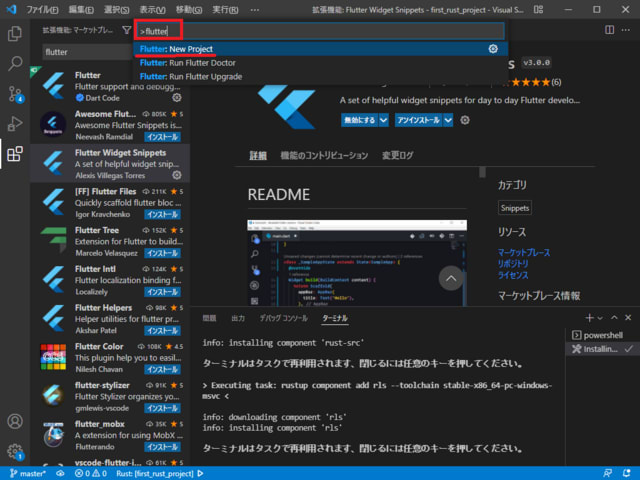
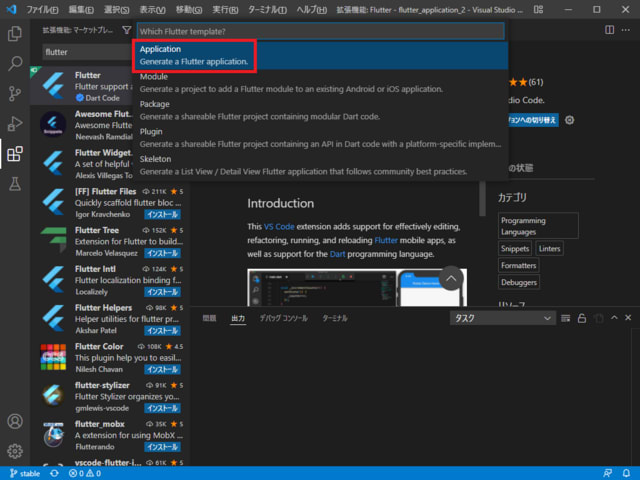
<F1>を入力 → flutter を入力 → Flutter: New Project を選択

Application を選択

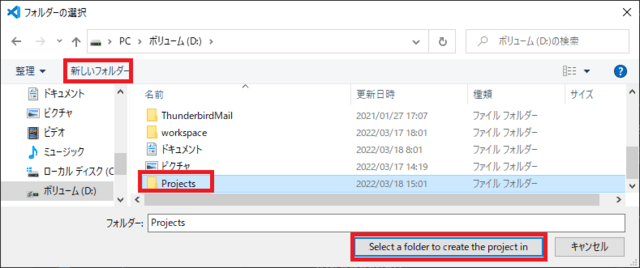
<新しいフォルダー> → Projects と入力
 → <Select a folder to create the project in >をクリック

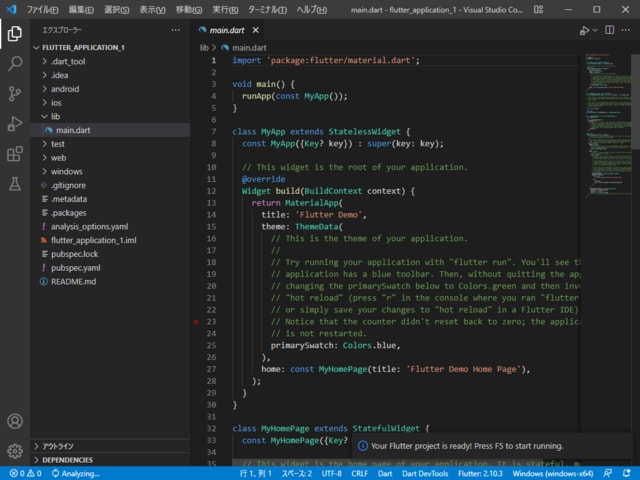
flutter_application_1 と入力

flutter のテンプレートプロジェクトが作成される
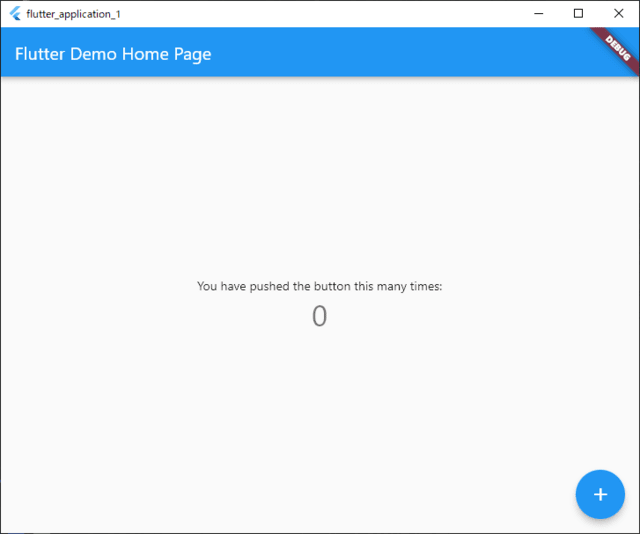
<F5>を入力

flutter のデモプログラムが起動する

─以上─


Windows10 に Flutter を導入[その1]

2022年03月18日 11時37分42秒 | Windows

◆Windows10 に Flutter開発環境を構築する手順

1.準備

●OS:Windows 10 Pro Version 21H1
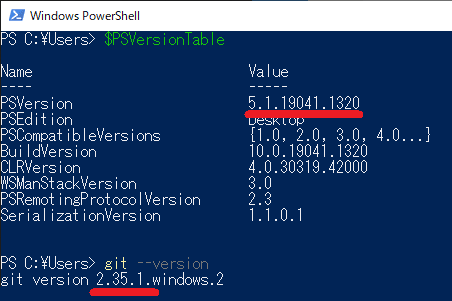
●Tool: Windows PowerShell 5.1.19041.1320
●Tool: Git for Windows 2.35.1

2.Flutter SDK をダウンロード

Windows PowerShell と Git for Windows のバージョンを確認

ここへアクセスして<flutter_windows_2.10.3-stable.zip>をクリック
zipファイルを解凍

3.パスの更新

解凍した Flutter フォルダをD:ドライブにコピー(使用するPC環境で変更する)
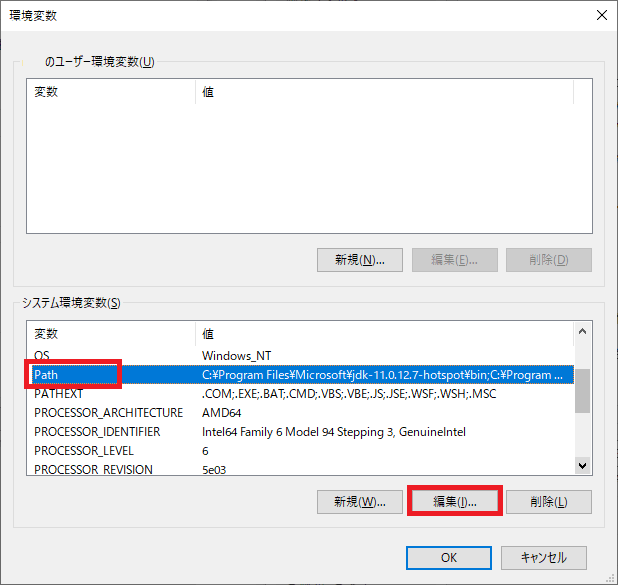
<システム> → <詳細設定> → <環境変数(N)>

Path を選択して、 <編集(I)>をクリック

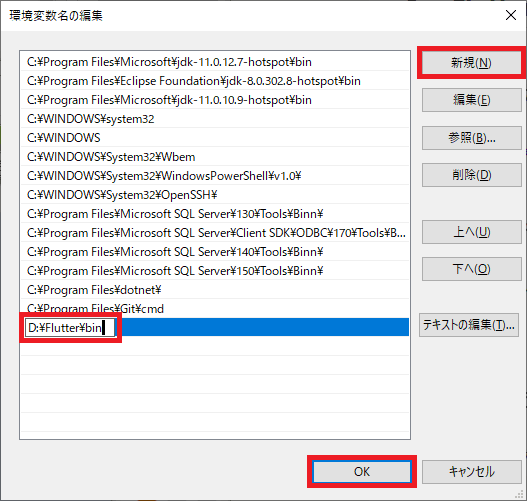
<新規(N)> → D:\flutter\bin を入力 → <OK> をクリック
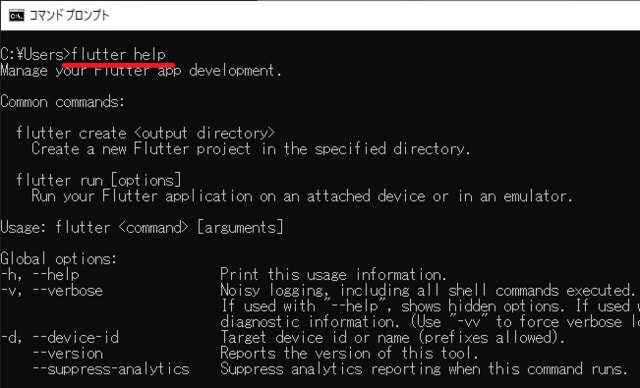
コマンドプロンプトで

flutter help を実行
Flutterにパスが通っているか確認

4.Android SDK のセットアップ


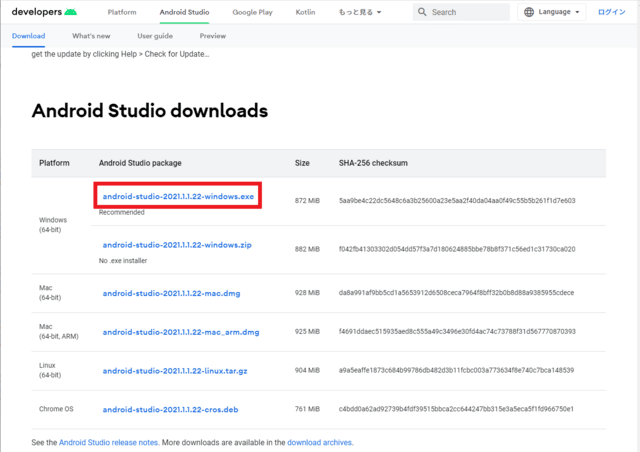
ここへアクセスして、<android-studio-2021.1.1.22-windows.exe>をダウンロード
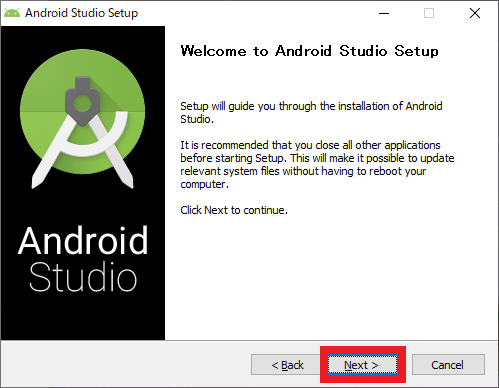
android-studio-2021.1.1.22-windows.exe を実行

<Next>をクリック

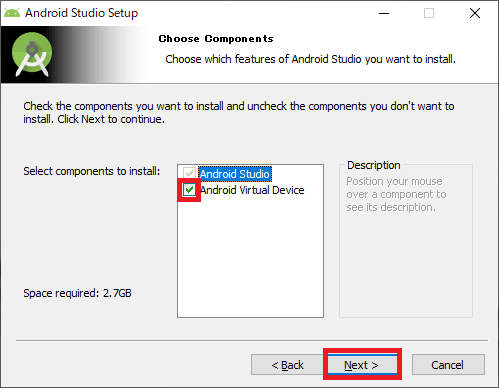
Android Virtual Device を選択して、<Next>をクリック

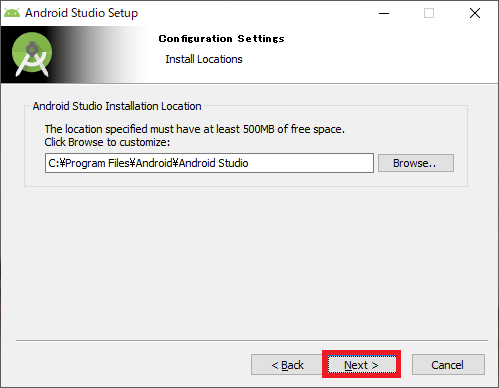
<Next>をクリック

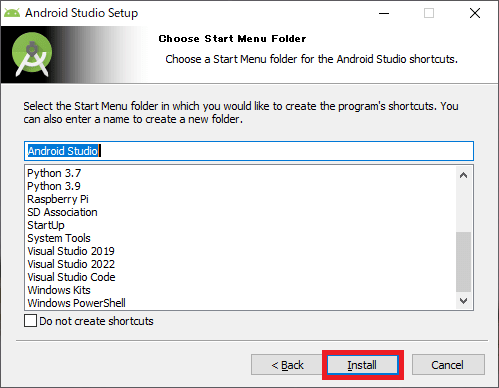
<Install>をクリック

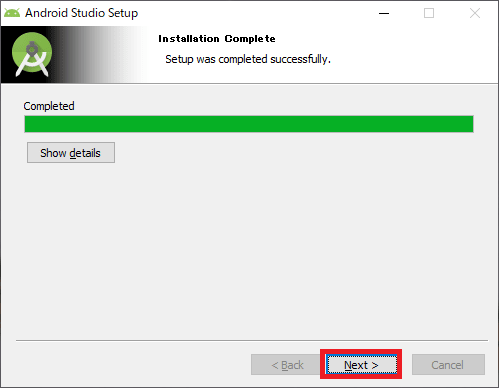
<Next>をクリック

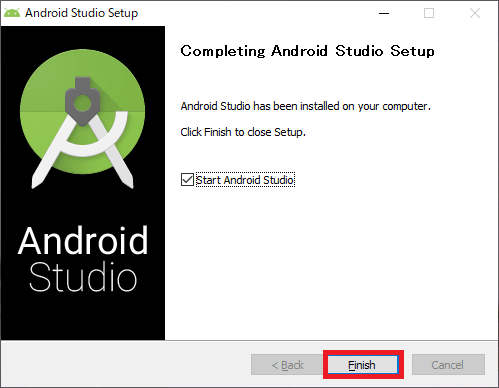
<Finish>をクリック

<Do not import setting>を選択して、<OK>をクリック

<Don't send>をクリック

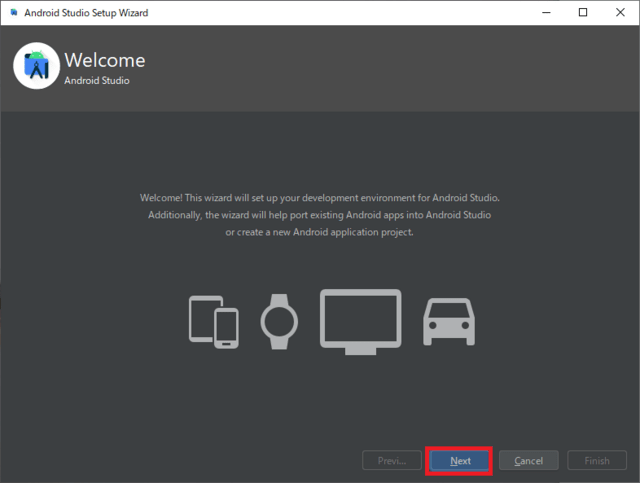
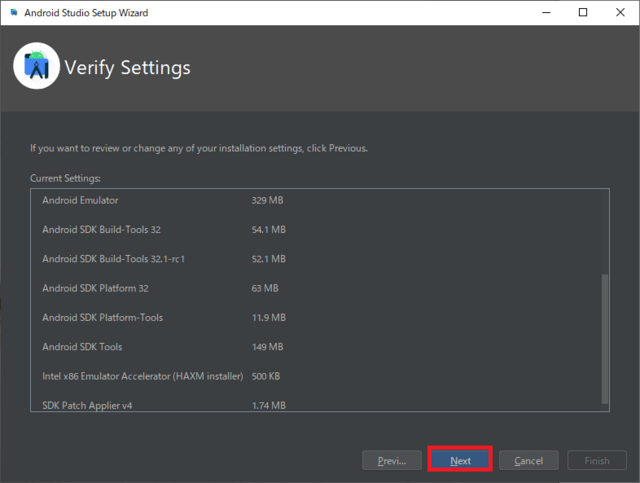
<Next>をクリック

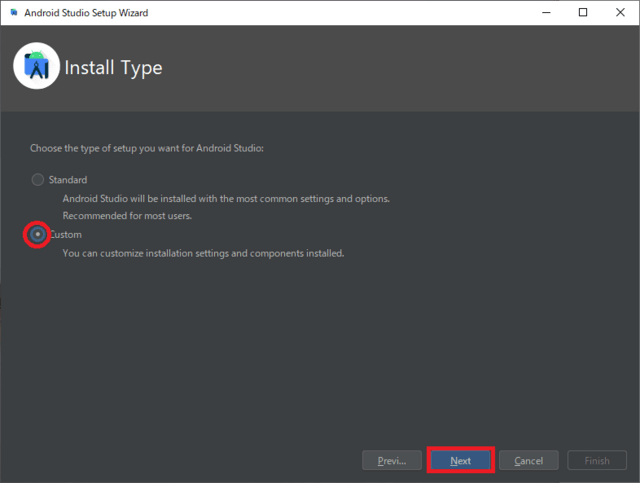
<Custom>を選択して、<Next>をクリック

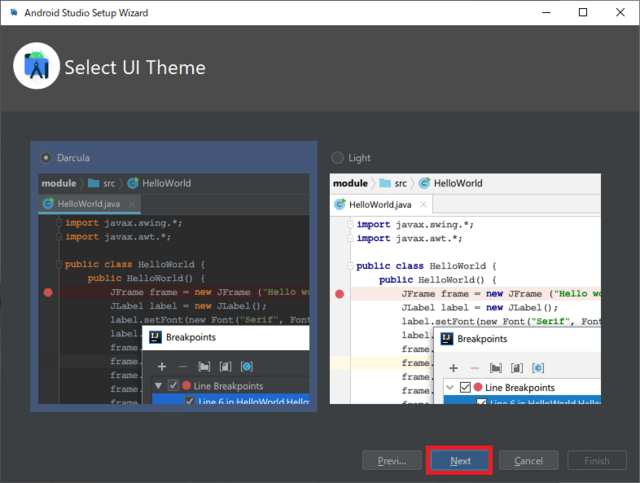
<Next>をクリック

<Next>をクリック

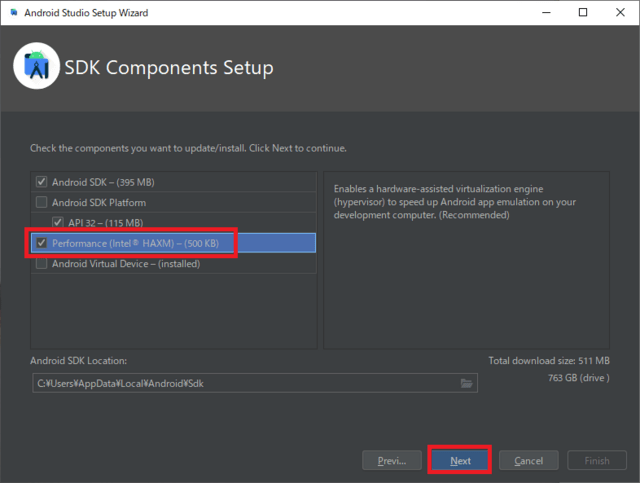
<Perfomance(Intel HAXM)>を選択して、<Next>をクリック

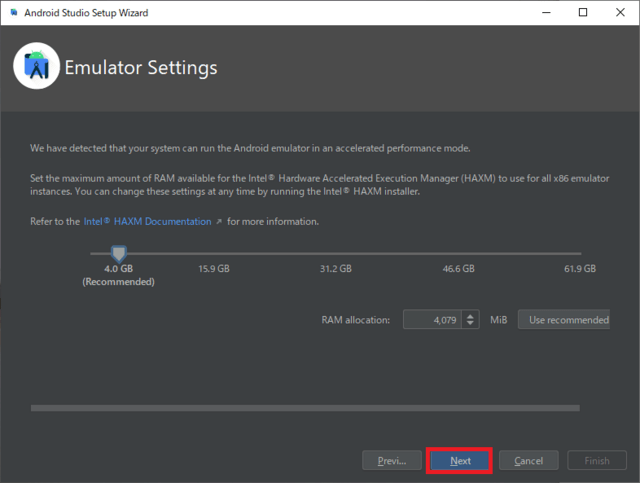
(使用するPC環境で変化する)<Next>をクリック

<Next>をクリック

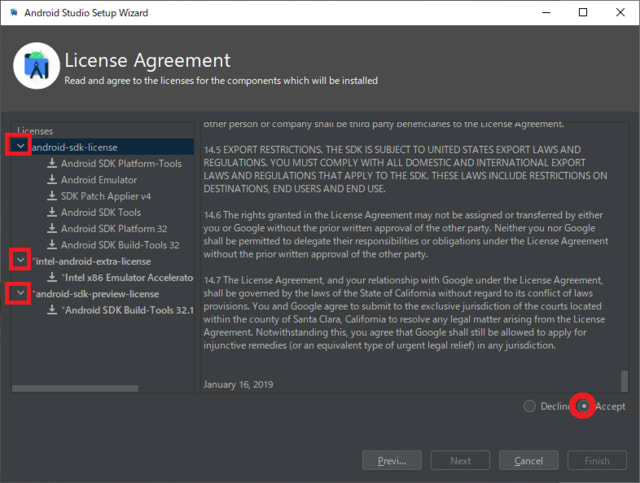
android-sdk-laicense で <Accept>を選択
intel-android-extra-license で <Accept>を選択
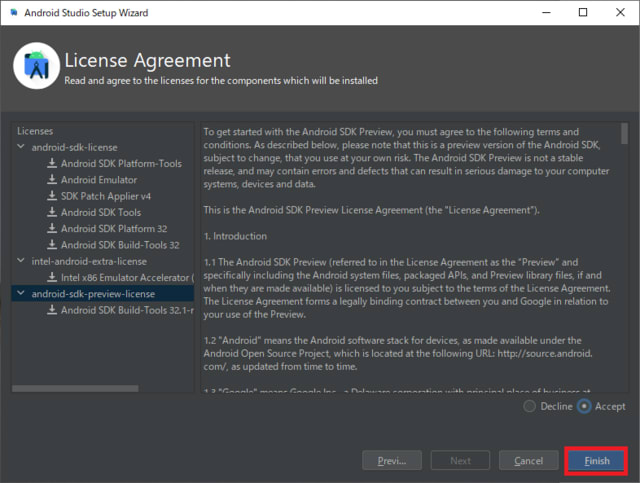
android-sdk-preview-license で <Accept>を選択

<Finish>をクリック

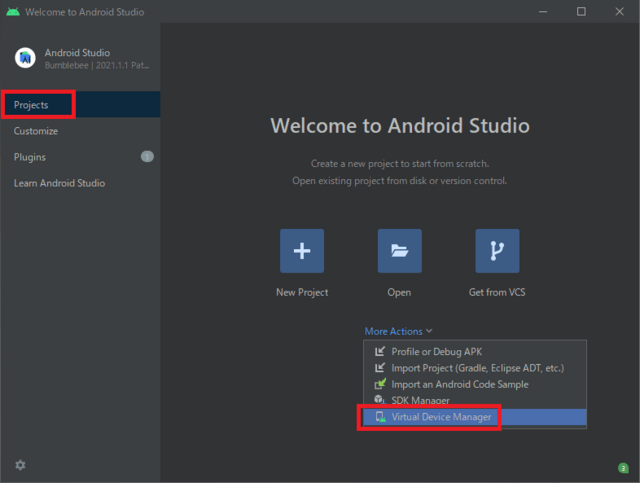
<Finish>をクリック

<Virtual Device Manager>をクリック

<OK>をクリック

<Finish>をクリック

<▶>をクリック

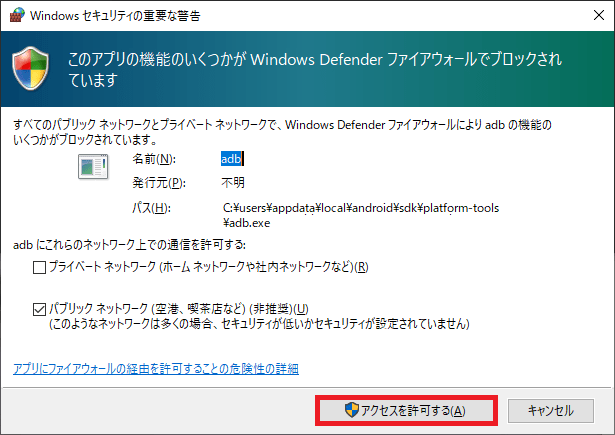
<アクセスを許可する(A)>をクリック

The emulator process for AVD Android_Emulator_30 has terminated.
エラーメッセージが表示されて、エミュレータが動作しない
【対応策】
<設定> → <アプリと機能>
Android Studio をアンインストール
C:\Users\ユーザー名\AppData\Local\Android ファオルダごとを削除
android-studio-2021.1.1.22-windows.exe を再実行

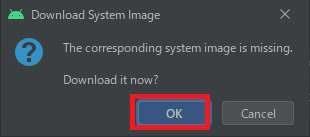
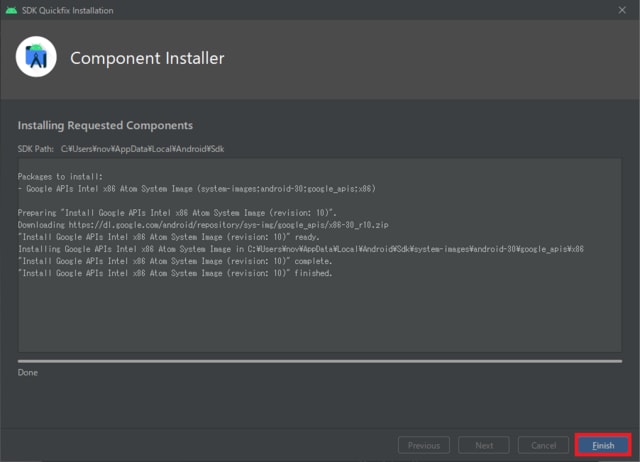
Android Studio → <Virtual Device Manager>をクリックするまで、再インストールを進める

<Create device>をクリック

<Pixel 4>を選択して、<Next>をクリック

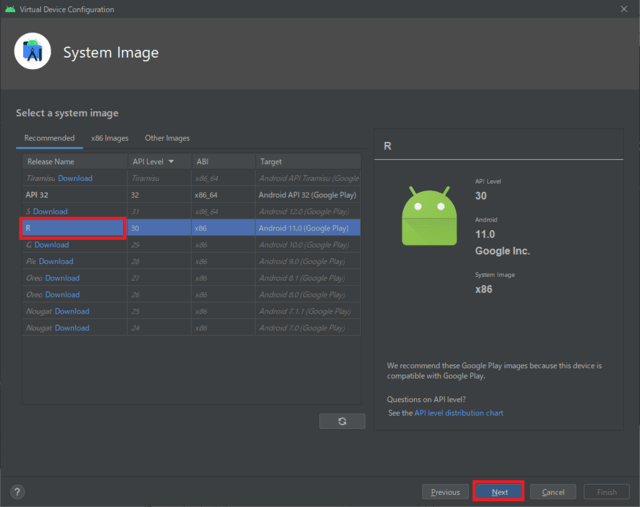
Release Name - <R>を選択して、<Next>をクリック

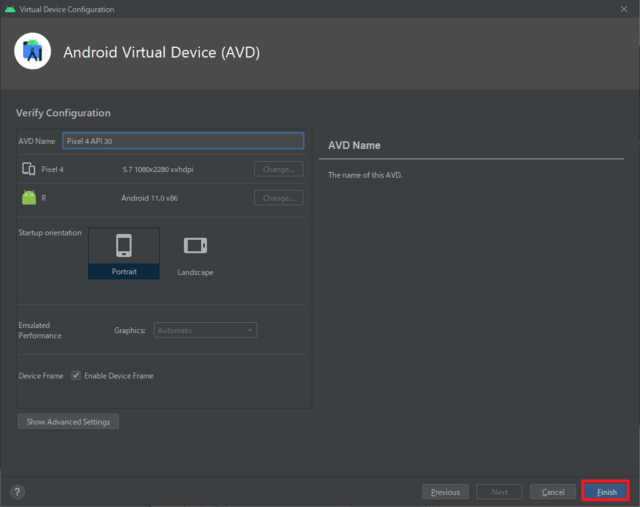
<Finish>をクリック

<▶>をクリック

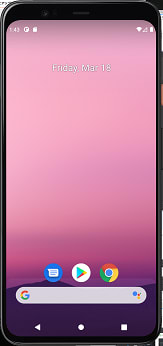
エミュレータが動作することを確認

─つづき─


NavigationViewの実装

2022年03月10日 09時53分59秒 | Windows

◆Windows UI (WinUI) ライブラリ ツールキットプロジェクトにナビゲーションビューを実装する手順


1.準備

●OS:Windows 10 Pro Version 21H1
●IDE:Visual Studio Community 2022 Version 17.1.1


2.新しいプロジェクトの作成

ここの記事を参考にプロジェクトを作成


3.ページの追加

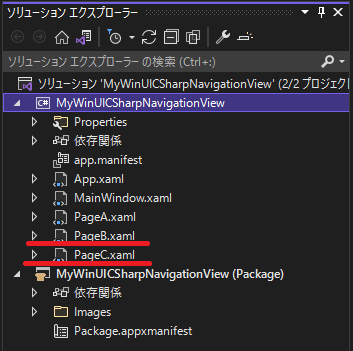
ここの記事を参考にページを追加


4.NavigationView.MenuItemsの記述

MainWindow.xamlのコード一部

        <NavigationView>
  ...
            <NavigationView.MenuItems>
                <NavigationViewItem
                    Tag="pageA"
                    Icon="Font"
                    Content="ページA"/>
                <NavigationViewItem
                    Tag="pageB"
                    Icon="Bold"
                    Content="ページB"/>
                <NavigationViewItem
                    Tag="pageC"
                    Icon="ContactInfo"
                    Content="ページC"/>
            </NavigationView.MenuItems>
  ... 
        </NavigationView>

ページA~ページCを記述

5.NavigationView_SelectionChanged の実装

MainWindow.xamlのコード一部

        <NavigationView
            x:Name="NavView"
            Header="ヘッダー"
            PaneTitle="パネルタイトル"
            PaneDisplayMode="Auto"
            SelectionChanged="NavigationView_SelectionChanged
            IsBackButtonVisible="Collapsed">
  ...
        </NavigationView>

MainWindow.xaml.csのコード一部

namespace MyWinUICSharpNavigationView
{
    public sealed partial class MainWindow : Window
    {
...
        private void NavigationView_SelectionChanged(NavigationView sender, NavigationViewSelectionChangedEventArgs args)
        {
            var selectedItem = (NavigationViewItem)args.SelectedItem;
            if ((string)selectedItem.Tag == "pageA") ContentFrame.Navigate(typeof(PageA));
            else if ((string)selectedItem.Tag == "pageB") ContentFrame.Navigate(typeof(PageB));
            else if ((string)selectedItem.Tag == "pageC") ContentFrame.Navigate(typeof(PageC));
        }
    }
}

6.アダプティブ動作の実装

MainWindow.xamlのコード一部

    <Grid>
...
        <VisualStateManager.VisualStateGroups>
            <VisualStateGroup>
                <VisualState>
                    <VisualState.StateTriggers>
                        <AdaptiveTrigger
                        MinWindowWidth="{x:Bind NavViewCompactModeThresholdWidth}"/>
                    </VisualState.StateTriggers>
                    <VisualState.Setters>
                        <!-- Remove the next 3 lines for left-only navigation. -->
                        <Setter Target="NavView.PaneDisplayMode" Value="Top"/>
                        <Setter Target="NavViewSearchBox.Width" Value="200"/>
                        <Setter Target="MainPagesHeader.Visibility" Value="Collapsed"/>
                        <!-- Leave the next line for left-only navigation. -->
                        <Setter Target="ContentFrame.Padding" Value="24,0,24,24"/>
                    </VisualState.Setters>
                </VisualState>
            </VisualStateGroup>
        </VisualStateManager.VisualStateGroups>
    </Grid>

MainWindow.xaml.csのコード一部

namespace MyWinUICSharpNavigationView
{
    public sealed partial class MainWindow : Window
    {
        private double NavViewCompactModeThresholdWidth { get { return NavView.CompactModeThresholdWidth; } }

...

    }
}

7.NavigationViewの動作確認

構成:Debug 、プラットフォーム:x64 を選択

ソリューションのビルド を実行

デバッグの開始<F5>を実行

起動時の状態

メニューからページAが選択された状態

メニューからページBが選択された状態

メニューからページCが選択された状態

8.アダプティブ動作確認

NavigationView の既定では、PaneDisplayMode は Auto に設定されている

マウスドラッグでウィンドウ幅を狭くしていくと
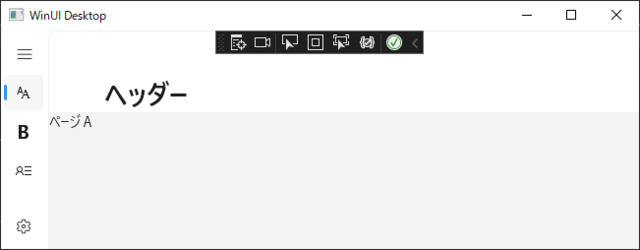
PaneDisplayMode=LeftCompact な状態

さらにウィンドウ幅を狭くする
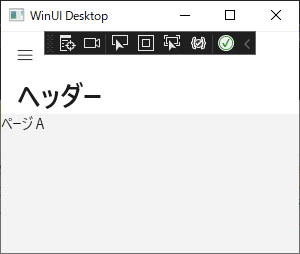
PaneDisplayMode=LeftMinimal な状態になる

9.全ソースコード

MainWindow.xamlのコード

<Window
    x:Class="MyWinUICSharpNavigationView.MainWindow"
    xmlns="http://schemas.microsoft.com/winfx/2006/xaml/presentation"
    xmlns:x="http://schemas.microsoft.com/winfx/2006/xaml"
    xmlns:local="using:MyWinUICSharpNavigationView"
    xmlns:d="http://schemas.microsoft.com/expression/blend/2008"
    xmlns:mc="http://schemas.openxmlformats.org/markup-compatibility/2006"
    mc:Ignorable="d">
    <Grid>
        <NavigationView 
            x:Name="NavView"
            Header="ヘッダー"
            PaneTitle="パネルタイトル"
            PaneDisplayMode="Auto"
            SelectionChanged="NavigationView_SelectionChanged" 
            IsBackButtonVisible="Collapsed">
            <NavigationView.MenuItems>
                <NavigationViewItem
                    Tag="pageA"
                    Icon="Font"
                    Content="ページA"/>
                <NavigationViewItem
                    Tag="pageB"
                    Icon="Bold"
                    Content="ページB"/>
                <NavigationViewItem
                    Tag="pageC"
                    Icon="ContactInfo"
                    Content="ページC"/>
            </NavigationView.MenuItems>
            <Frame x:Name="ContentFrame"/>
        </NavigationView>
        <VisualStateManager.VisualStateGroups>
            <VisualStateGroup>
                <VisualState>
                    <VisualState.StateTriggers>
                        <AdaptiveTrigger
                        MinWindowWidth="{x:Bind NavViewCompactModeThresholdWidth}"/>
                    </VisualState.StateTriggers>
                    <VisualState.Setters>
                        <!-- Remove the next 3 lines for left-only navigation. -->
                        <Setter Target="NavView.PaneDisplayMode" Value="Top"/>
                        <Setter Target="NavViewSearchBox.Width" Value="200"/>
                        <Setter Target="MainPagesHeader.Visibility" Value="Collapsed"/>
                        <!-- Leave the next line for left-only navigation. -->
                        <Setter Target="ContentFrame.Padding" Value="24,0,24,24"/>
                    </VisualState.Setters>
                </VisualState>
            </VisualStateGroup>
        </VisualStateManager.VisualStateGroups>
    </Grid>
</Window>

MainWindow.xaml.csのコード

using Microsoft.UI.Xaml;
using Microsoft.UI.Xaml.Controls;

// To learn more about WinUI, the WinUI project structure,
// and more about our project templates, see: http://aka.ms/winui-project-info.

namespace MyWinUICSharpNavigationView
{
    ///
    /// An empty window that can be used on its own or navigated to within a Frame.
    ///
    public sealed partial class MainWindow : Window
    {
        private double NavViewCompactModeThresholdWidth { get { return NavView.CompactModeThresholdWidth; } }
        public MainWindow()
        {
            this.InitializeComponent();
        }
        private void NavigationView_SelectionChanged(NavigationView sender, NavigationViewSelectionChangedEventArgs args)
        {
            var selectedItem = (NavigationViewItem)args.SelectedItem;
            if ((string)selectedItem.Tag == "pageA") ContentFrame.Navigate(typeof(PageA));
            else if ((string)selectedItem.Tag == "pageB") ContentFrame.Navigate(typeof(PageB));
            else if ((string)selectedItem.Tag == "pageC") ContentFrame.Navigate(typeof(PageC));
        }
    }
}

10.問題点

2022年3月10日現在

■ Windows App SDK にはデザイナーが無い

■ Windows10(バージョン 1809以降), Windows11でしか動作しない

■ リリースサイクルは早い。ここのロードマップを確認する必要がある

─以上─


NavigationViewのページ追加

2022年03月09日 11時42分45秒 | Windows

◆Windows UI (WinUI) ライブラリ ツールキットプロジェクトのナビゲーションビューでのページ追加手順


1.準備

●OS:Windows 10 Pro Version 21H1
●IDE:Visual Studio Community 2022 Version 17.1.1


2.新しいプロジェクトの作成

ここの記事を参考にプロジェクトを作成


3.ページ追加

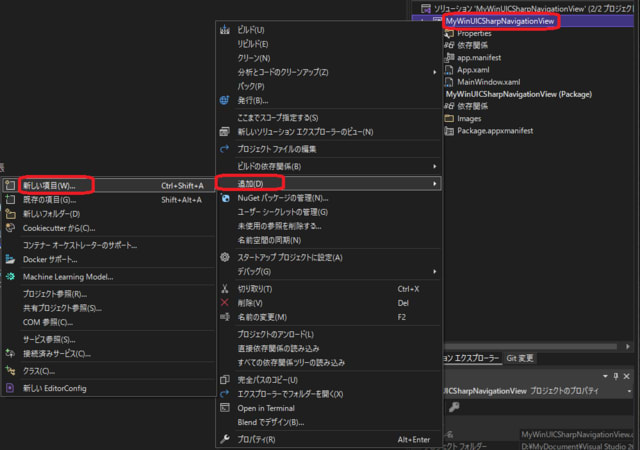
ソリューションエクスプローラーのプロジェクトを右クリック

<追加(A)> → <新しい項目(W)> を選択

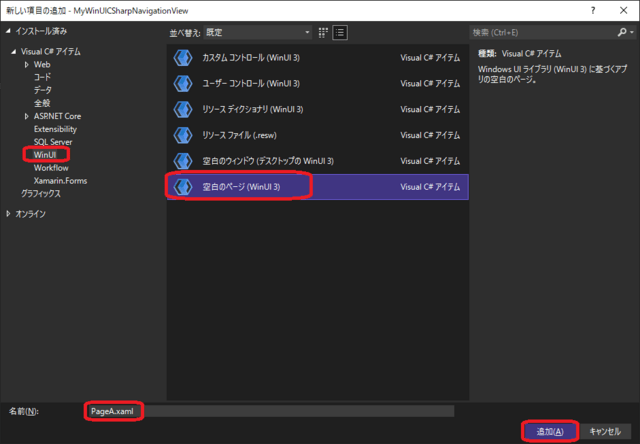
<Visual C#アイテム> → <WinUI> → <空白のページ(WinUI)> → <名前(N)>

PageA.xaml を入力

<追加(A)> をクリック


4.PageA.xaml のコード

<Page
    x:Class="MyWinUICSharpNavigationView.PageA"
    xmlns="http://schemas.microsoft.com/winfx/2006/xaml/presentation"
    xmlns:x="http://schemas.microsoft.com/winfx/2006/xaml"
    xmlns:local="using:MyWinUICSharpNavigationView"
    xmlns:d="http://schemas.microsoft.com/expression/blend/2008"
    xmlns:mc="http://schemas.openxmlformats.org/markup-compatibility/2006"
    mc:Ignorable="d"
    Background="{ThemeResource ApplicationPageBackgroundThemeBrush}">

   <Grid>
       <TextBlock>
            ページA
        </TextBlock>
    </Grid>
</Page>

5.さらにページ追加

PageA.xaml同様に、PageB.xaml, PageC.xaml を追加する

─以上─