@media (max-width: 1200px) { }
body .novashare-buttons.novashare-inline .novashare-button-icon { width: 100%; }
Share this Article:
TwitterFacebookPinterestPrint
body .novashare-pinterest-image{display:block;position:relative;margin:0;padding:0;line-height:0}figure>.novashare-pinterest-image{height:100%;width:100%}body .wp-block-image .novashare-pinterest-image+figcaption{display:block}body .novashare-pinterest-image-button{opacity:0;transition:.3s;position:absolute;height:18px;max-height:18px;width:auto!important;padding:10px;cursor:pointer;background:#c92228;color:#fff;font-size:16px;line-height:18px;z-index:1;text-decoration:none;box-sizing:content-box;top:50%;left:50%;transform:translate(-50%,-50%)}body .novashare-pinterest-image-button:hover{background:#b51f24}body .novashare-pinterest-image-button:visited{color:#fff}body .novashare-pinterest-image:hover .novashare-pinterest-image-button{opacity:1}body .novashare-pinterest-image-button svg{width:18px;height:18px;vertical-align:middle;pointer-events:none}
Brands or designers produce different types of hats to ensure there’s something for every person, season, and occasion. Hats are multi-functional accessories you need to have in your closet. Learn more about each of them to pick the right kinds that you can add to your arsenal.

PinTypes of Hats
Contents
18 Types of Hats to ConsiderTypes of Hats With Unisex DesignsMore Clothing Types1. Baseball2. Bucket3. Vizor4. Boater5. Bowler6. Beanie7. Deerstalker8. Trapper9. Cowboy10. Beret11. Newsboy12. Fedora13. Panama14. HomburgTypes of Hats With Feminine Designs15. Fascinator16. Cocktail17. Cloche18. PillboxHave Fun With Various Types of Hats
18 Types of Hats to Consider
With a good selection of hats in the market today, finding a style that will work best for your needs, style, and lifestyle can be confusing and time-consuming. We’ve listed some of the most common hats and divided them into two categories:
Types of Hats With Unisexual DesignsTypes of Hats With Feminine Designs
Types of Hats With Unisex Designs
14 types of hats that both men and women can wear are as follows:
BaseballBucketVizorBoaterBowlerBeanieDeerstalkerTrapperCowboyBeretNewsboyFedoraPanamaHomburg
More Clothing Types
Types of ScarvesTypes of SweatersTypes of DressesDress SilhouettesTypes of SkirtsTypes of TopsTypes of SleevesTypes of NecklinesTypes of ShortsTypes of JeansTypes of PocketsTypes of SocksTypes of UnderwearTypes of CorsetsTypes of VeilsTypes of Bras
1. Baseball
Worn since the 17th century, the baseball hat has a stiff, mid-sized bill in front, a small button on top, and a round-shaped crown. It’s made from different materials, making them versatile and easy to dress down and up.
Although named baseball, it isn’t just meant for attending sports events or playing sports, but the hat is also excellent for when you’re jogging, walking, running errands, and running, just to name a few. These hats are durable and provide sufficient protection for the head and face. Thus, they have become a staple in the uniform of many professions, such as the US Coast Guard, US Navy, and police, to name a few.
2. Bucket
The US Military initially wore bucket or Boonie types of hats during the Vietnam War. Nowadays, they’re most famous for fishing and farming because they offer great rain and sun protection. The hat has a mid-sized, downward-sloping brim that goes around the head, so you’re also protected from multiple elements. Likewise, it often comes with a chin strap to keep it in place even when it’s windy. The classic bucket hat also offers a high level of comfort and easy packability, handy for travelers and adventurers.


PinTypes of Hats - Baseball and Bucket
3. Vizor
These types of hats stay true to their name: they protect your eyes (and face) from the UV rays, thanks to the mid-sized brim. However, they won’t cover the top of your head since they’re crown-free. The advantage of this design is that the hat facilitates rapid heat loss from the top of your head, perfect for tennis, other cardio sports, and a walk or visit to the beach. The vizor hat’s strap encircles your head, and it usually uses Velcro to secure the hat to your head comfortably. You can adjust it according to your desired fit.
4. Boater
This type of hat was famous from the 1800s to the 1900s, worn by men during sailing events, boating, and when they’re transitioning from winter hats to summer hats. Made from straw, it has a timeless, unisexual, and versatile design. Both men and women can wear it as protection for the warm weather and as accessories for semi-formal and formal occasions. Some schools in South Africa, Australia, New Zealand, and the UK also use these types of hats as part of their students’ school uniforms.
The boater or skimmer hat has a flat top, small or mid-sized brim, and a two-tone ribbon around its short crown (women hats), giving it a European appeal. It’s also the kind of hat that you see Gondoliers in the Venice canals wear. The only difference is that what they wear has a wider and thinner brim, and its ribbon has two tails extending off its back.

PinTypes of Hats - Visor and Boater
5. Bowler
The bowler hat, popularly known as the derby hat in the US, was manufactured in the 1800s to help resolve top hats falling off while riding horses. Thanks to the hard felt material used, it`s also durable to ensure it can endure rough activities. It has a round-shaped crown and a short brim with an approximate size of two inches. This classic hat is also a popular fashion item, especially since it’s one of Charlie Chaplin’s signatures.
6. Beanie
Assumed to originate from the slang term for the head, “bean”, the beanie is a type of hat meant to provide warmth during the winter season. It’s available in various styles and made of different thick materials. The hat also usually has decorative weaves. Some beanie types of hats have balls or pom-poms on top, while others don’t. Likewise, you’ll find beanies with either short or long ear flaps for added warmth, while others don’t have any.

PinTypes of Hats - Bowler and Beanie
7. Deerstalker
A hat stereotyped for detectives because of its strong association with Sherlock Holmes, the deerstalker was actually initially designed for, well, deer stalking. That said, it’s also a famous hunting gear. From 1870 to 1890, though, it became a fashionable item for men to match their sports clothes. Nowadays, you’ll find unisexual deerstalker types of hats and those specifically designed for women, having ribbons, furs, and more.
8. Trapper
Initially worn by trappers in the 1600s, these hats are like giant beanies with longer ear flaps and thick covering for the forehead. They’re also popular pieces of hunting headgear during the cold season and for ice fishing. Today, some people wear them as fashionable pieces.

PinTypes of Hats - Deerstalker and Trapper
9. Cowboy
Among the most popular and easily recognizable types of hats, the Western, cowboy, or cowgirl hat has a wide brim for enhanced protection from dust and other elements. It’s perfect for when you are on the ranch, farm, and riding a horse. You’ll find waterproof varieties meant for rainy days and lightweight ones made of straw designed for the hot summer days.
Shape-wise, the hat has turned-up sides, but some designers keep them flat. The crown is also taller than other hats and can be pinched, teardrop or C shaped, or dented in the center. Not only did it become popular in the mid-1900s, thanks to Western movies, but many also embraced it as a fashionable item. That is why you’ll find cowboy or cowgirl hats with ribbons or buckles. It’s also already available in various colors, instead of the classic beige, brown, and black.
10. Beret
Another classic, the beret, was first introduced in Europe in the 17th century and is commonly worn by artists and farmers. During the 20th century, it became a political statement and then a part of pop culture. Its timeless design includes a flat, round, soft crown with poofy edges, thanks to the excess material. Some designers add an “apple stem” on top for additional style. Material-wise, these types of hats are usually made of acrylic, cotton, and wool. Beret hats provide excellent insulation, both cold and hot. You can wear them either hanging on one side of your head or the center.

PinTypes of Hats - Cowboy and Beret
11. Newsboy
Also known as ascot, ivy, duckbill, and paperboy, the newsboy hat was initially designed because of a law enacted in 1571. That is, males ages six and above were required to wear flat hats made from wool. The hat rose to popularity in the late 1800s. Then, in the early 1900s, it became a famous hat for newsboys, while in others, it was used for sport shooting and hunting. Come the 2000s, women started wearing the newsboy hat as a fashionable accessory. This low-profile classic hat is perfect for any occasion and climate, depending on the material used in its construction. It has six to eight quarter panels, an extended crown, a short brim, and a button on top. You’ll also find ones that have snaps on their brim.
12. Fedora
A type of hat named after a stage play, the fedora became an iconic symbol of Frank Sinatra. Women activists also started wearing this hat in 1924 and they became popular fashionable types of hats for men, thanks to Britain’s Prince Edward. Some of the most popular music artists, like Humphrey Bogart, Michael Jackson, Justin Timberlake, and Britney Spears, also wore this hat as part of their outfits. Hence, you’ll find fedora hats in many stylish varieties: stingy brim, snap brim, trilby, and pork pies, as well as made from several materials that suit several climates. The classic design, though, has a small brim turning up at the back and is made of wool or felt. You can also turn the hat’s front up or down.

PinTypes of Hats - Newsboy and Fedora
13. Panama
Often confused with the fedora, Panama hats originated in Ecuador but were made popular by miners who wore them as they traveled through Panama and during the Panama Canal’s construction. They have a light-colored, thick weave made of toquilla palm straw, perfect for a warm climate. These types of hats also usually have mid-sized brims for enhanced sun protection; thus, they’re popularly worn in tropical countries.
14. Homburg
Another hat made popular due to a movie and artist, the homburg is also known as the godfather or gangster hat. It is classy with an oval shape, a deeply dented crown center, curved sides, and a turned-up lip. You can match this with your casual, semi-formal, and formal attires.

PinTypes of Hats - Panama and Homburg
Types of Hats With Feminine Designs
The four best hats with feminine designs are:
FascinatorCocktailClochePillbox
15. Fascinator
Hats are usually are part of the dress code in European weddings, Christenings, and other formal occasions. Fascinators are one of the most common headpieces, but they do away with the classic hat design, as they’re brimless and crown-free. They’re usually headbands or clips ornamented with beads, flowers, feathers, and more.
16. Cocktail
Believed by some as a precursor to fascinator types of hats, cocktails are also great headpieces that can perfectly match your dresses and long gowns. They also have ornaments, but the difference is that cocktail hats have well-defined bases. They also often come with netting or veil to cover the face or eyes.

PinTypes of Hats - Fascinator and Cocktail
17. Cloche
A French term that means bell, these hats resemble large bells and perfectly frame the wearer’s face. They also provide excellent protection from the cold, sun, rain, and wind as they’re commonly worn low, allowing their short brims to cover the eyes. Women in the early 20th century popularly wore this hat. You’ll find these fashionable types of hats decorated with ribbons, large knitted or crocheted flowers, and more to add to its feminine vibe.
18. Pillbox
Last on our list is a simple but elegant and stylish hat introduced in 1930 and adopted by politicians’ wives and Royal family members. It even became an iconic symbol of Jacklyn Kennedy. It’s a brimless hat with straight, upright sides and a flat crown. It can come as plain types of hats made of solid colors, but you can also find ones with pearls, feathers, nets, veils, and other adornments or embellishments.

PinTypes of Hats - Cloche and Pillbox
Have Fun With Various Types of Hats
With the many hat styles available nowadays, having a few pieces in your closet won’t do any harm. That is most especially since they won’t just upgrade your style but also protect your head, eyes, and face, and, of course, some types of hats will provide you warmth. Just make sure you also consider the material used in their construction and ornaments (if any) added.
5/5 - (22 votes)


 PinHow to Pin Fabric


 PinHow to Laminate Fabric


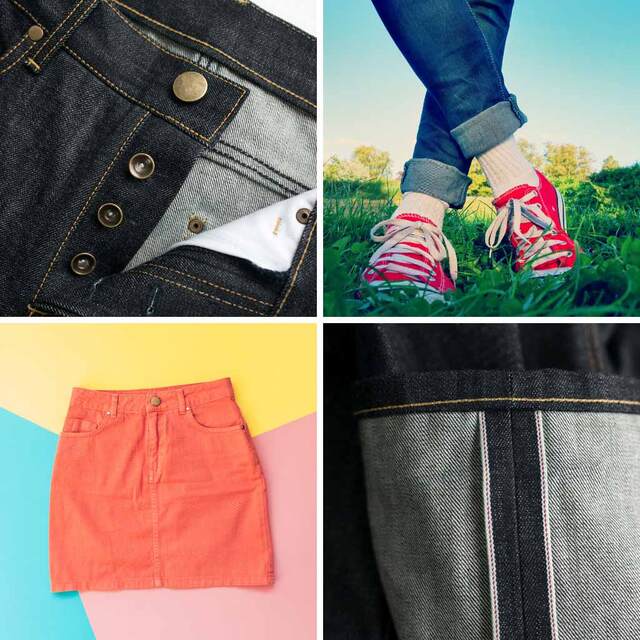
 PinTypes of Denim
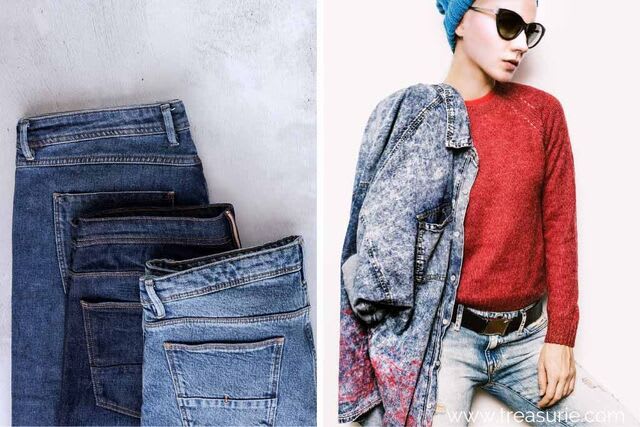


 PinHow to Do Chain Stitch Embroidery Tutorial


