(環境)
RPi: RaspberryPi4 4GB
OS: 2024-07-04-raspios-bookworm-armhf-full.img.xz
その他: ネットワーク設定済み
(準備)
システムのアップデート
sudo apt update;sudo apt -y upgrade
(プログラムのダウンロード&インストール)
参考情報
OpenPLCサイト、ソースコード
https://autonomylogic.com/
https://github.com/thiagoralves/
公式インストール手順
https://autonomylogic.com/docs/installing-openplc-runtime-on-linux-systems/
適当なディレクトリで下記のコマンドを実行
sudo apt install git
git clone https://github.com/thiagoralves/OpenPLC_v3.git
cd OpenPLC_v3
./install.sh rpi
(初期設定)
ウェブブラウザでログイン(localhost:8080 または RPiのIPアドレス:8080)
初期設定はユーザーネーム、パスワードはともに openplc

ハードウェアの設定
ダッシュボードで Hardware を選択
ドロップダウンリストで [Raspberry Pi] を選択

(動作確認)
Lチカで動作確認する
ダッシュボードで Programs を選択
[Brows] を押し "L_chika_rpi.st"ファイルを選択

[Brows]の横にアップロードしたファイルが表示されているのを確認
[Upload Program] を押す

Name欄に適当な名前を入力(名前無しではアップロードできない)
画面下の [Upload Program] を押す

[Upload Program] を押したあとプログラムがコンパイルされる
"Compilation finshed successfully !"の表示を確認する
[Go to Dashboard]を押す

画面下 [Start PLC] でPLC実行

実行状態を確認
Statusが Stopped → Running に変化する

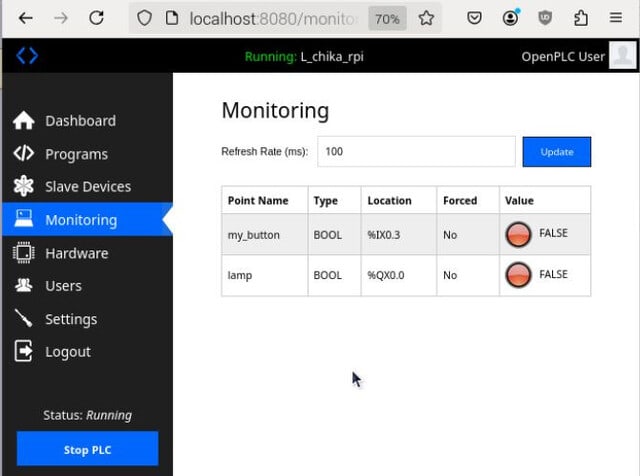
ダッシュボードで Monitoring を選択するとハードウェアの状態が確認できる

(やり残し)
Lチカプログラム、配線図の投稿
RPi4へのEditorプログラムのインストール手順


※コメント投稿者のブログIDはブログ作成者のみに通知されます