gooブログはじめました!

写真付きで日記や趣味を書くならgooブログ

How to Make Spandex Straps for Leotards & Swimwear

2022-10-12 14:37:30 | sewing

@media (max-width: 1200px) { }

body .novashare-buttons.novashare-inline .novashare-button-icon { width: 100%; }

Share this Article:

TwitterFacebookPinterestPrint

body .novashare-pinterest-image{display:block;position:relative;margin:0;padding:0;line-height:0}figure>.novashare-pinterest-image{height:100%;width:100%}body .wp-block-image .novashare-pinterest-image+figcaption{display:block}body .novashare-pinterest-image-button{opacity:0;transition:.3s;position:absolute;height:18px;max-height:18px;width:auto!important;padding:10px;cursor:pointer;background:#c92228;color:#fff;font-size:16px;line-height:18px;z-index:1;text-decoration:none;box-sizing:content-box;top:50%;left:50%;transform:translate(-50%,-50%)}body .novashare-pinterest-image-button:hover{background:#b51f24}body .novashare-pinterest-image-button:visited{color:#fff}body .novashare-pinterest-image:hover .novashare-pinterest-image-button{opacity:1}body .novashare-pinterest-image-button svg{width:18px;height:18px;vertical-align:middle;pointer-events:none}

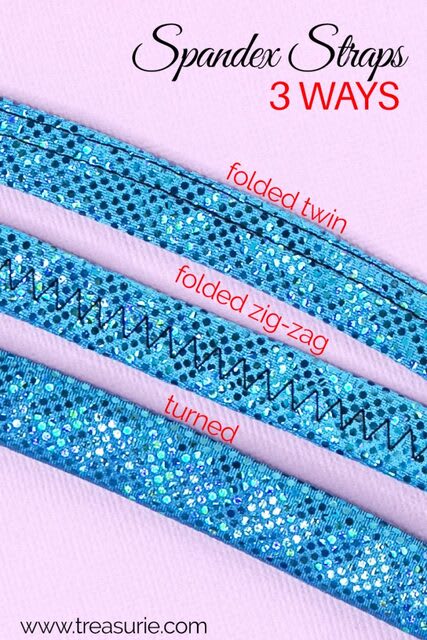
If you are learning how to make a leotard or swimwear, sooner or later you are going to want to sew some strappy styles. Here I will show you how to make Spandex Straps in 3 different ways to get the exact look you are after.

how to sew spandex strapsPinSpandex Straps

Once you are confident in how to sew spandex straps you can add single and double straps, cross over your straps and make all kinds of custom leotards and swimwear. Look at your local dance school or skating arena and you will find all kinds of unique strappy designs as inspiration.

How to make spandex strapsHow to make spandex strapsPin

Contents

How to Make Spandex StrapsCutting Binding for spandex strapsSewing Spandex StrapsMethod 1 - Wrap Around Zig-ZagMethod 2 - Folded Spandex Strap with Twin NeedleMethod 3 - How to Make Spandex Straps by TurningHow to Make Spandex Straps - In ConclusionFurther Reading on How to Make a leotard

How to Make Spandex Straps

In all my photos I used a contrast thread so you could easily see my stitching. If you use a matching thread your stitching will be almost invisible and look much more professional.

Don`t forget your stretch needle to prevent skipped stitches and a teflon foot to prevent the fabric from feeding through the machine unevenly.

Further Reading:How to sew Lycra and Spandex with a regular machine.

These straps all use ⅜" (1cm) swimwear elastic. Swimwear elastic is tightly woven and won`t rot with sweat or chlorine. Never use cheap elastic for your leotards or swimwear. All your hard work can be ruined by stretched out elastic that won`t hold its shape.

Further Reading:How to sew elastic in leotards

Cutting Binding for spandex straps

Cut a piece of Spandex 1 ½ inches (3.8cm) in width and the length indicated in the pattern.

If you don`t have a pattern to follow for the strap length, simply use your tape measure to work out roughly what you will need and then add a couple of inches for safety. It is easy to cut off any excess strap at the end.

Sewing Spandex Straps

Method 1 - Wrap Around Zig-Zag

This is the easiest and fastest method for making spandex straps and is great for beginners.

Step 1 - Cut the Fabric and Elastic

Cut the ⅜ inch (1cm) wide elastic 95% of the length of the binding (the maths: length x 0.95). This means that your elastic will be stretched out slightly giving better tension in your final strap.

Step 2 - Zig-Zag

Using a wide zig-zag, stitch the elastic along the wrong side of the binding stretching it slightly to fit the length of the binding.

If you have a really long strap you should mark the center of the elastic and the center of the binding. Pin the center and ends and stretch the in-between sections to get a nice even tension. The zig-zag will be right on the edge and go off the fabric. Try a width of 6.0 and a length of 3.0.

You could use a serger but I generally find the results are more consistent using a zig-zag. Sometimes a serger stretches the elastic out. Do a test first!

Zig Zag the Elastic to the EdgeZig Zag the Elastic to the EdgePinZig Zag the Elastic to the Edge

Step 3 - Fold

Fold the elastic edge over once on the wrong side of the binding.

How to Sew Spandex Straps - Step 2How to Sew Spandex Straps - Step 2PinFold Once

Turn over the edge again. The previous stitching will now be completely hidden. Try and wrap as tightly as you can.

For your first time put a few pins in vertically to hold it in place. As you get more experienced you will be able to turn twice and sew all in one motion without using pins.

How to Sew Spandex Straps - FoldingHow to Sew Spandex Straps - FoldingPinHow to Sew Spandex Straps - Folding

Step 4 - Stitch

On the top side of the strap, stitch with a zig-zag stitch through the center. The width is your personal preference but I generally reduce it slightly and use a width of 4.0 and a length of 2.5.

 How to Sew Spandex Straps - Stitch How to Sew Spandex Straps - StitchPin How to Sew Spandex Straps - Stitch

Step 5 - Trim

Turn over your strap to the back and carefully trim the excess fabric. I find it easiest with a small pair of sharp scissors to get closest to the stitching.

 How to Sew Spandex Straps - Trim How to Sew Spandex Straps - Trim
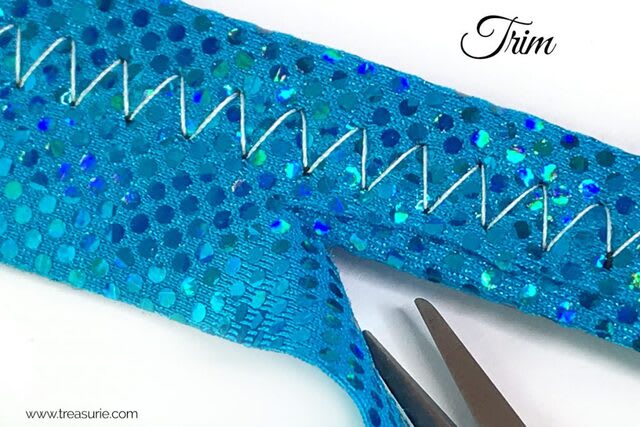
Pin How to Sew Spandex Straps - Trim

All finished and ready to sew on to your leotard!

Method 1 - Folded Spandex StrapMethod 1 - Folded Spandex StrapPinMethod 1 - Folded Spandex Strap

Method 2 - Folded Spandex Strap with Twin Needle

The next method I`d like to show you gives a professional-looking strap similar to what you will see in a lot of store-bought costumes.

Step 1: Start the strap the same as the zig-zag method up to step 5.Step 2: Instead of using a zig-zag on the top of the strap, use a twin needle. It is important you sew on the top of the strap as the underneath will look like a little zig-zag. If you are new to using a twin needle read how to sew with a twin needle.Step 3: Trim the excess fabric from the back just like step 6 of the zig-zag method above.How to Make Spandex Straps with a Twin NeedleHow to Make Spandex Straps with a Twin NeedlePinHow to Make Spandex Straps with a Twin Needle

Method 3 - How to Make Spandex Straps by Turning

The advantage of the turning method of making spandex straps is that there is no visible stitching along the strap. This makes for a very clean and professional strap. They do take a little longer to make than the above 2 methods however and are not suitable for really long straps as they are too hard to turn.

Step 1 - Cut Binding

Once again you will use binding 1 ½ inches wide (3.8cm) wide and a few inches longer than you will need. Cut your ⅜" (1cm) elastic the same length this time with no reduction.

Step 2 - Fold

Fold your binding in half lengthwise with right sides together.

How to Make Spandex Straps by FoldingHow to Make Spandex Straps by FoldingPinHow to Make Spandex Straps by Folding

Step 3 - Attach Elastic

Attach the elastic to the raw edges with a zig-zag stitch. Use a wide zig-zag of 6.0 wide and 3.0 length. You can use a serger instead but it may stretch out the elastic. Counteract that by shortening the elastic length slightly or stretching it as you sew. Experiment a little to get the tension right with a serger.

How to Make Spandex Straps by FoldingHow to Make Spandex Straps by FoldingPin How to Make Spandex Straps by Folding

Step 4 - Turn

Now for the tricky part. Turn your tube right way out. I generally use a small safety pin but you can use a tube turner or bobby pin.

How to Make Spandex Straps by FoldingHow to Make Spandex Straps by FoldingPin How to Make Spandex Straps by Folding

All finished and ready for attaching. Look how clean the top looks.

How to Make Spandex Straps by FoldingHow to Make Spandex Straps by FoldingPin How to Make Spandex Straps by Folding

How to Make Spandex Straps - In Conclusion

So now you know 3 ways how to make spandex straps! Leave a comment below on your favorite method. Mine is the zig-zag as it is the fastest. Using a matching thread you can hardly see the stitching.

How to Make Spandex Straps - 3 WaysHow to Make Spandex Straps - 3 WaysPinHow to Make Spandex Straps - 3 Ways

Here are some of my bestselling leotard patterns you can use as a base for your unique customized costume.

Shop leotard patterns

swim top patternswim top patternPinswimwear patternswimwear patternPinleotard patternleotard patternPinswim top patternswim top patternPin

Further Reading on How to Make a leotard

How to Make a LeotardHow to Measure Stretch FactorSewing Spandex and Lycra with a regular machineBuying Guide for Spandex and LycraHow to Sew Elastic in Leotards and SwimwearHow to Sew with a Twin NeedleDIY Bikini - free pattern for girlsHow to Sew Sequins

4.9/5 - (27 votes)


Sewing Fleece - How to Sew Fleece Correctly

2022-10-12 13:20:05 | sewing

@media (max-width: 1200px) { }

body .novashare-buttons.novashare-inline .novashare-button-icon { width: 100%; }

Share this Article:

TwitterFacebookPinterestPrint

body .novashare-pinterest-image{display:block;position:relative;margin:0;padding:0;line-height:0}figure>.novashare-pinterest-image{height:100%;width:100%}body .wp-block-image .novashare-pinterest-image+figcaption{display:block}body .novashare-pinterest-image-button{opacity:0;transition:.3s;position:absolute;height:18px;max-height:18px;width:auto!important;padding:10px;cursor:pointer;background:#c92228;color:#fff;font-size:16px;line-height:18px;z-index:1;text-decoration:none;box-sizing:content-box;top:50%;left:50%;transform:translate(-50%,-50%)}body .novashare-pinterest-image-button:hover{background:#b51f24}body .novashare-pinterest-image-button:visited{color:#fff}body .novashare-pinterest-image:hover .novashare-pinterest-image-button{opacity:1}body .novashare-pinterest-image-button svg{width:18px;height:18px;vertical-align:middle;pointer-events:none}

Sewing fleece is a piece of relatively new fabric on the market. Originally known as Polar Fleece it is soft and warm. Fluffy on both sides, it is basically a wash-and-wear fabric. Polar fleece is not woven and is 100% polyester. It comes in a wide range of colors and designs. Popular for tracksuits and leisurewear for all ages it is relatively easy to sew.

Sewing fleecePinSewing Fleece

Contents

What is Fleece Fabric?Main Types of Fleece FabricSewing Fleece Fabric TutorialStep 1 - PreparationStep 2 - Cutting Before Sewing FleeceStep 3 - Sewing Fleece ToolsStep 4 - Stitching for Sewing FleeceStep 5 -Seam Finishes when Sewing FleeceStep 6 - Cleaning after Sewing FleeceMore About Sewing Fleece What Kind of Stitch Should I Use on Fleece?Do I Need a Stabilizer to Sew Fleece?Sewing Fleece ProjectsSewing Fleece - In ConclusionSewing Fabrics

What is Fleece Fabric?

Fleece fabric is a 100% polyester fabric with a fluffy nap. It is used for warm clothing and is a cheaper alternative to natural wool. Because it does not fray and has minimal stretch, it is easy to sew. While fleece is thick it is lighter than wool and thus is comfortable to wear. Read more about what is fleece fabric.

Main Types of Fleece Fabric

Polar Fleece - this is one of the most common types of fleece that you will find. It is fluffy on both sides and can be medium to heavyweight. Polar fleece is great for no-sew projects and for when you want something quick and easy to make with edges that will not fray.

Sewing FleeceSewing FleecePinSewing Fleece

Sweatshirt Fleece - I like using this type of fleece for dresses, hoodies and pants. On the outside, it looks knitted and on the inside it is fluffy. Sweatshirt fleece can also be labeled brushed fleece or cotton fleece. Buy better quality sweatshirt fleece so the outside doesn`t pill after a few washes.

Sweatshirt FleeceSweatshirt FleecePinSweatshirt Fleece

Micro Fleece - This is a lightweight fleece mainly used for baby clothing. It is a little thinner and stretchier to sew and can overstretch if you are not careful.

Sewing Fleece Fabric Tutorial

Here are some basic tips to consider when sewing with fleece.

Step 1 - Preparation

PREWASH - Before cutting out your sewing project, prewash your fleece fabric to test for shrinkage and colorfastness. PATTERN CHOICE - Not all patterns are suited to fleece. Check your pattern says - ‘suitable for stretch fabrics’ this will enable you to cut and sew fleece with the pattern you choose. Also, determine the stretch factor (article includes a printable sheet) to match the pattern type to your fleece. You generally need at least 20-50% stretch. Some cheaper fleece types have next to no stretch and are not suitable for stretch patterns.

All of these samples were sewn from Treasurie patterns using fleece. You can tell that I like red, can`t you? I tend to prefer sweatshirt fleece which generally doesn`t come in quite as many colors and patterns as Polar fleece.

sewing fleece patternssewing fleece patternsPinSewing Fleece Patterns

Step 2 - Cutting Before Sewing Fleece

GRAINLINES - Fleece fabric is not woven so a grain of the fabric is not clearly visible. The grain is defined by the nap or the way the brushed texture of the fabric moves.WRONG SIDE VS RIGHT SIDE - The best way to define the right or wrong side is to cut a sample of the fabric and then cut the sample on the cross. The fabric will naturally curl towards the wrong side. Fleece is usually fluffier on the wrong side.SCISSORS - Use sharp scissors so the edges don`t burr and for very thick fleece, you may need to cut in single layers instead of double. Don`t forget that some pieces may need to be mirrored so flip your pattern piece when cutting the second shape if necessary. PINS - If you find that your pins are slipping out of the fabric, use safety pins instead. Quilting pins that are longer can also be used. MARKING - Traditional marking methods using chalk don`t always work on fleece due to the pile on the fabric. Try using a running stitch or Tailor`s tacks to mark darts and markings. Tailor`s Tacks to MarkTailor`s Tacks to MarkPinTailor`s Tacks to Mark

Step 3 - Sewing Fleece Tools

BEST THREAD FOR SEWING FLEECE- Sew with a good quality polyester thread. Like most sewing projects, a matching thread will be more forgiving of any crooked seams.

BEST NEEDLES FOR SEWING FLEECE - Use good quality sewing needles and change them often. Microtex or ballpoint needles are best. Do a test seam and if you get any skipped stitches, try a stretch needle designed for sewing knit fabrics.

BEST SEWING MACHINE FOOTFOR SEWING FLEECE - Most of the time an all-purpose foot can be used but for really thick fleece, try a walking foot or a Teflon foot. These specialty feet will prevent the thicker fleece from bunching up and wrinkling.

Step 4 - Stitching for Sewing Fleece

PREPARATION - Stay stitching on curved areas such as necklines is important because this fabric is very stretchy.

STITCHES - Use a small zig zag stitch to help with the stretch of the fabric. This will prevent stitches from popping in areas with extra movement where some elasticity is needed. Try a stitch of width 1.0 and length 3.0 and adjust as needed. Test a scrap. The stitches should not break when you stretch the seam. If your fleece is too bulky to sew a regular seam, then consider a lapped or flat fell seam.

BESTTENSIONFOR SEWING FLEECE- Loosen the sewing machine tension with a larger, longer stitch to give a bit more stretch. Ease the fabric through the machine, don’t pull, and cause tension issues.

Sewing Fleece with a Zig Zag StitchSewing Fleece with a Zig Zag StitchPinSewing Fleece with a Zig Zag Stitch

SERGER - A serger is ideal for sewing fleece as the seam will have a built-in elasticity. (How to use a serger)

Sewing Fleece with a SergerSewing Fleece with a SergerPinSewing Fleece with a Serger

SEWING FLEECEHEMS - Finish off hems and sleeve edges with rib trim. Alternatively, turn up the hem and use a wide zig-zag to stitch over the edge. Test a width of 4.0 and a length of 3.0.

HAND STITCHING FLEECE - If you don`t have a sewing machine, you could use a backstitch for the seams and a blanket stitch for the hems. Blanket stitch in particular results in a very attractive edge and can be used in conjunction with machine seams. If you are an absolute beginner, consider doing a simple up and down stitch called a running stitch.

PRESSINGFLEECE - Press the fabric with caution, fleece does not enjoy a hot iron and may melt. If you do need to press, use a cotton pressing cloth in between the iron and your fleece.

Step 5 -Seam Finishes when Sewing Fleece

Fleece does not fray and therefore seam finishes are not really necessary but can still look nice.

Seam finishing options include -

Zig zag the raw edges.Use a serger (overlocker) to neaten the seam.Trim the seams neatly with sharp straight scissors. You could also use pinking shears but they can be harder to use unless they are really new and sharp.

BULKY SEAMS - Try to reduce bulk in seams and on the attachment of collars or cuffs.  Line the underside of a collar with a cotton fabric to lessen the bulk of a collar for example. Thick seams can be cut in layers which is called seam grading.

Pin

Step 6 - Cleaning after Sewing Fleece

Fleece may tend to fluff up your machine and caution needs to be taken to keep your machine clean during the time you sew with fleece. Keep an eye on the bobbin case as this is a major collector of lint! Read cleaning a sewing machine. If you use a serger, keep the blade of the machine clean and remove fluff from the underneath of the machine.

More About Sewing Fleece

What Kind of Stitch Should I Use on Fleece?

The best kind of stitch for sewing fleece is a narrow zig-zag. This will give the seam some elasticity so the stitches don`t break. If you have a serger, this will give a strong elastic seam also.

Do I Need a Stabilizer to Sew Fleece?

If you are having problems with the stitches sinking into the fleece and skipping, try adding a stabilizer along the seam only. You can use a water-soluble stabilizer that will disappear in the wash.

Sewing Fleece Projects

Now you have the basics of sewing fleece down pat, it is time to sew some easy projects. Here are some from the Treasurie blog:

How to Make a Fleece ScarfHow to Make a Fleece ScarfPinHow to Sew a Fleece ScarfHow to Make a Fleece BlanketHow to Make a Fleece BlanketPinHow to Sew a Fleece Blanket

Sewing Fleece - In Conclusion

Generally speaking, sewing fleece is very rewarding as it is an easy to sew fabric that needs the minimum finishing off and neatening.  Fleece is comfortable to wear and warm during the winter chills and making leisurewear is made easy with the use of fleece for all kinds of projects.   

Sewing Fabrics

CHIFFON – Sewing ChiffonBATIK – What is BatikCANVAS – Sewing CanvasCOTTON – Sewing CottonDENIM – Sewing DenimFELT – Sewing FeltFUR – Sewing FurKNITS – How to Sew Stretch FabricINTERFACING – Types of InterfacingLACE – How to Sew LaceLEATHER – Sewing LeatherRAYON – Sewing RayonSHEER – Sewing Sheer FabricsSILK – How to Sew SilkTHICK – Sewing Thick FabricsVELVET Sewing VelvetWOOL – Sewing WoolFLEECE - Sewing Fleece

5/5 - (26 votes)


SEWING SEQUINS | How to Sew Sequins by Hand

2022-10-12 10:37:30 | sewing

@media (max-width: 1200px) { }

body .novashare-buttons.novashare-inline .novashare-button-icon { width: 100%; }

Share this Article:

TwitterFacebookPinterestPrint

body .novashare-pinterest-image{display:block;position:relative;margin:0;padding:0;line-height:0}figure>.novashare-pinterest-image{height:100%;width:100%}body .wp-block-image .novashare-pinterest-image+figcaption{display:block}body .novashare-pinterest-image-button{opacity:0;transition:.3s;position:absolute;height:18px;max-height:18px;width:auto!important;padding:10px;cursor:pointer;background:#c92228;color:#fff;font-size:16px;line-height:18px;z-index:1;text-decoration:none;box-sizing:content-box;top:50%;left:50%;transform:translate(-50%,-50%)}body .novashare-pinterest-image-button:hover{background:#b51f24}body .novashare-pinterest-image-button:visited{color:#fff}body .novashare-pinterest-image:hover .novashare-pinterest-image-button{opacity:1}body .novashare-pinterest-image-button svg{width:18px;height:18px;vertical-align:middle;pointer-events:none}

This tutorial will teach you all about sewing sequins and how to sew sequins by hand. I really can’t tell you how much I love sparkly beads and sequins. In my alternate universe, I am dressed from head to toe in fancy sequined clothing. In real life, I settle for adding cute embellishments to my daughter`s clothing. She is particularly girly too and her little face lights up if I make her something with sequins – especially if there is a Lycra leotard involved!

Sewing Sequins, How to Sew SequinsPinSewing Sequins, How to Sew Sequins

Contents

How to Sew Sequins Sewing Sequins in a Row (Side by Side)Sewing Sequins in a Row (Overlapping)Sewing Sequins in Scattered EffectsMethod 1: Sewing Sequins Without a BeadMethod 2: Sewing Sequins with a Seed BeadSewing Sequins FAQsHow Do You Sew Sequin FabricCan you Sew Sequins By Machine?What is the Best Way to Attach SequinsCan you Hot Glue Sequins?What is the Easiest Way to Pick Up SequinsSewing Sequins - In ConclusionLearn More

How to Sew Sequins

When sewing sequins, you will need:

Sequins – These come in a dizzying array of colors, shapes and sizesHand needle – Just make sure it fits through the hole of your sequins easily.Thread - A strong thread in a matching color to the sequin. Choose a good quality thread that doesn’t tangle.

Thread your needle with either a single or double strand of thread and knot the end.

If you are having trouble getting the thread through the eye of the needle, read my article on how to use a needle threader.

Here I will show you 4 main ways to sew sequins. All 4 methods require hand sewing. The only way to sew individual sequins is by machine. If you don`t like hand sewing then see my article on how to sew sequin trim by machine.

In a rowOverlappingScatteredwith no beadsScattered with beads

Sewing Sequins in a Row (Side by Side)

If you would like your sequins to sit side by side then use a simple backstitch adding the sequins into each stitch.

Sewing Sequins, How to Sew SequinsSewing Sequins, How to Sew SequinsPinSewing Sequins, How to Sew Sequins

STEP 1: Insert your needle into the wrong side of the fabric and bring it up to the right side through the center of your first sequin.

how to sew sequinshow to sew sequinsPin

STEP 2: Put your needle back through to the side of the sequin on the right.

how-to-hand-sew-sequins-7how-to-hand-sew-sequins-7Pin

STEP 3: Bring the needle up on the left side of the sequin.

how-to-hand-sew-sequins-8how-to-hand-sew-sequins-8Pin

STEP 4: Put the needle back through the middle of the sequin. Now both sides are stitched down.

how to sew sequinshow to sew sequinsPin

STEP 5: Place the next sequin on your fabric and bring the needle up in its center and start the steps again.

how-to-hand-sew-sequins-10how-to-hand-sew-sequins-10Pin

Step 6: Keep repeating until you have a row. Once again, just make sure your fabric remains flat underneath.

how to sew sequinshow to sew sequinsPin

Sewing Sequins in a Row (Overlapping)

Sewing sequins that are overlapped is a common method to give an extra sparkle to your leotards and costumes. The overlapped edges mean there is very little thread visible and can be used to create dense shapes and rows like this example below.

Sewing Sequins, How to Sew SequinsSewing Sequins, How to Sew SequinsPinSewing Sequins, How to Sew Sequins

Step 1: Insert your needle into the wrong side of the fabric and bring it up to the right side through the center of your first sequin.

PinPin

Step 2: Bring the needle back down at the side of the sequin.  This means the thread will be across one side of the sequin.

Pin

Step 3: Overlap the next sequin and bring the needle up through the center again.

how-to-hand-sew-sequins-13how-to-hand-sew-sequins-13Pin

Step 4: Repeat until you have a whole string. Just make sure the fabric underneath stays flat.

how-to-hand-sew-sequins-14how-to-hand-sew-sequins-14Pin

Great fun! I find this is a good “sit in front of the TV” job. If you are going to be sewing a lot of sequins, make sure you invest in a thimble to protect your fingers from constant pricks. (Further Reading - What is a thimble)

how-to-hand-sew-sequins-12how-to-hand-sew-sequins-12PinSewing Sequins

Sewing Sequins in Scattered Effects

You can also scatter the sequins across your garment using small seed beads as an anchor.

There are 2 methods you can use to sew scattered sequins. You can sew them with or without a seed bead in the center.

What you will need

Sequins – Any shape or color! They can be flat or capped and faceted.Hand needle – Just make sure it fits through the hole of your sequins and seed beads easily.Thread - A strong thread in a matching color to the sequin – Choose a good quality thread that doesn’t tangle.For method 2 only: Seed beads - These can be glass or plastic. My favorites are the little glass ones with mirrored holes.

Method 1: Sewing Sequins Without a Bead

Sewing Sequins, How to Sew SequinsSewing Sequins, How to Sew SequinsPinSewing Sequins, How to Sew Sequins

Step 1: Insert your needle into the wrong side of the fabric and bring it up to the right side through the center of your first sequin.

Pin

Step 2: Put your needle back through to the side of the sequin on the right.

Pin

Step 3: Bring it up on the left side of the sequin.

Pin

Step 4: Put the needle back through the middle of the sequin. Now both sides are stitched down.

Pin

Step 5: Knot it off on the back. Each sequin will need to be individually knotted on the back for the greatest durability. If you are in a hurry you may just knot off every few sequins.

Pin

DESIGN IDEAS

Stitch your thread in a Y shape or a cross shape for decorative effect. This looks particularly nice when you use a contrasting thread.Stitch a little cluster of sequins. Because the sequins are quite close you can just knot off every few sequins.

Method 2: Sewing Sequins with a Seed Bead

Another way to sew sequins is by placing a seed bead in the center.  This method will leave the edges of the sequin free so they may be more inclined to catch the light.

Sewing Sequins, How to Sew SequinsSewing Sequins, How to Sew SequinsPinSewing Sequins, How to Sew Sequins

Step 1: Insert the knotted thread through the wrong side of the fabric and up through the center of a sequin. If you have used a faceted sequin then it should be facing up.

PinPin

Step 2: Thread your needle through the center of the seed bead.

Pin

Step 3: Now take the needle back through the hole in the center of the sequin.

Pin

Step 4: Knot off the back. The seed bead will hold the sequin in place and sparkle in the sunlight!

Pin

Sewing Sequins FAQs

How Do You Sew Sequin Fabric

Sewing fabric with sequins takes a little extra care. Most sequin fabric has a mesh backing. On the edges where you will sew the seams, you will need to remove the sequins so you are sewing through the backing and not the actual sequins that may damage your needle and machine.

Can you Sew Sequins By Machine?

While you can sew sequin trim by machine, individual sequins need to be sewn by hand. The best way to sew sequin trim is with a wide zig-zag using a clear or matching thread.

What is the Best Way to Attach Sequins

The simplest and strongest way to attach sequins is using a needle and thread. A few stitches will hold sequins in place. Glue can also be used but may not last as long and may not be suitable for washing.

Can you Hot Glue Sequins?

You can use hot glue for sequins but due to their small size, there is more chance of not only burning your fingers but getting glue on the fabric. Hot glue can only be used if you are not planning on washing the sequined item.

What is the Easiest Way to Pick Up Sequins

Craft stores sell an easy-to-use tool called a jewel picker. These tools have a sticky end and are designed to pick up beads, sequins, and rhinestones. If you are sewing the sequins, insert the tip of the needle into the middle of the sequin and pull it up. That way you don`t need to handle each sequin.

Sewing Sequins - In Conclusion

So now you have learned all about sewing sequins and how to sew sequins, what will you be putting sequins on? Share your ideas below.

Learn More

How to Sew SequinsHow to Sew Sequin Trim with a MachineSewing Fabric with SequinsSewing BeadsSeed Beads

4.8/5 - (26 votes)


Rag Quilt Patterns - 15 of the Best

2022-10-12 10:32:13 | sewing

@media (max-width: 1200px) { }

body .novashare-buttons.novashare-inline .novashare-button-icon { width: 100%; }

Share this Article:

TwitterFacebookPinterestPrint

body .novashare-pinterest-image{display:block;position:relative;margin:0;padding:0;line-height:0}figure>.novashare-pinterest-image{height:100%;width:100%}body .wp-block-image .novashare-pinterest-image+figcaption{display:block}body .novashare-pinterest-image-button{opacity:0;transition:.3s;position:absolute;height:18px;max-height:18px;width:auto!important;padding:10px;cursor:pointer;background:#c92228;color:#fff;font-size:16px;line-height:18px;z-index:1;text-decoration:none;box-sizing:content-box;top:50%;left:50%;transform:translate(-50%,-50%)}body .novashare-pinterest-image-button:hover{background:#b51f24}body .novashare-pinterest-image-button:visited{color:#fff}body .novashare-pinterest-image:hover .novashare-pinterest-image-button{opacity:1}body .novashare-pinterest-image-button svg{width:18px;height:18px;vertical-align:middle;pointer-events:none}

Satisfy your desire to make a visual treat by whipping up something easy with these free rag quilt patterns. The rag quilt is a convenient choice suitable for both new quilt-makers and seasoned ones searching for quick, gratifying projects. Easy yet interesting, the rag quilt projects are great for weekends when you want to sew without too much fuss. Experiment with color schemes, border choices, and fabric selection and enjoy the personalized aesthetic of your sleeping space.

Rag Quilt Patterns
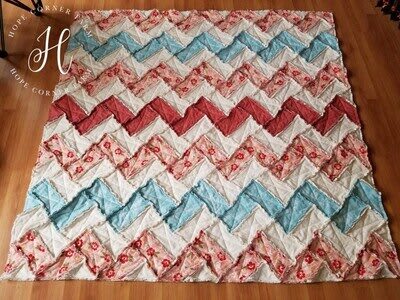
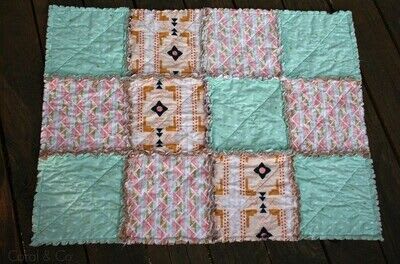
PinRag Quilt Patterns

Contents

Free Rag Quilt Patterns#1 Easiest, Beginner-Friendly Rag Quilt#2 Christmas Tree Rag Quilt#3 The Denim Rag Quilt#4 Easy Double Four Patch Rag QuiltMore Quilting Patterns#5 Frayed Flannel Rag Quilt#6 Easy Blue Jeans Rag Quilt#7 It’s Fall Y’all Scrappy Rag Quilt#8 Rag Quilt – Chevron Style#9 Heirloom Piece Rag Quilt#10 T-Shirt Rag Quilt#11 Easiest Ever Rag Quilt#12 DIY Rag Quilt#13 Flannel Rag Quilt#14 Raw-Edge Layer Cake Rag Quilt#15 Ruffled Flower Rag QuiltQuilt Patterns – In Conclusion

Free Rag Quilt Patterns

Here are some fun patterns that will facilitate you in stitching up quilts with some depth and drama that you don’t easily find among the heaps of conventional, boring store-bought quilts. Rag quilts have exposed seams on the quilt’s front instead of being carefully hidden underneath patchwork, hence their name. After the finished quilt has enjoyed a few trips to the laundry, it will start showing fabric fraying true to its name, giving it an artsy look.

Pin

More Quilting

How to Make a QuiltQuilting for BeginnersHow to Bind QuiltsQuilting StitchesQuilt Borders

#1 Easiest, Beginner-Friendly Rag Quilt

Pin Free Rag Quilt Patterns from Quilter`s Candy

This easy, beginner-friendly rag quilt is fast and fun to make. You will need to choose some pretty fabric for it that complements the ragged edges and looks cute. Besides the fabric, you will require batting, a sewing machine, thread, and scissors. The pattern comes with fabric requirements for 2 sizes of rag quilts: a baby quilt and a lap size quilt. Patterns from Quilter`s Candy

#2 Christmas Tree Rag Quilt

Pin Free Rag Quilt Patterns from The Spruce Crafts

The Christmas Tree Rag Quilt Pattern is a great choice for the holiday season. You can use it as a throw or a backdrop for your Christmas dinner set-up. If you have a lot of green and light brown fabric pieces lying around, your best shot at using them well is this pattern. Since it is more wintery than Christmas-y, you can enjoy it all season long. Patterns from The Spruce Crafts

#3 The Denim Rag Quilt

Rag Quilt Patterns 3Rag Quilt Patterns 3Pin Free Rag Quilt Patterns from Vicky Myers Collections

Add a personalized and modern touch to your living space with this upcycled quilt project. This Denim Rag Quilt Tutorial is proof of how recyclable goodies can be fashioned into something really cool and usable. For this quilt, you can easily reuse old jeans and pillowcases that have been lying around for a long time. With this pattern, you will be able to make a denim quilt that is not only easy on the eyes but also very durable. Patterns from Vicky Myers Collections

#4 Easy Double Four Patch Rag Quilt

Pin Free Rag Quilt Patterns from The Spruce Crafts

This stunning rag quilt is made by alternating between a bunch of simple four-patch quilt blocks and plain squares of fabrics. This pattern is easily adaptable and creates entirely distinct looks by opting for a different selection of fabrics. This pattern is a great choice for beginners looking to start their first rag quilt as it doesn’t require you to sew perfect seams. Patterns from The Spruce Crafts

More Quilting Patterns

Quilt Border PatternsQuilt Border PatternsPinBorder Quilt PatternsHeart Quilt PatternsHeart Quilt PatternsPinHeart Quilt PatternsBaby Quilt PatternsBaby Quilt PatternsPinBaby QuiltsChristmas Quilt PatternsChristmas Quilt PatternsPinChristmas Quilt PatternsPlacemat Quilt PatternsPlacemat Quilt PatternsPinPlacemat Quilt PatternsJelly Roll Quilt PatternsJelly Roll Quilt PatternsPinJelly Roll Quilt PatternsLog Cabin Quilt PatternsLog Cabin Quilt PatternsPinLog Cabin Patterns

#5 Frayed Flannel Rag Quilt

Pin Free Rag Quilt Patterns from Life Sew Savory

I love the perfection that comes with embracing imperfections. Seeing this pattern, I’m all stoked to get my hands on around 4 yards of some yummy fabric, and put together this classy, flannel baby blanket. This rag quilt is incredibly easy to make, and as long as you can sew a straight line you can make one of these. If you are interested in trying out this pattern, you can benefit from the photo and video tutorial that has step-by-step instructions as well as the design and fabric dimensions included in it. Patterns from Life Sew Savory

#6 Easy Blue Jeans Rag Quilt

Rag Quilt Patterns 6Rag Quilt Patterns 6Pin Free Rag Quilt Patterns from Inspired Quilting by Lea Louise

Can’t seem to gather up the courage to throw away your favorite yet worn-out pair of old jeans? You can learn to make an easy blue jean rag quilt with this tutorial that will teach you how to cut, design, and assemble your own denim rag quilt with your old blue jeans. Once you grasp the idea of creating a rag quilt, you will find the process quick and easy to follow. You can make this quilt seem a lot more put together by adding the lattice and borders. Patterns from Inspired Quilting by Lea Louise

#7 It’s Fall Y’all Scrappy Rag Quilt

Rag Quilt Patterns 7Rag Quilt Patterns 7Pin Free Rag Quilt Patterns from A Vision to Remember

Welcome the Autumn season with this Autumn-special Scrappy Rag Quilt Pattern made from warm and wonderfully cozy fabrics. This will make a great throw for your couch; perfect for snuggling in and watching your favorite TV show. With just an evening or two to spare and several yards of your favorite fabric, you will have this delightful rag quilt ready. Patterns from A Vision to Remember

#8 Rag Quilt – Chevron Style

Rag Quilt Patterns 8Rag Quilt Patterns 8Pin Free Rag Quilt Patterns from Hope Corner Farm

Much as I would love to try this pattern out for myself, I would love it, even more, to be on the receiving end of this cutie. This quilt pattern requires you to sew in corner-to-corner construction. This means that you will start this quilt at one corner with the rows growing bigger until you reach the middle of the quilt from where the blocks decrease in size until they reach the other corner. That said, it’s a beautiful pattern that would go great with all sorts of interior choices. Patterns from Hope Corner Farm

#9 Heirloom Piece Rag Quilt

Pin Free Rag Quilt Patterns from Happiest Camper

Start out the Heirloom Piece as a random project or pre-planned with a careful selection of fabric pieces. Either way, this quilt is a great place to start experimenting with rag quilts. It will let you ease into the process while still allowing you to feel accomplished. Patterns from Happiest Camper

#10 T-Shirt Rag Quilt

Rag Quilt Patterns 10Rag Quilt Patterns 10Pin Free Rag Quilt Patterns from Sweet Tea in the South

Do you have a collection of T-shirts that are too worn out to be kept as wearables, yet too precious for you to part with? You need to take that stash out and transform them into a usable rag quilt with this amazing free pattern. That way, you will always have bits of your favorites to cherish and use at the same time. Doesn’t that sound good?! Patterns from Sweet Tea in the South

#11 Easiest Ever Rag Quilt

DIY Rag QuiltsDIY Rag QuiltsPin Free Rag Quilt Patterns from Alanda Craft

Make a quilt that’s easy to construct and looks really good too. Choose some pretty patterned fabrics that contrast well yet look good put together. To achieve the ragged edges effect, you will start off with cutting every seam and all the way around the edges of the quilt and tossing it into the washing machine. Once the quilt has been washed, let it go through the and spin cycle and into the dryer. Voila, you will have a quirky and raw rag quilt ready. Patterns from Alanda Craft

#12 DIY Rag Quilt

Rag Quilt Patterns 12Rag Quilt Patterns 12Pin Free Rag Quilt Patterns from Coral and Co.

The DIY Rag quilt is for those looking for a quick quilt project. It has super simple and really fast construction. This pattern has instructions for a baby-sized quilt that measures 35x26 inches, however, you can recreate it in a bigger size by adding more squares. It’s really that simple. Patterns from Coral and Co.

#13 Flannel Rag Quilt

Rag Quilt Patterns 13Rag Quilt Patterns 13Pin Free Rag Quilt Patterns from So Sew Easy

The Flannel Rag Quilt requires you to get a combination of 4 to 5 different contrasting colors and a mix of solid and printed fabrics. The finished product is a complete marvel and you are bound to impress your tribe with your skills once they see this Patterns from So Sew Easy

#14 Raw-Edge Layer Cake Rag Quilt

Rag Quilt Patterns 14Rag Quilt Patterns 14Pin Free Rag Quilt Patterns from Bloom Australia

Want to learn how to save time yet still make a family-sized quilt? Try out the Raw-Edge Layer Cake Rag Quilt. For this delightful pattern, you can use scrappy quilt leftovers or layer cakes and assemble this easy peasy rag quilt in lesser time than you might be expecting. This pattern will help you produce the soft and cozy ragged results that everyone adores about these quilts. Use this quilt to snuggle up in front of the TV or simply on a couch and enjoy game night with your family. Patterns from Bloom Australia

#15 Ruffled Flower Rag Quilt

Pin Free Rag Quilt Patterns from A Vision to Remember

Ah-amazing! A rag quilt this adorable deserves to be bookmarked and make it to your must-try projects list. You will be amazed to learn just how easy making this gorgeous Ruffled Rag Quilt is. This stunning free rag quilt pattern features pretty flowers that will bloom for years to come. You can welcome spring by sewing up this beauty and using it as a couch throw or a wall hanging. Your guests will be buzzing about the tales of your quilt-making skills and you might find yourself surrounded by a lot of requests. Patterns from A Vision to Remember

Quilt Patterns – In Conclusion

If you appreciate raw and artsy edges over perfectly finished and hidden seams, then you will find the rag quilts to be total charmers. Use these as lap throws or bed quilts and complete the look with some warm and cozy lighting. Rag quilts make great decorative pieces and are tastefully raw. Get stitching now and make what truly seems like your style (pun intended).

5/5 - (1 vote)


WHAT IS A FAT QUARTER? Fabric Pre-Cut Sizes

2022-10-12 09:20:20 | sewing

@media (max-width: 1200px) { }

body .novashare-buttons.novashare-inline .novashare-button-icon { width: 100%; }

Share this Article:

TwitterFacebookPinterestPrint

body .novashare-pinterest-image{display:block;position:relative;margin:0;padding:0;line-height:0}figure>.novashare-pinterest-image{height:100%;width:100%}body .wp-block-image .novashare-pinterest-image+figcaption{display:block}body .novashare-pinterest-image-button{opacity:0;transition:.3s;position:absolute;height:18px;max-height:18px;width:auto!important;padding:10px;cursor:pointer;background:#c92228;color:#fff;font-size:16px;line-height:18px;z-index:1;text-decoration:none;box-sizing:content-box;top:50%;left:50%;transform:translate(-50%,-50%)}body .novashare-pinterest-image-button:hover{background:#b51f24}body .novashare-pinterest-image-button:visited{color:#fff}body .novashare-pinterest-image:hover .novashare-pinterest-image-button{opacity:1}body .novashare-pinterest-image-button svg{width:18px;height:18px;vertical-align:middle;pointer-events:none}

So what is a fat quarter? A fat quarter, in the sewing world, is something you really need to embrace. They are measured pre-cut pieces of fabric that can be used for all sorts of sewing and quilting patterns. Fat quarters are a really great fabric size used for quilting, applique, and other small projects. Fat, in its positive connotation, means generous, abounding, and prosperous. The fat quarter is just like that!

What is a Fat QuarterPinWhat is a Fat Quarter

Contents

What is a Fat Quarter in Fabrics?What is a Fat Quarter in Cm?How Many Fat Quarters in a Yard?Are all Fat Quarters the Same?Is a Fat Quarter the Same as a Quarter Yard of FabricWhat is a Fat Eighth?Cutting More Pre-Cut Fabric PiecesHow to Cut a Fat QuarterWhat is a Fat Quarter and Fabric Cuts ChartFabric Cut Printable ChartWhere to Buy Fat QuartersWhat is a Fat Quarter Used For? (Fat Quarter Projects)What is a Fat Quarter - In Conclusion

What is a Fat Quarter in Fabrics?

In simple terms, a fat quarter is a pre-cut piece of quilting fabric that is 22 inches (56cm) wide by 18 inches (46cm) high. It will usually then be folded in quarters so it is a nice grab-sized item at your local fabric shop. Quilting fabric is a light to medium weight cotton fabric.

What is a Fat Quarter in Cm?

A fat quarter in centimeters is 56cm wide by 46cm high when purchased from most US manufacturers. You may find some UK or Australian fabric companies that round it up to 50 x 55cm to match the metric measurements of their rolls. They will cut 4 fat quarters per meter of fabric instead of per yard of fabric (1 yard = 90cm).

How Many Fat Quarters in a Yard?

There are 4 fat quarters per yard (0.90m). Think of it as simply cutting a yard piece of fabric into 4 equal pieces. Due to the standard 44-45 inch (112cm) width of fabrics, a fat quarter will be rectangular rather than square.

Are all Fat Quarters the Same?

There can be a slight difference in fat quarters in different countries. For example, in Australia, they measure fabric by the meter (a meter is approximately 1.1 yards) so a fat quarter is a little wider than it is in the US in some but not all occasions. It depends entirely on the manufacturer or shops it is sold in.

Is a Fat Quarter the Same as a Quarter Yard of Fabric

A fat quarter and a regular quarter of a yard of fabric have the same surface area but are different shapes. A ¼ yard will be cut along the length of the fabric bolt meaning it will be ¼ yard or 9 inches by 44 inches or the width of the fabric. In contrast, a fat quarter typically measures 22x18".

What is a Fat Eighth?

Cutting a fat quarter in half will give you a fat eight. If you look at the cutting chart below, you will see that a fat eighth can be cut either lengthwise or widthwise. The typical size of a fat eighth is 22x9 inches or 18x11inches. Fat eighths are not as common as fat quarters.

Cutting More Pre-Cut Fabric Pieces

Fat quarters are so generous with the number of pieces you can cut from them. The quarter can become an eighth and the eighth diminishes to other sizes going down the line to teeny tiny 2’’ squares.

All these miniature sizes have delightful names, like charm squares, layer cake squares, and Jelly rolls. You can indulge in all these treats and not have to count one single calorie.

Jelly rolls are cut from long strips of fabric along the selvage of the fabric and are particularly useful for quilt borders and small sewing projects like hair accessories.

What is a Fat Quarter and Jelly RollWhat is a Fat Quarter and Jelly RollPinJelly Roll

How to Cut a Fat Quarter

See how you can get 4 fat quarters to a yard and these can be further cut down into fat eights. As you can see from the diagram, fat eights can be cut vertically or horizontally. In plain fabrics, this makes no difference but if your fabric has a pattern, just make sure the fat eighth is cut in the correct direction to best display the pattern. Here is a chart to show you the sizes in both metric and imperial for some common fabric cuts including what is a fat quarter.

What is a Fat QuarterWhat is a Fat QuarterPinWhat is a Fat Quarter

What is a Fat Quarter and Fabric Cuts Chart

Here is a chart showing you all the typical measurements of fabric pre-cuts including fat quarters. You may find some variation between manufacturers and countries.

FABRIC TYPEINCHESCENTIMETRES
MINI CHARM SQUARES2.5 X 2.56.4 X 6.4
CHARM SQUARES5 X 512.7 X 12.7
JELLY ROLLS2.5 X 426.4 X 6.4
LAYER CAKE SQUARES10 X 1025.4 X 25.4
FAT EIGHTH9 X 2122.8 X 53.3
FAT EIGHTH*11 X 1828 X 45.7
FAT QUARTER 18 X 2145.7 X 53.3
HALF YARD18 X 4445.7 X 112
ONE YARD33 X 4494.4 X 112

Fabric Cut Printable Chart

The fat quarter is abounding with multiple sizes do you know you can cut 99 X 2’’ squares from one fat quarter. Wonderful facts to know, but how do you remember the numbers in that magic moment when you find the most amazing fabric?

That’s when you pull out your Handy Fabric Shopping guide with all the measurements on one piece of card. It is a printable masterpiece that you can fold and store in your wallet. Then off you go with this, compact, size guide to any fabric shop. This Handy Fabric Guide comes with measurements in meters or inches. Exactly what you need for whichever system of measurement you use.

Click this link to download your printable fabric cut guide.

What is a Fat Quarter Printable ChartWhat is a Fat Quarter Printable ChartPinWhat is a Fat Quarter Printable Chart

Take your Easy Quilting Fabric size guide wherever you go. When you see all those tempting rolls of fabric tied up with ribbon you can pull out your guide and know just what each piece measures. You can feed your desire to have beautiful fabrics.

Go out and buy all sorts of fat quarters and turn them into delicious, handmade creations. Bon Appetite and enjoy indulging in a fat quarter or two!

Now you know what is a fat quarter it is time for some projects!

Where to Buy Fat Quarters

Many fabric and quilt shops now carry fat quarters as they are becoming more popular, especially with quilters. Look for fat quarter bundles with a good assortment of complementary patterns and colors.

My other favorite place to purchase fat quarters is Etsy where you can get many of the popular designer quilting cotton fabrics in fat quarter sizes. Fat eights are not as easy to find but of course, you can cut your fat quarters in half and you have 2 fat eights!

What is a Fat Quarter Used For? (Fat Quarter Projects)

Fat quarters can be used for absolutely anything you want, not just quilts. The best thing about fat quarters is that they are amazing for small sewing projects.

They result in minimal waste and allow you to purchase a greater variety of colors and textures than if you had to purchase whole yards. This makes them very economical and fun to use.

Now you know what is a fat quarter, here are some of my most popular items you can sew.

DIY Napkins Doll Pillows, Doll Blanket,Doll MattressHow to Make Bias TapeFree Makeup Brush Pattern How to Make Fabric BowsContinuous Bias TapeHow to Make Scrunchies

diy fabric bowdiy fabric bowPinHow to Make Fabric Bowshow to make bows for clothinghow to make bows for clothingPinLarge Bows how to make fabric yo yoshow to make fabric yo yosPinYo-yo flowershow to make a scrunchiehow to make a scrunchiePinScrunchiesPinMakeup Roll Patterndiy hair tiesdiy hair tiesPinDIY Hair Tiestravel tissue covertravel tissue coverPinTissue CoverDIY Envelope ClutchDIY Envelope ClutchPinEnvelope Clutch Pattern

What is a Fat Quarter - In Conclusion

So what is a fat quarter? A fat quarter is simply a yard cut in quarters! If you think of it like that instead of remembering the measurements you will never go wrong. If you want more free fat quarter ideas, then check out my tutorial on small sewing projects.

5/5 - (27 votes)